 Skip to content
Introduction: Discover How 3D Picture Printing Turns Ordinary Photos into Stunning, Touchable Art
3D picture printing transforms flat photos into beautiful objects that you can see and feel. After working in the 3D printing field for over a decade, I’ve watched this technology evolve from a niche tool to an accessible way for everyday people to create art.
Whether you’re a hobbyist wanting to turn a family photo into a sculpted keepsake or a business owner searching for the best 3D printer for a small business, 3D picture printing opens the door to exciting creative possibilities. Anyone can turn a digital image into a physical artwork with the right tools and guidance.
This guide explains everything in simple terms. You’ll learn what you need, how it works, and how to avoid beginner mistakes. If you’re ready to craft something unique and personal, this is the place to start.
Understanding How 3D Picture Printing Works from a Non-Technical Point of View
What 3D Picture Printing Is and Why It Matters in Creative Projects
3D picture printing is a fascinating process that takes a flat, 2D image and turns it into a tangible, three-dimensional object. This method converts a digital photo into a 3D model and prints it layer by layer with a 3D printer. This is a game-changer for creative projects, as it allows people to capture memories and bring them to life in a physical form. The ability to create 3D printed art opens up endless possibilities, from custom home decor to personal gifts and unique art pieces. For instance, you could print a 3D replica of a family photo, a piece of artwork, or a cherished memory. The versatility and personal touch of 3D picture printing make it highly valuable for both home and business applications.
3D picture printing is particularly popular in areas such as home art, where people can add a unique and personal touch to their living spaces. It is also widely used for gifts, allowing individuals to create thoughtful, customized presents. Whether it’s a special occasion or a simple way to celebrate a memory, 3D picture prints add emotional value beyond a simple photograph. Additionally, this technology can transform basic decor items into eye-catching masterpieces that stand out with their tactile, 3D presence.
How the Evolution of 3D Printing Opened Doors for Artistic Creations
Initially, 3D printing was used primarily for industrial purposes, such as creating prototypes or machine parts. However, over the years, the technology has evolved significantly, becoming more affordable, accessible, and user-friendly. As a result, it has opened doors for artists, designers, and hobbyists to explore 3D printing in personal and creative applications. Today, individuals use 3D printers in homes and small businesses to create intricate designs, customized products, and artistic pieces without relying on industrial-scale setups.
Artists and makers can now push the limits of creativity. They use 3D printing to craft complex designs that were once impossible to make with traditional methods. Whether it’s unique sculptures, personalized keepsakes, or architectural models, the possibilities in 3D printing are endless. These advancements have truly democratized creativity. Now, anyone with a vision for 3D printing can bring their ideas to life in once unimaginable ways.
Tools and Materials You Need to Start 3D Picture Printing at Home or in Business
Beginner-Friendly and Budget-Friendly 3D Printers for Picture Printing
When starting with 3D picture printing, choosing the right 3D printer is essential for ensuring that your prints are clear and detailed. For beginners, several affordable options are available that deliver great results without a steep learning curve. Reliable printers like the Creality Ender 3, for instance, offer high-quality prints at a budget-friendly price, making them perfect for those new to 3D printing. These printers are known for their ease of use, with intuitive interfaces that allow users to get started without needing advanced technical knowledge. When selecting a 3D printer for picture printing, consider factors like reliability, price, ease of use, and the print bed size, since larger prints may require a bigger printer.
Additionally, as you begin printing, selecting a printer that can handle the demands of creating 3D images with fine detail and precision is crucial. A reliable printer ensures consistent performance, helping you avoid print failures and wasted time and material.
Best Filament Choices to Get Strong, Clean, and Sharp 3D Prints
Selecting the right filament for your 3D prints is as important as choosing the right printer. Filaments like PLA (Polylactic Acid) are often the best choice for clear, detailed prints for beginners. PLA is easy to work with and provides smooth surfaces ideal for turning 2D images into 3D models. It is also environmentally friendly, being biodegradable, making it a popular choice for those who are conscious of sustainability. Filaments such as PETG or ABS are good alternatives for prints requiring greater durability and resistance to higher temperatures. PETG offers a nice balance between strength and flexibility, while ABS is known for its sturdiness and ability to withstand higher temperatures. Depending on the complexity and functionality of the prints you’re working on, you’ll want to choose a filament that fits your needs.
Choosing the right filament ensures that your prints come out strong and sharp. PLA, for example, is excellent for artistic creations and home decor pieces, while PETG and ABS are better suited for functional items that require added strength.
Helpful Software for Turning Images into 3D Prints Without Being a Tech Expert
Once you have the correct printer and filament, the next step is to convert your 2D image into a 3D model that can be printed. Thankfully, several user-friendly software tools make this process easier, even for beginners. Tinkercad is one of the most popular platforms for designing and editing 3D models. Its intuitive interface makes it accessible for those who may not have any prior experience with 3D design software. For those seeking more advanced capabilities, programs like Ultimaker Cura enable you to slice and prepare your model for printing, providing customizable settings that can enhance print quality. For fast and straightforward conversions, Womp offers a simple solution to turn your photos into 3D models with minimal effort. These tools are typically available in both free and paid versions, depending on the features and complexity you need.
With the right software, you can easily convert any flat image into a 3D design ready to be printed, even if you don’t have a technical background. These tools are designed for beginners, making it possible for anyone to start creating their own 3D prints from photos.
Simple Steps to Print Your First 3D Picture Without Feeling Overwhelmed
Choose the Right Image for a Good 3D Result
Selecting the right image is one of the most crucial factors in creating a successful 3D print. The image needs to have good contrast, clarity, and depth to translate well into 3D. High-contrast images help create distinct differences between foreground and background elements, which is essential for a successful print. Clear and focused photos ensure that every detail is captured in the 3D model. You should also look for depth images that show a noticeable separation between the main subject and the background. You can adjust the photo’s contrast and brightness using editing software to enhance the depth and clarity before converting it into a 3D model.
Turn a 2D Image into a 3D Model with Beginner Tools.
Once you have a suitable image, the next step is to convert it into a 3D model. To begin, you’ll need to create a depth map, a grayscale image that shows depth in a 3D space. In this map, lighter areas appear raised, while darker regions remain flat. You don’t need to do this manually, as several beginner-friendly apps can handle it for you. Tools like 3Dthis and Selva3D can quickly turn a 2D image into a 3D model. These apps are intuitive and straightforward, making it easy to start printing without having to learn complex or technical software.
Set Up Your Printer for Success Without Common Mistakes
Setting up your printer properly is key to ensuring a successful print. Before you begin, make sure the print bed is level. An uneven bed can lead to poor adhesion and warping, resulting in a failed print. You should also use slicing software to prepare your 3D model for printing, dividing it into layers that the printer can handle. Most slicing software allows you to tweak layer height, print speed, and temperature settings. It’s also good to run a few test prints before printing your final model. This way, you can identify any potential issues and adjust your settings accordingly. Avoid common mistakes like improper bed leveling or incorrect temperature settings, as these can lead to poor results or failed prints.
Make Your 3D Prints Look Even Better with These Finishing and Display Ideas.
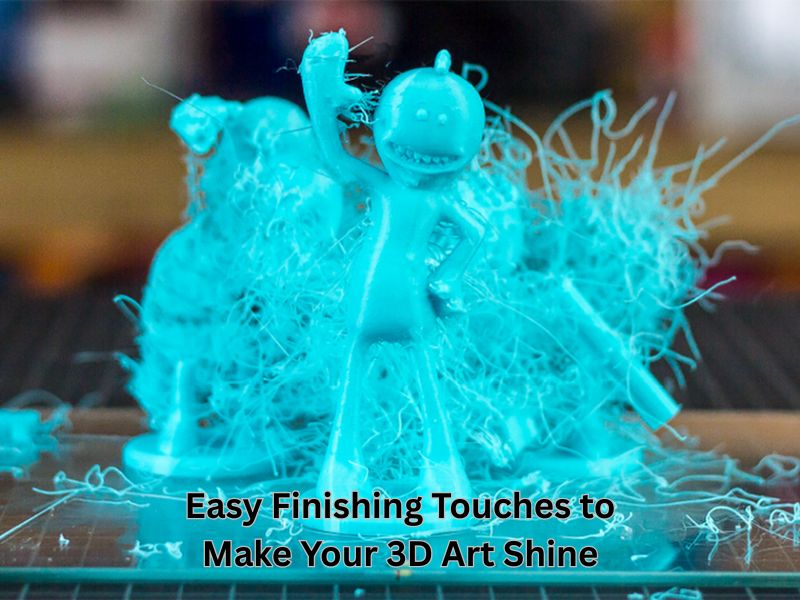
Easy Finishing Touches to Make Your 3D Art Shine
Once your 3D print is complete, you can enhance its appearance with some simple finishing touches. Sanding your prints can help smooth rough edges and remove imperfections from the surface. If you want to add color, painting is a great option, and many people find that acrylic paints work well for 3D printed items. You can also apply a protective sealant to your print, which will help preserve its appearance and durability over time. Be careful when handling your print during the finishing process, as it’s easy to damage delicate details if you’re not gentle.
Fun and Creative Ways to Display Your 3D Printed Pictures at Home or for Sale
Once your 3D picture print is complete, the next step is displaying it in a way that enhances its appeal. You can frame it like traditional artwork. Or, you can get creative with lighting to add drama and highlight certain features. Consider turning your prints into functional decor items, such as lamp bases or wall hangings. This gives your display an even more unique approach. If you plan to sell your prints, these methods can attract buyers and increase the perceived value of your work. Showing your 3D prints in creative and unexpected ways not only makes them stand out but also enhances their appeal. It also highlights the versatility of 3D picture printing in both home and commercial settings.
Wrapping Up
3D picture printing has transformed the way we capture and display memories, offering a tangible dimension to our digital photos. By converting flat images into 3D objects, this technology makes it easy to create personalized gifts, unique decor, and artistic designs once thought impossible. With accessible tools and user-friendly software, anyone can start exploring 3D printing. A wide variety of materials adds even more creative freedom. Both enthusiasts and professionals can now bring visual ideas to life. As the technology evolves, new opportunities for innovation and expression continue to grow. 3D picture printing is becoming an exciting space for art and practical design alike.
FAQs
What is the Phrozen Sonic Mighty 8K and what are its key specs?
The Sonic Mighty 8K is a resin (MSLA) 3D printer from Phrozen with ~10-inch monochrome 8K LCD, and a build volume of around 218 × 123 × 235 mm (X × Y × Z).
What are the strengths (advantages) of the Mighty 8K compared to rivals?
Large build volume for an 8K resin printer, which lets you batch-print many small models or print bigger statues.
Good XY resolution (on the order of ~0.028 mm) for fine detail.
Features like Wi-Fi and ease of use (onboard touchscreen interface) that reduce friction for users.
What are the common drawbacks or limitations?
The built-in webcam shipped with early units was nonfunctional at the time of review.
Resin printers inherently demand careful calibration, maintenance, and resin tuning (e.g., exposure settings).
Consumables (FEP/NFEP films, LCD replacement) and resin cost are ongoing expenses.
Print failures (due to adhesion, peeling, support issues) are more common than in high-end industrial systems, particularly until the optimal settings are determined.
How does the Mighty 8K compare to Phrozen’s own Sonic Mini 8K?
Build volume: Mighty is significantly larger, so you can print more or bigger models.
XY resolution: Mini 8K offers slightly higher fine detail (≈ 22 µm) versus Mighty’s ~28 µm.
Use case: If you primarily print tiny models and require maximum detail, Mini is suitable. If you’re looking for scale or volume, Mighty is the better choice.
Trade-offs: The larger format of Mighty brings more challenges in leveling, resin uniformity, and mechanical stability.
Who are the main competitors of the Mighty 8K in the resin 3D printer market?
Some notable competitors include:
- Elegoo Saturn 4 Ultra — high-end resin printer offering strong performance and features.
- Anycubic Photon M3 / M3 Premium — competing in high-resolution, medium/large build formats.
- Formlabs Form 4 — more premium, industrial/desktop SLA system with integrated ecosystem.
- Uniformation GkTwo — among newer competitors introducing features like self-heating vat and improved usability.
These offer different tradeoffs in resolution, reliability, ecosystem, price, and features.
Is the Mighty 8K good for beginners?
It is usable by beginners, but not fully plug-and-play. The user will need to learn resin handling, leveling, exposure tuning, and post-processing. The onboard tutorial and touchscreen ease the process somewhat.
For absolute newcomers, starting with a smaller, simpler resin printer (e.g., 4K or 6K class) might reduce frustration.
How reliable is the support and parts availability?
- Phrozen provides typical warranty coverage (varies by region) and publishes documentation and profiles.
- Community support (forums, user groups) is significant — users share many settings and fixes.
- Some users express concerns about the cost of replacement parts or the technical support turnaround. For example, in a Reddit thread: “Phrozen gives me a quality impression. How is Phrozen’s technical support regarding malfunctions? … parts availability?”
In short, support is decent for hobbyist level, but not as turnkey as premium industrial systems.
What post-processing steps are required with Mighty 8K prints?
After printing, standard post-processing includes:
- Washing the print (typically in isopropyl alcohol or designated solvent) to remove uncured resin.
- Drying, then complete curing under UV light to harden the surface.
- Removing supports, sanding, finishing, and painting if needed.
These steps are required for all resin printers; the better your calibration and supports, the easier this is.
What types of resins are compatible, and can you use third-party resins?
The Mighty 8K can work with many standard 405 nm UV resins (standard, tough, flexible, castable, etc.).
Phrozen may offer validated resin profiles, but many users also use third-party resins (with tuning).
Performance with non-validated resins can vary: you may get more failures or have to adjust exposure / post-settings.
What are best practices to reduce print failures and improve print success?
Use sturdy and well-calibrated leveling (check zero plane, plate-flatness).
Use sufficient but not overaggressive supports, especially for overhangs and thin features.
Adjust exposure and lifting speed to minimize peel stress.
Ensure resin is well mixed, fresh, and free of contaminants.
Monitor prints (if possible) and clean the vat/film regularly.
Use a proper workflow for postprocessing (washing, curing) and protect the optics (keep resin off screens, keep the environment dust-free).
