 Skip to content
3D printed light pictures, or lithophanes, have become a beloved trend in 2025, captivating both DIY enthusiasts and small business owners.
As a seasoned 3D printing expert, I’ve witnessed firsthand how the 3d print light picture trend transforms ordinary photos into luminous, personalized keepsakes by blending technology and art. The resurgence of this 19th-century art form, now accessible through modern 3D printing, allows individuals to create intricate designs that come alive when backlit.
This fusion of nostalgia and innovation resonates deeply, making 3D printed lithophanes a cherished addition to homes and a unique offering for entrepreneurs using the best 3d printer for small business.
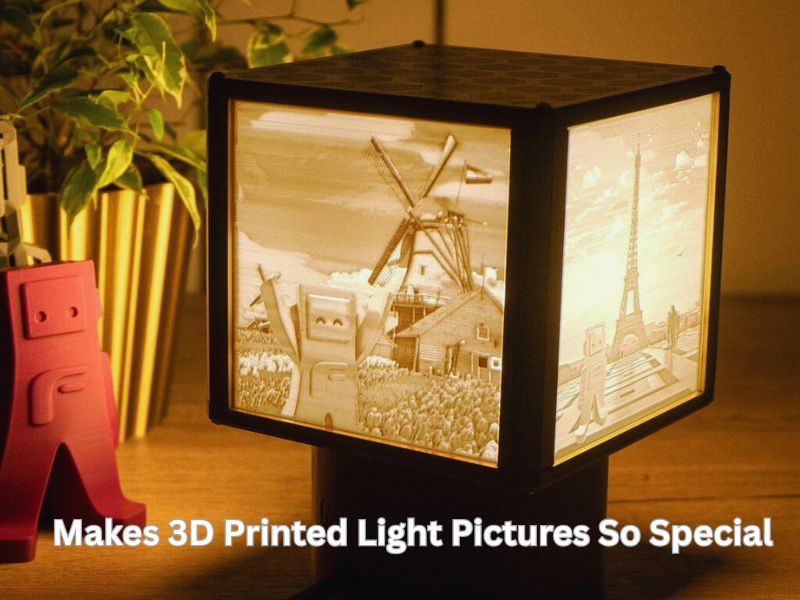
What Makes 3D Printed Light Pictures So Special and Easy to Love
Understanding What a 3D Printed Lithophane Light Picture Is and How It Works
A 3d print light picture, also called a lithophane, is more than just a photo. It’s a detailed print that reveals an image when lit from behind. Without light, it looks like a textured surface. But add a light, and the picture comes alive. Thinner parts glow brighter. Thicker areas stay darker. This simple trick with light and depth turns your memories into glowing art.
A Quick Look at the History: From Classic Lithophanes to Modern 3D Print Designs
Lithophanes began in the early 1800s as delicate porcelain artworks. People loved how they revealed beautiful scenes when backlit. Today, 3D printers have revived that charm. Instead of carving by hand, we now turn digital photos into glowing prints. It’s a perfect mix of old-world beauty and modern creativity.
Why People Are Falling in Love with 3D Print Light Pictures in 2025
3D Printed Light Pictures Make Perfect Personalized Gifts and Home Decor
People love giving gifts that feel personal. That’s why 3D print light picture creations, also called lithophanes, are so popular in 2025. You can take a photo—maybe of a family member, pet, or favorite moment—and turn flat pictures into 3d prints that glow as custom wall art. It’s a heartfelt way to say “you matter.”
Unlike store-bought items, each piece tells a story. These prints bring back memories beautifully and creatively. Whether for a birthday or a cozy living room wall, they add a warm, personal touch.
DIY Fans Are Enjoying the Fun of Making Lithophanes at Home
Taking a clear picture is easier than ever. People enjoy turning their favorite pictures into glowing keepsakes with the help of beginner-friendly tools and free design software. It’s fun, creative, and doesn’t require expert skills.
Anyone can start experimenting with a 3D printer. Watching the design take shape layer by layer feels like magic, which is a big reason why DIYers are hooked.
Small Businesses Are Turning Lithophanes into a Growing Side Hustle
Personalized light decor is in high demand. Many small business owners now sell custom 3d print light picture lithophanes for weddings, baby showers, holidays, and memorial gifts. These items are unique and meaningful and stand out in a world full of generic products.
It’s a great way for makers and artists to earn from creativity. Customers love the emotional value, and sellers enjoy turning photos into products people cherish.
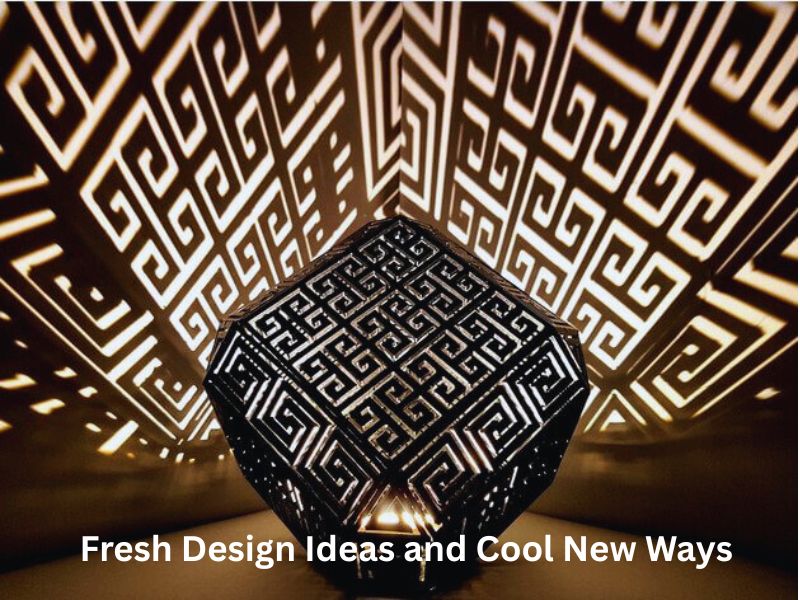
Fresh Design Ideas and Cool New Ways to Use 3D Printed Light Pictures
Adding a Splash of Color: Easy Ways to Make Bright and Vibrant Lithophanes
While classic lithophanes are white, adding color brings a whole new vibe. Try using a colored image as a backlight to enhance your 3d print light picture. The result is a glowing, photo-like effect that’s rich and personal. If you have a dual extrusion printer, you can use two filaments to print built-in color layers. Another fun trick is to print your photo on transparent paper and stick it behind your design. It’s simple and makes your 3D printed photo light look magical.
Making Interactive Light Pictures with LED Lights and Motion Sensors
Want to impress your guests? Add LEDs behind your 3d print light picture for an even brighter glow. Some makers go further and include motion sensors. The light turns on when someone walks by, adding surprise and charm. You can also use touch lights or timers to control when the picture lights up. These small upgrades give your DIY 3D light art a high-tech feel without the complexity.
Fun and Creative Ways to Display Your 3D Printed Lithophane Light Pictures at Home
Don’t just hang it on the wall—get creative. Turn your lithophane into a night light for a cozy glow. Hang one in your window so sunlight brings it to life during the day. You can also frame it as a lampshade to add soft lighting to any room. Even placing it on a rotating stand gives it a cool, dynamic look. Size, shape, and frame style all play a role. A well-placed custom lithophane becomes an eye-catching part of your home décor.
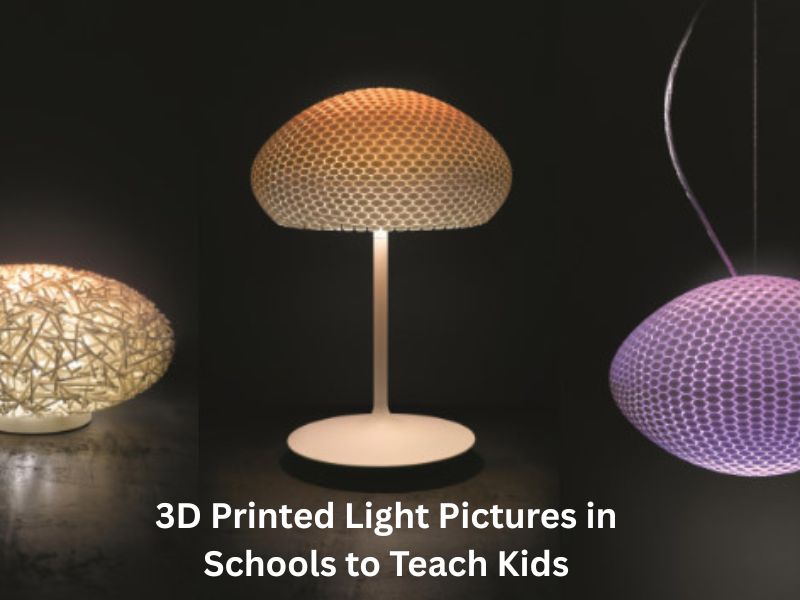
Using 3D Printed Light Pictures in Schools to Teach Kids and Support Tactile Learning
3D printed light pictures, also called lithophanes, are now used in classrooms to make learning fun and hands-on. Teachers use them to help kids explore how light and shadow work. When a light shines through the picture, students can clearly see how different thicknesses affect brightness.
These light-up prints are also helping visually impaired students. Because lithophanes are raised and textured, kids can feel the shapes and patterns with their hands. It turns pictures into something they can touch and enjoy like real art. This brings inclusion and creativity into learning.
Going Green: Eco-Friendly Materials in 3D Printed Light Picture Projects
Sustainability is becoming a big part of 3D printing. Many creators now use PLA filament, a plant-based material that’s biodegradable and safer for the planet. It’s perfect for making light pictures because it’s strong and easy to print with.
People are also choosing LED lights to reduce their energy consumption. Some even use solar-powered frames to light up their 3D prints. These smart choices make the light picture trend not only creative but also eco-friendly—something that matters more than ever in 2025.
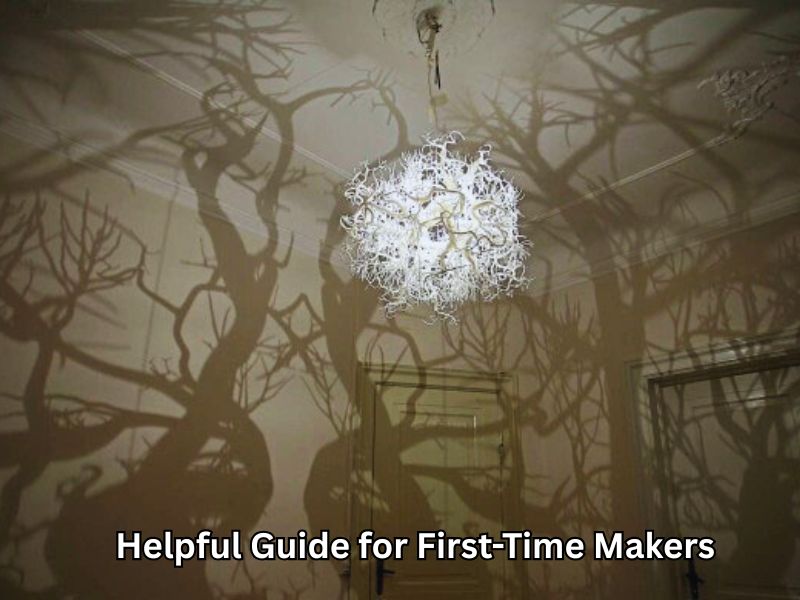
Helpful Guide for First-Time Makers Who Want to Join the 3D Print Light Picture Trend
What You Need: The Best Tools, Printers, and Settings for Lithophane Success
If you’re new to 3D printing, starting with lithophanes is smart. They’re personal, creative, and surprisingly easy once you know the basics.
Beginner-Friendly 3D Printers to Try:
- Creality Ender 3 V3 SE – Budget-friendly, reliable, and perfect for learning.
- Bambu Lab A1 – Great features and simple to use.
- ELEGOO Neptune 3 Pro – Excellent for fine detail and very beginner-friendly.
Best Settings for Sharp and Clean Lithophanes:
- Layer Height: Use 0.1–0.12 mm for fine detail.
- Print Speed: Keep it between 30–40 mm/s for smooth finishes.
- Filament: White PLA works best—it brings out contrast and makes the image pop.
Step-by-Step: How to Turn a Picture into a Glowing 3D Print
1. Pick the Right Photo
Use a clear, high-contrast photo. The better the quality, the sharper your final print.
2. Convert to 3D
Use a free online tool to turn your image into a 3D model. Then, you can adjust the size and depth to fit your frame or lamp.
3. Slice the Model
Open your 3D model in slicer software like Cura. Set the right layer height, speed, and infill (usually solid for lithophanes).
4. Start Printing
Load your filament, double-check your bed leveling, and let the printer do its magic.
5. Light It Up
Once done, place your print near a backlight or lamp. That’s when the image truly shines.
Common Lithophane Problems and Easy Fixes
- Blurry Image: Use a higher resolution photo and clean filament.
- Lines or Gaps: Tighten belts and slow down print speed.
- Warping: Level your bed and apply adhesive, such as a glue stick, if necessary.
This section is optimized for keywords like 3D print light picture, beginner lithophane guide, best 3D printers for lithophanes, and how to print 3D photos. Let me know if you want this broken into visuals or infographic suggestions too!
Wrapping Up
In 2025, the 3D print light picture trend is more than just a hobby—it’s a way to light up memories. People love how easy it is to turn a favorite photo into glowing art. With affordable printers and simple tools, even beginners can join in. These custom prints make perfect gifts and beautiful home décor. They’re personal, creative, and full of heart. That’s why so many DIY fans and small businesses are embracing this trend. It’s the perfect mix of tech, emotion, and style—all in one glowing frame.
Frequently Asked Questions
Why are lithophanes so popular for gifts and decor?
They are cherished because they transform ordinary digital photos into luminous, personalized keepsakes. They offer a high degree of personalization, making them ideal for heartfelt gifts for holidays, weddings, or memorials. Advances in 3D printing have made this once-laborious 19th-century art form easy and affordable for anyone to create at home.
What kind of light source works best for displaying a lithophane?
A strong, consistent backlight is essential. LED light strips or USB-powered LED lamps are ideal because they are bright, cool-running, and energy efficient. The lithophane should be placed as close to the light source as possible for maximum contrast and brightness.
What is the best material (filament) to use for a lithophane?
White PLA (Polylactic Acid) is overwhelmingly recommended. It prints easily, offers excellent light transmission, and provides the necessary contrast. Translucent PLA varieties can also work, but white generally yields the best contrast and detail.
What type of photo works best for conversion into a lithophane?
The most successful images have high contrast and good resolution. A lithophane converts the image to grayscale, so clear distinctions between light and dark areas are vital. Blurry, low-resolution, or overly dark images will produce poor results.
My lithophane is blurry, has lines, or looks distorted. What went wrong?
This usually points to a printing or calibration issue:
- Blurry/Lack of Detail: Check your Layer Height—it may be too large (e.g., 0.2mm). Decrease it to 0.1mm or 0.12mm.
- Horizontal Lines (Layer Lines): The print speed might be too fast, or your E-steps (extrusion calibration) may be off, causing under- or over-extrusion.
- Warping/Lifting: This is common with tall, thin prints. Ensure your print bed is level, use a brim for adhesion, and consider glue stick or hairspray.
- Layer Shifting: Your printer’s belts or bolts are likely loose, causing a slight lateral shift at a random height during the long print.
