
Common Softwares for Different 3D printing Brands
Choosing the perfect 3D printer brand is just the beginning. The software you pair with it is equally important. I’ve spent years testing dozens of printers with different slicers and firmware. From my hands-on experience, a poor software match can completely waste great hardware. You end up with failed prints, ugly surfaces, and weird errors.
Most beginner 3D printers’ common software also gets stuck on confusing menus and missing profiles. In this article, I’ll show you the most innovative brand-to-software combinations that actually work.
I’ll share real results—what shines and what disappoints. You’ll get honest pros and cons for each setup. Plus, I’ll tell you exactly which combination fits your skill level and the projects you want to make. By the end, you’ll feel confident picking the right pair for yourself.

How 3D Printer Common Software Actually Works
Think of slicer software as the translator between your 3D model and the printer. You drop an STL or OBJ file into it. The slicer reads every triangle.
Then it spits out G-code — the exact set of instructions your printer understands. I’ve taken the same printer and the same model and sliced it with five different programs.
Every single print came out looking and feeling different. Same hardware, totally different results. That’s how much the 3D Printer Common Software matters.
Here’s the real workflow I follow every time:
- You grab or design a model.
- The slicer chops it into thin layers and plans every move.
- The printer’s firmware reads those instructions.
- The hotend and bed finally start dancing, layer by layer.
Here is the basic workflow you should understand before printing:
Modeling → Slicing → Firmware Control → Print Execution
Break any one of those steps, and the whole print is toast. I’ve watched perfect models turn into spaghetti because the slicer used the wrong temperature profile. I’ve also watched a $220 Ender 3 beat a $1,000 machine because I dialed in the correct settings.
Even the fanciest printer is only as good as the software driving it. The slicer decides layer height, speed, cooling, support placement, brim size, and how the material flows. Want to print flexible TPU or wood-fill PLA? Almost everything depends on the slicer knowing how to baby that filament. Multi-color or multi-material prints? That’s 95 % software magic.
Beginners especially feel the difference. A clean, friendly interface saves hours of frustration. I still remember my first weeks fighting menus that looked like rocket-science dashboards. Switch to a beginner-friendly slicer, and suddenly printing feels fun instead of stressful.
Bottom line from years at the printer: the right software can make a cheap machine feel premium. The wrong one will make an expensive machine feel broken. Choose wisely, and you’ll wonder why you ever blamed the hardware.
The Two Slicers I Actually Use on Every Printer I Own (And One Wild Card)
After printing on Creality, Anycubic, Elegoo, Sovol, and even a couple of weird Chinese no-names, two slicers keep winning shelf space on my desktop: Ultimaker Cura and PrusaSlicer. I’ve run both on every single one of those machines. They just work.
Cura is the one I always install first for someone new. It’s free, open-source, and already knows about 400+ printers the moment you open it. The interface hides the scary stuff until you’re ready. You can literally drag a model in, hit slice, and get a perfect print in under five minutes. I still use it for 70 % of my daily prints.
The only annoyance? Every few months a big update lands and some of my old profiles throw a tantrum. Ten minutes of re-tuning and I’m back in business.
PrusaSlicer is the one I switch to when I need the print to be perfect. Better seam hiding, smarter tree supports, cleaner multi-material switching. I did a side-by-side test last month: same model, same Ender 3 V3 SE, same PLA. PrusaSlicer gave me sharper corners and almost invisible layer lines. The price you pay is the steeper learning curve.
New users open it and immediately go “uhh… what are all these tabs?” But once you spend an afternoon with it, you never want to go back.
There are also forks like Orca Slicer and SuperSlicer that take PrusaSlicer and crank everything to eleven. I run Orca on my faster machines now.
Then there’s the nuclear option: Klipper. I flashed Klipper on one of my Enders and paired it with Cura/Orca. Print speeds jumped from 80 mm/s to 300+ mm/s with almost zero ringing.
The motion is buttery. Downside? You’re basically turning your printer into a mini server. You need a Raspberry Pi, some terminal commands, and a free weekend. Not for the faint of heart.
3D Printer Common Software Ecosystems — Pros and Trade-offs
I have used both brand software and open-source slicers with many printers. Each type has clear strengths and limits. Your choice depends on how much control you want and how simple your workflow needs to be
Why Brands Build Their Own Slicers
They want your first print to be perfect. Official slicers ship with ready-made profiles that already know your exact bed size, sensor locations, filament type, and special features like auto-bed leveling or input shaping. I unboxed a Bambu Lab X1C, opened Bambu Studio, clicked “Print”, and 18 minutes later had a flawless Benchy. Zero tweaking. That’s the magic they sell.
Same story with Creality Print, Anycubic Slicer, or Elegoo’s Cura fork — everything just works out of the box. For beginners or people who hate menus, it feels like cheating (in the best way).
The Hidden Price You Pay
The moment you want to go beyond stock settings, the walls appear.
- Updates come slowly. Community fixes take months, not days.
- Advanced features (tree supports, lightning infill, custom G-code macros) are often missing or half-baked.
- Switching brands later is painful — you have to learn a whole new program from scratch.
- Modders get locked out. I tried adding a BL-Touch to an older Creality that only wanted Creality Print. Half the functions disappeared.
I now treat brand slicers like training wheels: excellent for the first 50 prints, then I jump to Cura/PrusaSlicer/Orca. The second, I want absolute control.
Mapping Popular 3D-Printer Brands to Their Common Software
From my real use with many machines, I learned one clear truth. Most 3D-printer brands support both brand-specific software and open-source slicers. You are not locked to one tool in most cases. Still, each brand works best with certain software. If you choose the wrong match, you may face poor prints, failed starts, or missing features.
Below is a simple mapping based on what actually works well in daily use.
Popular 3D-Printer Brands vs Their Common Software
| 3D Printer Brand | Official Brand Software | Open Slicers That Work Well | Firmware Type | Best For |
|---|---|---|---|---|
| Creality | Creality Print | Cura, PrusaSlicer | Marlin / Klipper | Beginners, budget users |
| Anycubic | Anycubic Workshop | Cura, PrusaSlicer | Marlin | Mixed FDM & resin users |
| Elegoo (FDM) | None | Cura, PrusaSlicer | Marlin | Clean prints, quiet use |
| Elegoo (Resin) | ChiTuBox | Lychee Slicer | Proprietary | Miniatures, detail models |
| Bambu Lab | Bambu Studio | Limited Cura use | Proprietary | Speed, automation |
| Prusa | PrusaSlicer | Cura (manual setup) | Marlin-based | Reliability, open-source fans |
| Sovol | None | Cura, PrusaSlicer | Marlin | Modders, DIY users |
| FlashForge | FlashPrint | Limited Cura use | Proprietary | Schools, kids, safety |
| Raise3D | ideaMaker | Cura (advanced setup) | Proprietary | Business, prototyping |
What I Learned From Using These Combos
If you use Creality, Anycubic, Elegoo, or Sovol, Cura and PrusaSlicer give you the most control. I use them when I want better support tuning, cleaner walls, and advanced speed control. If you use Bambu Lab, you should stay with Bambu Studio. The hardware depends on the software. You get auto calibration, AI failure checks, and cloud printing. But you lose deep tuning freedom.
If you use FlashForge, FlashPrint is easiest. It is safe and straightforward. But it feels limited for advanced users. If you use Prusa, PrusaSlicer is the best match. It gives a perfect profile.
How to Choose the Right Brand + Software Combination (Your 5-Point Checklist)
I’ve bought printers that felt perfect in the shop, only to spend weeks fighting the software. Here’s the exact checklist I now use before every purchase. It saves money and headaches.
1. Be Honest About Your Skill Level
- Total beginner (first printer ever) → Pick a brand whose official slicer is dead-simple. Bambu Studio, Creality Print, or Qidi Print lets you click once and get a good print.
- Hobbyist who likes tweaking → Jump straight to Cura or PrusaSlicer/Orca Slicer. You’ll outgrow the baby software in a month anyway.
- Advanced tinkerer → Flash Klipper and run Orca Slicer. You’ll unlock speeds and quality nobody else gets.
I wasted $400 on a “fast” printer because its locked slicer had no advanced settings. Skill match matters more than specs.
2. Match the Combo to What You Actually Print
- Toys, organizers, home fixes → Any decent FDM + Cura = happy life.
- Multi-color gifts or Etsy products → Bambu Lab + Bambu Studio (or Orca fork) is still unbeatable.
- Warhammer minis or jewelry → Elegoo/Anncubic/Photon + Lychee Pro. Nothing else touches the detail.
- Cosplay helmets & armor → Big-bed machine (Creality K1 Max, Anycubic Kobra 3 Max, Qidi X-Max 3) + Orca Slicer for perfect tree supports.
Print the wrong thing on the wrong combo, and you’ll fight every job.
3. Check Material Support Before You Buy
- Only PLA/PETG → Anything works.
- TPU, wood-fill, carbon fiber → Cura, PrusaSlicer, and Orca have the best retraction and pressure-advance tuning. Brand slicers usually struggle.
- Resin (any kind) → You’re forced into Chitubox, Lychee, or Voxeldance. No way around it.
- Future exotic materials → Avoid locked brand software like the plague.
I once bought a “flexible capable” printer whose official slicer couldn’t handle TPU at all. Two rolls wasted.
4. Think About Your Next Printer, Not Just This One
- Open slicers (Cura, PrusaSlicer, Orca) travel with you forever.
- Brand-locked slicers mean starting from zero when you upgrade. I moved from Creality to Prusa to Bambu to Elegoo resin. Because I stuck with PrusaSlicer/Orca the whole time, every new machine felt familiar on day one.
5. Look at the Community Size — It’s a Lifeline
- Huge communities → Creality, Prusa, Elegoo, Anycubic, Bambu. YouTube tutorials, ready profiles, and Discord help 24/7.
- Small or new brands → You’re often on your own. One weird error and you’re googling in the dark.
I’ve fixed ringing, bed adhesion, and stringing issues in minutes because ten thousand people already solved it on Reddit.
Recommended Combinations for Different Use-Cases
Below are the best brand-software matches based on real use cases. I have used most of these setups myself. Each one serves a different kind of user. You should pick based on how you plan to print.
For Beginners / First-Time Users
If you are new to 3D printing, you should avoid complex software. A brand-agnostic FDM printer with Cura or PrusaSlicer is the safest choice. I started with this setup. It was simple and stress-free. Cura gives you ready-made profiles. You only need to adjust a few basic settings.
PrusaSlicer is also easy once you understand the layout. Print success is high with both tools. The downside is that Cura can feel heavy on slow PCs. PrusaSlicer updates can also change menus often. This setup is best for students, home users, and first-time buyers.
Best for: Home users, students, total beginners
Not ideal for: People who want extreme speed or automation
For Hobbyists & Modders
If you like tuning, upgrading, and pushing limits, you need an open-source printer with PrusaSlicer or SuperSlicer + Klipper firmware. I use this setup for speed tests and custom builds. PrusaSlicer gives deep control over walls, flow, retraction, and supports.
SuperSlicer adds even more advanced tuning. Klipper unlocks high-speed printing and intelligent motion control. The results are excellent. The negative side is the learning curve. Setup takes time. Firmware mistakes can stop your printer. This setup is ideal if you enjoy learning and tweaking.
Best for: Hobbyists, modders, speed printers
Not ideal for: Beginners and casual users
For Resin & High-Detail Work
For miniatures, dental work, and jewelry, you must use a resin printer with Lychee or Chitubox. I use both. Chitubox is fast and simple. It works well with most Elegoo and Anycubic resin machines.
Lychee offers better support, control, and layout tools. Print detail is sharp with both. Cleanup is the real downside. Resin is messy. You must wash and cure every print. Safety is also important. Gloves and masks are required. This setup is perfect if detail matters more than speed.
Best for: Miniatures, jewelry, dental, and display models
Not ideal for: Kids, shared rooms, quick daily prints
For Multi-Material / Advanced Prints
If you want dual-color support in PVA or mixed materials, you need a multi-material printer with a slicer that supports multiple extruders. Bambu Studio and PrusaSlicer both work very well here. I tested multi-material prints with Bambu’s system. It is fast and clean. Supports break away easily.
Color changes are smooth. The drawback is cost and filament waste. Multi-material systems use more filament during purging. Maintenance is also higher. This setup is best for product design, business printing, and professional models.
Best for: Businesses, product designers, color models
Not ideal for: Low-budget users and small workspaces
Troubleshooting & Compatibility Pitfalls — What Can Go Wrong
Even with a good printer and slicer, things can still fail. I faced many of these problems myself. Most issues stem from 3D Printer Common Software mismatches, incorrect settings, or skipped calibration. If you know these risks, you can avoid wasted time and filament.
Mismatched Slicer Settings Cause Print Failure
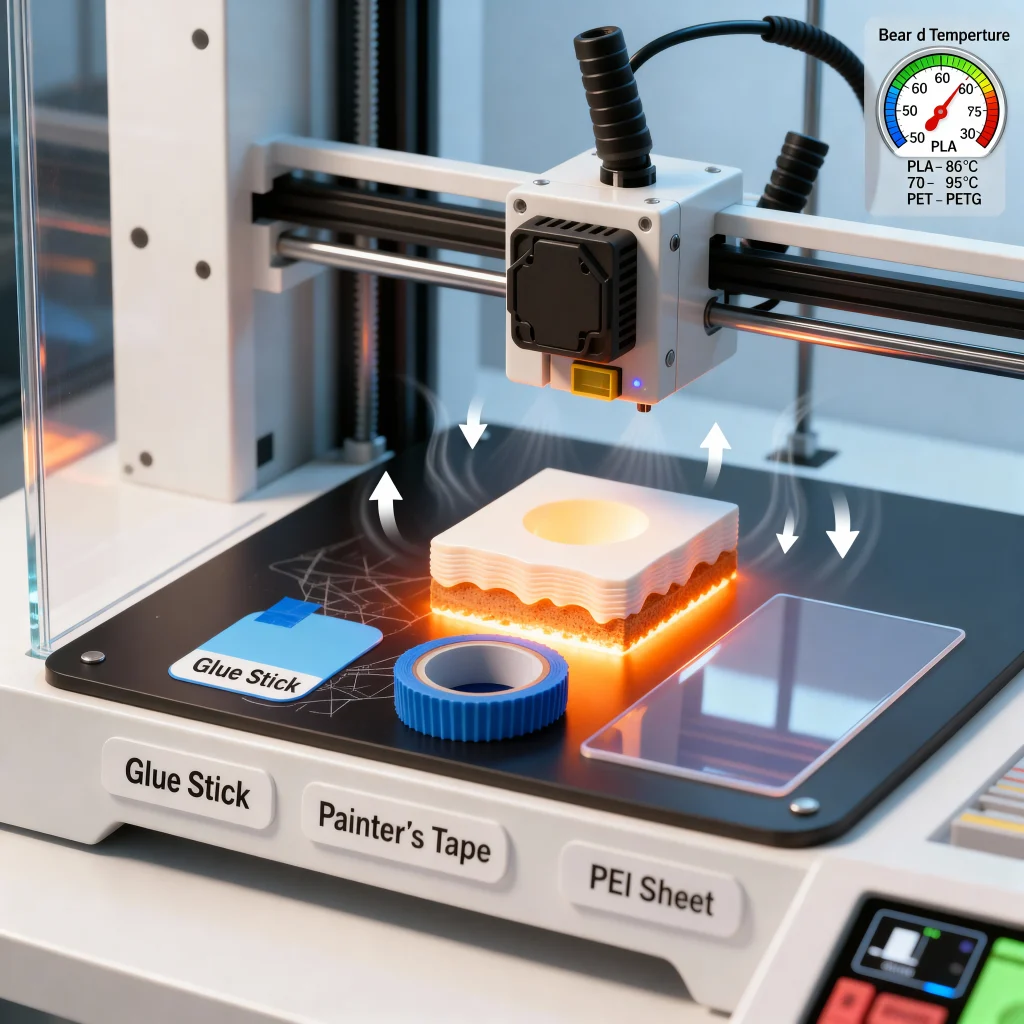
When your slicer settings do not match your printer, prints fail fast. I once used the wrong nozzle size in Cura. The first layer did not stick at all. Poor profiles can cause warping, weak layers, and stringing. Bed temperature, flow rate, and speed must match your machine. You should always use the correct printer profile. You should also fine-tune for each filament brand.
Common results of bad slicer settings:
- Poor bed adhesion
- Warped corners
- Weak layer bonding
- Under-extrusion or blobs
Firmware Conflicts Break Motion and Heating
Firmware problems appear when you modify your printer. I saw this after flashing custom firmware. My motors skipped steps. The heater also overshot the temperature. Old slicer profiles can clash with new firmware. This causes wrong movement and unstable heating. You should reset your slicer after firmware updates. You should also re-check steps/mm and temperature limits.
Risk is higher if:
- You use custom boards
- You switch to Klipper or Marlin
- You update firmware often
Resin vs FDM Slicer Confusion Ruins Prints
This is a very common beginner mistake. Resin slicers and FDM slicers are not interchangeable. I once imported a resin file into an FDM slicer by mistake. The print failed at once. Resin slicers control exposure. FDM slicers control extrusion and speed. Mixing them up gives useless G-code. You must always match print type with the correct slicer.
Correct match:
- FDM printer → Cura, PrusaSlicer, Bambu Studio
- Resin printer → Chitubox, Lychee
Calibration Is Required After Every Major Change
Every time you change firmware or material, calibration is needed. I learned this the hard way. New PLA needed different temperatures. A firmware update changed my Z-offset. Without recalibration, prints failed again. You should always check:
- Bed leveling
- Z-offset
- Flow rate
- Temperature
Skipping this step results in poor-quality prints and failed prints. Calibration saves more time than it costs.
Conclusion
After using many printers and slicers, I learned one clear lesson. The best setup depends on ease, flexibility, print type, and long-term use. If you want simple printing, brand software works well. If you want full control, open slicers are better. Your choice should match how you print and how much you want to tweak.
You should start with universal slicers like Cura or PrusaSlicer. They work with most brands. They also have strong user support. I used them across many printers with good results. Once you gain experience, you can try brand software. That helps if your printer has special features.
The best thing you can do is test and tweak your setup. Save profiles for each filament. Write down your best settings. Small changes make big differences. When you do this, your print quality improves fast. Your failures also drop.
In the end, no single brand and software pair is perfect for everyone. What matters is what works best for you. Test your tools. Learn your settings. Then stick with the setup that gives you clean, reliable prints every time.
FAQs on 3D Printer Common Softwares
Yes. Cura supports 400+ printers. It works on Creality, Prusa, Elegoo, and more. I sliced an Ender with it. Results matched the official software. Add custom profiles for odd brands.
Switch anytime. Official slicers crash often. I ditched Creality Print for Orca. It fixed jams. Test the G-code first. Most brands use Marlin firmware. It reads the Cura output fine.
No. Firmware like Marlin is universal. Prusa’s custom works with Cura. Bambu proprietary locks some features. But forks like Klipper free you. I flashed Klipper on Elegoo. No limits.
Yes. FDM needs Cura or PrusaSlicer. Resin uses Chitubox or Lychee. FDM slicers ignore resin exposure. I mixed once. The vat overflowed. Stick to type-specific. Orca handles both now.
Start with Cura. It’s free and straightforward. Drag model, hit slice. Profiles load automatically. I began here. No overwhelm. Lychee for resin newbies. Avoid advanced features like SuperSlicer early.
Download official profiles. Test a calibration cube. Adjust bed size in settings. I did this on Anycubic. First print stuck. Bed tweak fixed it. Check forums for brand-specific G-code.
Yes. It supports 200+ brands. I ran it on Creality. Supports generated cleaner. Add custom config. Minor tweaks for the extruder. Great for hobbyists seeking control.
Slicer makes G-code. Firmware runs it. Slicer plans layers. Firmware moves motors. I updated the firmware on Bambu. Speed doubled. Slicer stayed the same. Both need a match for the best.
Orca forks Cura. It adds easy tweaks. Beginners stick with Cura. Orca shines for speed tests. I switched after 50 prints. Orca’s tree supports saved time. Start Cura. Upgrade later.
Update quarterly. Fixes bugs. Adds features. I updated PrusaSlicer. Ringing cut 50%. But backup profiles. Updates break old ones sometimes. Test after each.
No. Bambu Studio ties to hardware. AMS integration fails elsewhere. I tried on Ender. Colors jammed. Use Cura for cross-brand. Bambu locks for its ecosystem.
PrusaSlicer or Bambu Studio. Prusa handles MMU2S. Bambu AMS seamless. I printed a toy with Prusa. Swaps clean. For non-Prusa, Orca forks it well.
No for most. Free like Cura suffice. Simplify3D tunes pros. I used it once. Cost $150. Cura matched 90%. Save money. Free options update faster.
Run the temperature tower. Test flow rate. I do this weekly. Adjust retraction for TPU. Slicer guides help. Wrong settings string or gap. Calibration saves waste.
Yes. Bad G-code overloads. I fixed it with PrusaSlicer. It optimized paths. Check start code. Firmware matches too. Errors drop 80%. Test small models first.