 Skip to content
Lithophanes transform your favorite photos into glowing 3D prints. Anyone can create these stunning light-based artworks with the right tools and settings.
As a 3D printing expert with years of hands-on experience, I’ve learned that success in 3d printing lithophane projects hinges on three key factors: selecting the appropriate software, fine-tuning your printer settings, and choosing the right materials. This guide will explore the best software, printer configurations, and creative ideas to help you produce high-quality lithophanes. Whether crafting a personalized gift or using the best 3d printer for a small business, this article will help you bring your images to life.
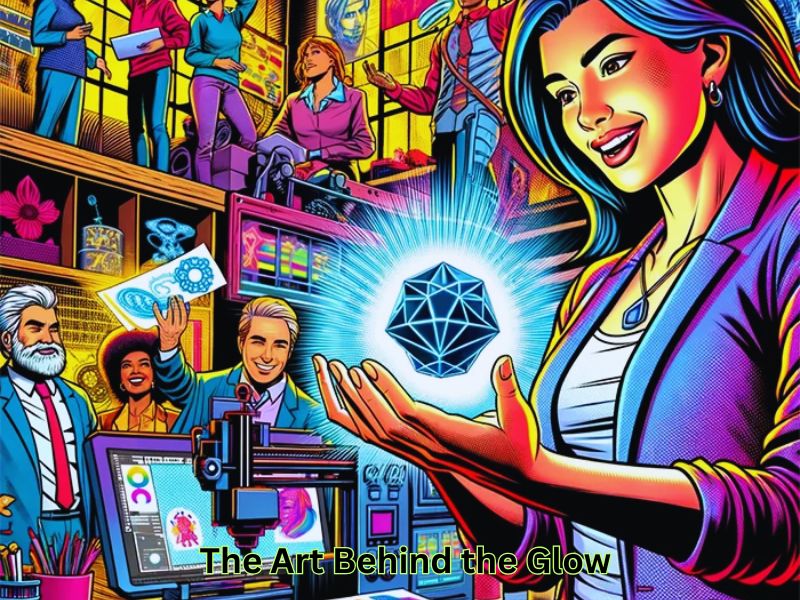
Understanding Lithophanes: The Art Behind the Glow
How Lithophanes Work Through Light and Thickness Variations
Lithophanes are one of the most unique forms of 3D printing. They utilize the principle of light passing through varying material thicknesses to create stunning visual effects. When light shines from behind a lithophane, areas with greater thickness appear darker, while thinner sections allow more light to pass through, revealing brighter details. This dynamic creates a grayscale image, making lithophanes appear illuminated and full of depth when backlit.
The key to creating a successful lithophane is adjusting the material’s thickness with great precision. This variation is typically achieved through 3D printing, where each layer adds to the desired effect. It’s beneficial when going from photo to 3D print, making it a perfect fit for creating intricate designs that rely on light and shadow.
A Short History and the Fusion with Modern 3D Printing
Lithophanes have a rich history that dates back to the early 19th century when they were first crafted from porcelain. These delicate pieces were often used as lampshades, giving off a soft glow when illuminated. The artwork was painstakingly etched into the porcelain, and the light passing through would bring out the images.
With the advent of 3D printing, 3D printing lithophane designs have made a remarkable comeback. Instead of laboriously carving intricate designs into ceramic, digital tools and 3D printers can easily convert images into 3D surfaces with varying thicknesses. The ability to create these designs at home or in a business setting has brought lithophanes into the modern age, making them accessible to hobbyists, DIYers, and entrepreneurs alike.
Choosing the Right Software for Designing Lithophanes
Exploring User-Friendly Lithophane Design Tools for Beginners and Experts
When designing lithophanes, selecting the right software is crucial for achieving high-quality prints. Several tools are available that cater to both beginners and experienced users. Let’s explore a few of the most popular options:
- ItsLitho: Ideal for beginners, ItsLitho offers an intuitive online platform where users can upload images, customize them into 3D printing lithophane designs, and preview the final product in real-time. It’s an excellent option for creating simple designs or experimenting with custom shapes like spheres, lampshades, and nightlights.
- 3DP Rocks: 3DP Rocks is an excellent platform for those who want a straightforward and fast method to turn photos into lithophanes. This tool transforms images into basic lithophanes without complex settings, making it perfect for quick and simple designs.
- Lithophane Maker: Lithophane Maker offers a range of special shapes beyond flat lithophanes, such as spheres, lamps, and other decorative items. This tool is ideal for those who want to take their designs a step further by adding custom shapes that are often difficult to create with traditional 3D modeling software.
How to Use Blender for Making Detailed and Artistic Lithophane Designs
Blender is an excellent choice for more advanced users looking to create highly detailed and artistic lithophanes. Blender is a powerful 3D modeling software that can import images, convert them into 3D meshes, and create intricate designs. Here’s a basic guide:
- Importing Images: The first step in creating a lithophane in Blender is importing a high-quality image. For the best results, this image should be grayscale.
- Converting to 3D: Use Blender’s displacement mapping feature to convert the image into a 3D surface. This surface will have thickness variations corresponding to the brightness levels of the image.
- Customizing and Refining the Design: After mapping the image onto a 3D object, you can adjust the geometry, add textures, or combine multiple photos to create a complex design. You can also add frames or stands to enhance the final product.
Using Fusion 360 for Complex Lithophane Structures and Multi-Part Projects
For those working on more complex designs involving multiple parts, Fusion 360 is a top choice. It allows you to incorporate lithophanes into larger product designs, such as lamps, decorative panels, or even furniture.
- Designing Integrated Lithophanes: One key advantage of Fusion 360 is its ability to work with parametric design. You can incorporate 3D printing lithophane into products like lamps or custom wall panels, allowing for seamless integration of functional and aesthetic elements.
- Multi-Part Lithophane Projects: Fusion 360 is also ideal for projects that require multi-part designs. You can combine lithophanes with other 3D-printed parts, such as frames, holders, or even mechanical components like light fixtures.
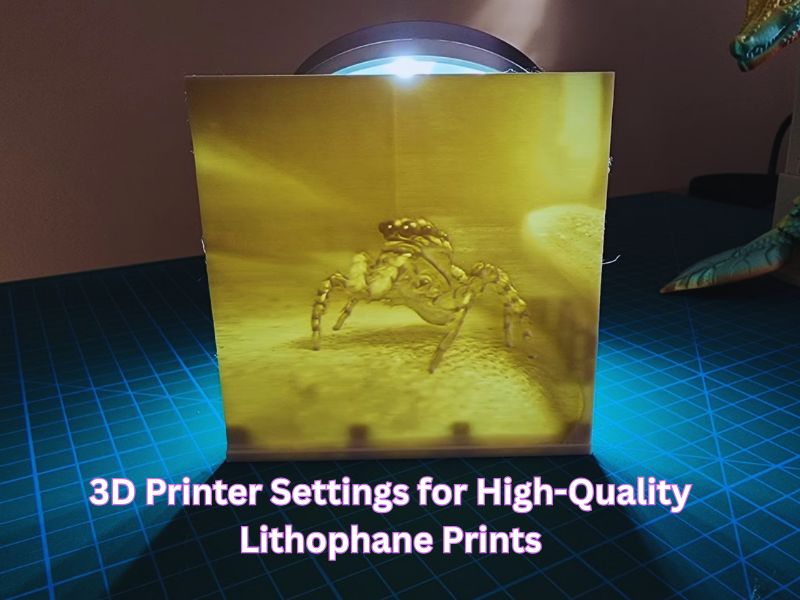
Optimizing 3D Printer Settings for High-Quality Lithophane Prints
How Layer Height Impacts Image Detail in Lithophane Printing
The layer height you choose plays a critical role in the final appearance of a lithophane. Smaller layer heights (around 0.1 mm or 0.12 mm) allow for more precise detailing and smoother transitions between light and dark areas. This level of detail is necessary to capture the subtleties of the image when illuminated. In contrast, thicker layers may result in a rougher surface, reducing the clarity of the picture. When 3D printing lithophane designs, selecting the appropriate layer height is essential for the best result.
Choosing the Best Infill and Wall Settings for Durable and Clear Lithophanes
To achieve a durable and visually appealing lithophane, it is essential to consider your infill and wall settings. For high-quality results, you should:
- Use 100% Infill: This ensures that the lithophane has a solid core, which is essential for achieving the desired light diffusion and durability.
- Thick Walls: Instead of a high infill, you can increase the wall thickness to strengthen the lithophane and reduce the material used. This method works well for creating lightweight designs with a solid structure.
Recommended Print Speeds for Better Lithophane Results and Less Print Failure
Lithophane printing requires slower print speeds to ensure that each layer is accurately placed and that the design does not shift. Slower print speeds between 20 mm/s and 35 mm/s are ideal for high-detail 3D printing lithophane designs. This slower speed helps reduce print failures, such as blobs or gaps in the print, and results in smoother surfaces.
Best Orientation and Bed Adhesion Techniques for Successful Lithophane Printing
When printing lithophanes, orientation plays a significant role in the clarity of the final product. Printing the lithophane vertically (along the Z-axis) is recommended as it allows light to pass through evenly, improving the image’s clarity. Additionally, using a brim with at least 10 lines for better bed adhesion helps prevent warping and ensures the lithophane stays in place throughout the printing process.
Creative Lithophane Project Ideas to Inspire Your Next 3D Print
Designing Custom Photo Frames with Lithophanes for Personal Gifts and Home Decor
Lithophanes make amazing custom photo frames. These can be used as personalized gifts for birthdays, anniversaries, or special occasions. You can add names, dates, or quotes to make the frame more meaningful. The backlighting illuminates the image, giving it a soft and enchanting glow. 3D printing lithophane designs elevate these frames, creating a stunning visual effect that is both unique and memorable.
Making Lithophane Lampshades to Turn Art into Functional Lighting
Create beautiful lithophane lampshades that display your artwork when lit. These lamps can serve as both functional lighting and decorative pieces, adding a warm, inviting glow to any room. By experimenting with light placement, you can enhance the appearance of the lithophane, highlighting its intricate details.
Creating Holiday Ornaments and Decorations with a Personal Touch
Consider creating 3D printing lithophane ornaments for a truly personalized touch to your holiday decorations. These could feature family photos, holiday scenes, or custom designs. The best part? They will glow beautifully when the lights behind them are turned on.
Crafting Puzzle Lithophanes for an Interactive 3D Printing Experience
Another unique idea is to create puzzle lithophanes. These interactive designs consist of several pieces that, when assembled, form a complete image. Puzzle lithophanes are great for kids, gifts, or fun home decor.
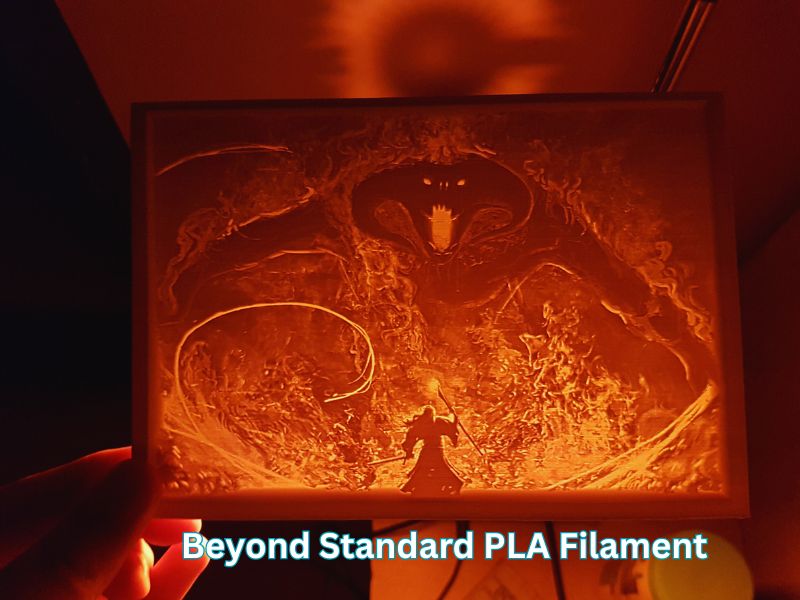
Experimenting with Materials: Going Beyond Standard PLA Filament
Trying Colored and Translucent Filaments to Create Unique Lithophane Effects
Experimenting with different filament types can significantly change the final appearance of your 3D printing lithophane. Colored filaments, such as red, blue, or even translucent varieties, can give your designs a more striking or ethereal quality. Translucent filaments allow more light to pass through, enhancing the glowing effect, while solid-colored filaments can create a more dramatic contrast.
Using Resin Printers to Achieve Ultra-Fine Lithophane Details
Resin printers offer higher resolution and are perfect for printing detailed lithophanes. These printers use UV-cured resin to produce intricate and sharp designs, making them ideal for small or highly detailed lithophanes requiring higher accuracy. Resin printers also allow for smoother finishes and finer details, perfect for intricate lithophane designs.
Post-Processing Techniques to Enhance the Look of Your Lithophane
Adding Paint or Coatings to Make Your Lithophane Stand Out
Once your 3D printing lithophane is printed, you can enhance its visual appeal by applying paints or coatings. Transparent paints can add color while maintaining the material’s translucency, ensuring the lighting effects are still visible. You can experiment with metallic or antique finishes to give your 3D printing lithophane a unique, eye-catching look.
Installing LED Lights to Boost the Glow and Impact of Lithophanes
LED lights are the best way to highlight the beauty of lithophanes. Installing an LED system behind the lithophane, or integrating it into a lamp, will enhance the design’s glow. You can experiment with different types of lighting, such as color-changing LEDs, to add more dynamic effects to the lithophane.
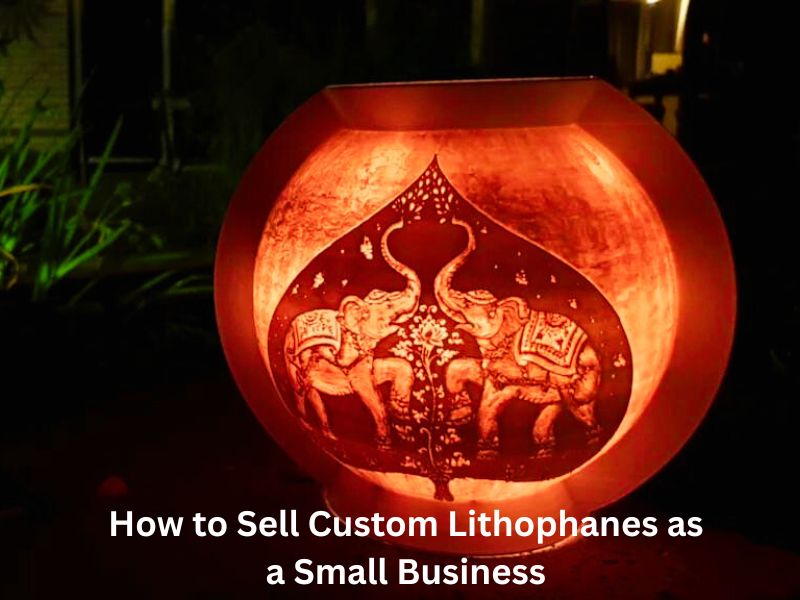
Turning Passion into Profit: How to Sell Custom Lithophanes as a Small Business
For those who want to turn their passion for lithophanes into a business, there are several ways to monetize your designs. You can sell your custom creations on online marketplaces like Etsy or Amazon Handmade, or even set up your own online store. Additionally, offering personalized lithophanes as gifts for special occasions, such as weddings, memorials, or birthdays, can help you attract a wider audience.
Pricing your 3D printing lithophane involves considering factors such as the cost of materials, time spent designing and printing, and the complexity of the design. Marketing your 3D printing lithophane through social media platforms like Instagram or Pinterest can also help you attract customers, as these platforms are perfect for showcasing visually striking products.
Wrapping Up
3D printing lithophanes offers a captivating blend of art and technology, transforming ordinary images into illuminated masterpieces. By selecting the appropriate software, such as ItsLitho for beginners, Blender for detailed designs, or Fusion 360 for complex structures, you can tailor your creations to your specific needs. Optimizing printer settings, including using a 0.1–0.16 mm layer height, 100% infill, and printing at slower speeds (20–35 mm/s), ensures high-quality results. Additionally, experimenting with different materials and post-processing techniques can further enhance the visual appeal of your lithophanes. Whether for personal projects or as a product offering, mastering these techniques allows you to bring your creative visions to life with depth and clarity.
Frequently Asked Questions
What is a lithophane and how does 3D printing create one?
A lithophane is a unique 3D print that transforms a two-dimensional image into a glowing, three-dimensional piece of art when backlit.
How it works: The image is translated into variations in material thickness. Darker areas of the original photo are printed thicker, blocking more light. Lighter areas are printed thinner, allowing more light to pass through. This dynamic contrast creates the visual depth and detail of the image when illuminated.
What kind of filament is best for printing lithophanes?
The most successful lithophanes are printed with White or natural (bone white/light grey) PLA filament.
Alternatives: Resin printers using white or light grey resin can achieve ultra-fine details and smoother finishes. Specialized “Litho” PLA filaments are also available for optimized results.
Color: Avoid completely transparent filaments. A light, semi-translucent color like white offers the best contrast and diffusion of light.
What image quality is required to make a good lithophane?
The source image determines the quality of your final lithophane.
Resolution: A high-resolution image is best. While extremely high resolutions aren’t always necessary for smaller prints, a good starting point is ensuring the image is clear and sharp. Many lithophane converters automatically process the image to grayscale to optimize it for printing.
High Contrast: Choose an image with clear distinctions between light and dark areas (high contrast). Images with similar colors or deep shadows can result in blurred details in the final print.
What software can I use to create the lithophane 3D model (STL file)?
There are several software options, depending on your skill level and needs:
- Beginner/Simple: ItsLitho or 3DP Rocks are excellent online tools that are fast, intuitive, and allow you to upload an image and download the printable STL file easily.
- Intermediate/Custom Shapes: Lithophane Maker is a good choice for generating special shapes like spheres, lampshades, or decorative items.
- Advanced/Complex Designs: Blender (using displacement mapping) or Fusion 360 allows for greater control over complex designs, multi-part projects, and integrating the lithophane into a larger functional product.
Do I need to use supports when printing a lithophane?
Generally, no supports are needed for the lithophane itself, especially if you print it in the recommended vertical orientation.
However, if you print an arched, cylindrical, or framed design, you may need to use a brim for better bed adhesion. If the design includes a complex structure or frame with extreme overhangs, you may need to set supports to “touching build plate” to prevent them from being generated inside the lithophane model itself.
