
Mastering 3D Printing: A 3D printing industry analysis reveals readiness to expand further, with a 23.5% rate that will increase its value to $88 billion by 2030. Those who seek tailorable devices for professional, DIY, or cost-effective clothing will especially appreciate this emerging trend.
Rapid prototyping, small-scale production, and more are all possible with 3D printing technology. Find out how 3D printing can change your life, whether you’re a hobbyist or an entrepreneur.
Getting Started with 3D Printing
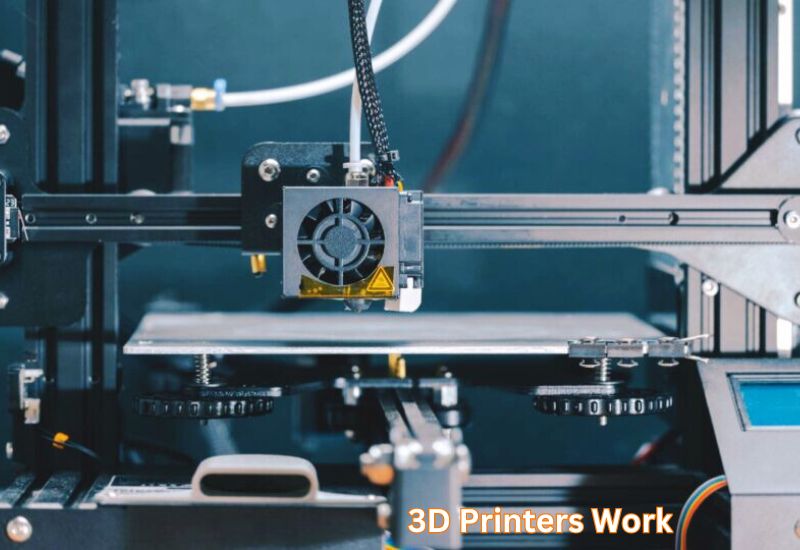
Understanding How 3D Printers Work
The 3D printer works by depositing layers of material until the whole object is completed.
A digital design file is created using specific software, and the printer divides the file into layers.
Main parts of a 3D printer include:
- Print Bed – Printing is done on flat surfaces. Some surfaces are heated for better material adhesion.
- Extruder or Nozzle – A resin printer uses UV light instead of melting and placing the material.
- Materials – The most commonly used materials are PLA (easy to use), ABS (strong), and resins (detailed).
There are different types of printers. The FDM is the most popular for novices, while the SLA and SLS are best for high-end projects.
Choosing the Right 3D Printer for Your Needs
Pick a printer based on your purpose, budget, and experience.
Ask Yourself These Questions:
- What will you use it for?
- DIY and hobby projects? Try FDM printers.
- Detailed models or jewelry? Go for SLA printers.
- Durable industrial items? Look into SLS printers.
- What is your budget?
- Beginner printers cost $200–$700.
- Advanced printers can go over $1,000.
- How experienced are you?
- New users should get simple, ready-to-use models.
- Experts can try advanced printers with more features.
Tips for Choosing:
- Project Size: Make sure the printer matches your project dimensions.
- Materials: Check if the printer supports the materials you want to use.
- Support: Choose brands with good customer service and easy-to-find parts.
Choosing the right printer for your needs and goals is the key to a successful 3D printing journey.
Must-Have Accessories for Smooth Operation
- Filaments – differences and what works best for beginners and pros
- Safety tools to protect yourself during resin or FDM printing
- Maintenance tools for continued printer health
Preparing Your Workspace
- Setting up a proper, safe, and efficient workstation
- Tips for storing your filaments to avoid moisture damage
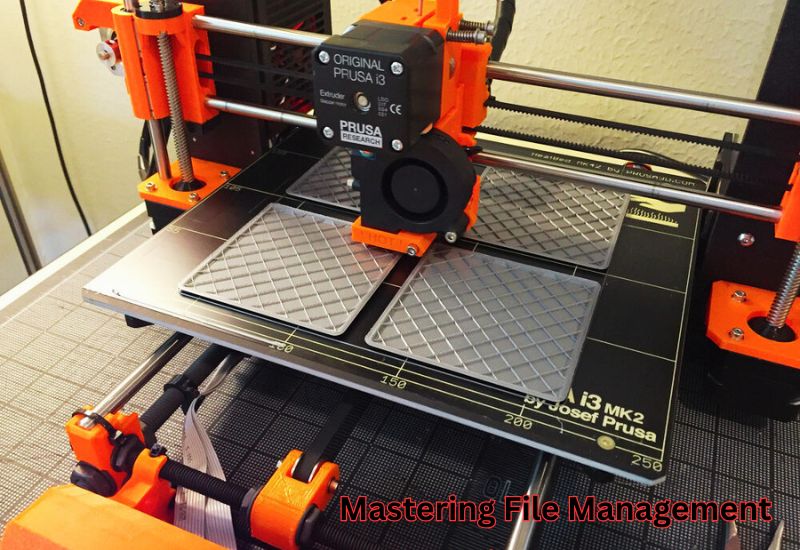
Mastering File Management
Mastering File Management for 3D Printing
Effective file management also contributes to 3D printing’s success. Here’s how to get started.
Preparing Your 3D Models for Printing
STL and GCode Files
- STL files define your 3D model’s shape.
- GCode files tell the printer what to do, like moving and setting temperatures.
Both are essential for every print.
Using Slicer Software Tools
- Slicers turn STL designs into GCode. Examples are Cura or PrusaSlicer.
- Use default settings if you’re unsure. Customize when you gain experience.
- Start simple to avoid errors.
Avoiding Common Problems
- Fix broken models using software like Meshmixer.
- Position your model to reduce extra support.
- Ensure files fit your printer’s size and detail limits.
Organizing Print Files
Cloud-Based Systems
- Use platforms like 3DPrinterOS to store and organize files.
- Access your files anywhere. Share them securely.
- Cloud storage keeps your data safe.
Sorting and Backups
- Use folders for projects or client names to stay organized.
- Label file versions clearly to track updates.
- Save backups on cloud or external drives to protect your work.
These simple steps make printing more efficient and reduce problems. Organize your items carefully and print them finely.
Improving Your 3D Print Quality
With a few simple steps, you can improve the quality of your 3D prints and increase success.
Getting Bed Leveling and Nozzle Settings Right
Ensure the print bed surface is level. The best way to calibrate is to insert an A4 sheet of paper under the nozzle. The sheet should feel snug when inserted. If it’s too close or too far away, the tip won’t stick, so fine-tune it. Proper bed leveling is especially important when using the best 3d printer for small business, as consistent first layers are key to professional results.
Temperature and Material Settings for Excellent Results
The temperature of every filament is different. PLA prints correctly at 200°C with a bed temperature of 60°C, for example. Look at the filament’s recommended temperature range. If the layers start deforming or do not print successfully, adjust the nozzle temperature or bed temperature. Otherwise, try to keep the room temperature constant.
Tips and Tricks for Reducing Printing Errors
- Keep filaments dry to avoid bubbles in your prints. Use a sealed container.
- Use supports for overhangs to prevent sagging. Adjust support density as needed.
- Slow down for detailed prints. Lower speeds improve print quality.
- Adjust retraction settings to stop stringing or oozing. Experiment until it’s right.
Post-Processing Your Prints for a Polished Look
For resin prints, rinse with isopropyl alcohol and cure under UV light. Carefully remove supports and sand rough areas with 200-grit sandpaper. If you make a 3D model for printing that needs a glossy finish, polish the ABS print with acetone or a clear coat. If you intend to paint, first apply a primer.
By following these tips, you can improve the quality of your prints.
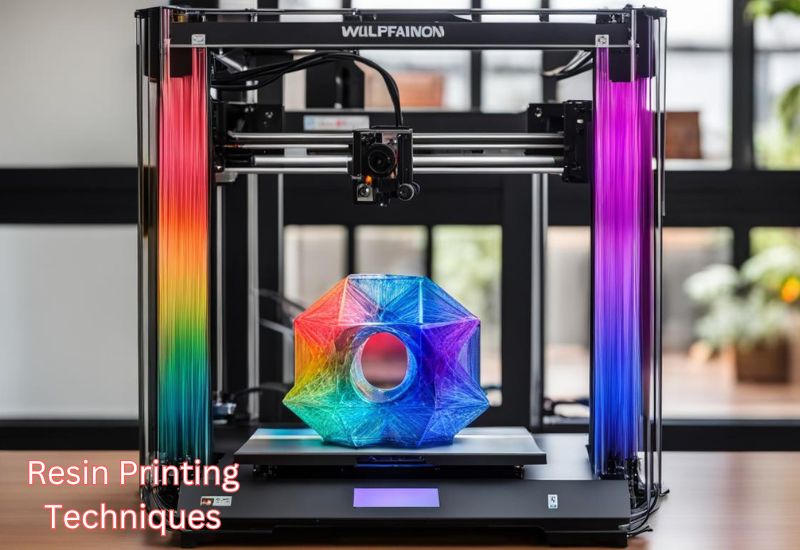
Deep-Dive into Resin Printing Techniques (Unique Section)
Special Care for Resin Printers
Unlike filament-based 3D printing, resin printing requires extensive management and precision. It uses a liquid-based photopolymer resin. Therefore, it is important to maintain your resin printer well to achieve optimal results and extend its life.
- Maintain a Clean Workspace: Printing resin has its drawbacks, including spills and uncured resin that can cause a mess. Use disposable mats under your printer, and make sure your office is well-ventilated. Additionally, keep the printer away from bright sunlight. When exposed to the sun, the resin may dry out.
- Regular Vat Cleaning: The magic happens in the resin vat, which is also the most prone to contamination. Therefore, cleaning the resins after each print job is always necessary. This will prevent particles from obstructing future prints.
- Protective Equipment is Key: If you are creating molds or castings with resin, wear nitrile gloves, a respirator, and safety glasses. The uncured material is adhesive and irritating.
- Proper Storage of Resin: If your resin is stored in a cool, dark location and in a tightly sealed container, it will be spoiled by light and heat, and your prints will suffer. See the manufacturer’s instructions to find out how long your resin will last.
- Regular Printer Calibration: To prevent the layers from being placed in the same spot, the Z-axis and build platform need to be adjusted so that they are flat. This ensures no print failures and improved adhesion between the layers.
Your printer will last longer if you follow such rules, and your prints will always be enhanced.
Expert-Approved Steps for Better Resin Prints
A resin 3D printer is capable of producing high-precision models when properly used. Here are some tips to improve your resin printing:
- Optimize Printer Settings: When setting up UVC power and lift speed, it is important to start with the layer heights and exposure times recommended by the resin manufacturer.
- Warm and Shake Your Resin: If the resin bottle is kept in a cold environment, submerge it in warm water for two minutes to warm it up and mix it well. If it’s still cold, submerge it in cold water for 20 seconds to warm it.
- Test with RERF Files: Before changing the type or color of resin, run a RERF test to help determine the best range for your printer’s eye settings.
- Focus on Model Orientation: It is important to place the model on the build platform so that support structures are minimized as much as possible. Printed objects can also be reduced by printing them at an angle. This method allows for easier post-processing and better surface texture.
- Ensure Proper Post-Processing: Use 99.9% isopropyl alcohol to clean the uncured resin after printing. For best results, always use a specific washing station to wash the model thoroughly. After washing, place the print under UV light or in a curing chamber to improve hardness and strength.
- Sanding and Finishing Touches: Support stubs can be sanded using grits from 300 to 1200 for smoother surfaces. Small gaps can be filled with filler resin or UV resin and then cured to ensure a perfect finish.
- Keep the Build Plate Pristine: The build plate needs to be properly cleaned after use and leveled periodically for adhesion purposes.
These common practices can enhance the quality of resin prints in both prototyping and professional products. By maintaining and calibrating your 3D printing system disciplinedly, you’ll get enhanced results every time you work on a project.

Improving Print Speed Without Losing Quality
Changing the printer settings properly can speed up the printing process while maintaining quality.
Quick Tips for Adjusting Printer Settings
Increase the print speed in small steps, performing a sample print after each change. Alter the travel speeds so that the non-printing movements are faster. Adjust the acceleration settings so that the movement remains smooth. This prevents defects like rough edges or weak layer adhesion.
Balancing Speed, Infill, and Walls
If you want your print to be faster, reduce your infill density. For print display items, a 10% infill will do. For faster printing, use a grid pattern. Keep thin walls, but they should be thick enough to make the model work. The model is structurally a shell, resulting in low build times, but if too much weight is saved, it may result in a weak print.
Choosing the Right Nozzle and Layer Height
Using a larger nozzle can speed up the printing process. A 0.6mm or 0.8mm nozzle can reduce the number of layers, resulting in a quicker printing process. For intricate models, choose thinner filaments and smaller nozzles. The thickness of the layer can be faster, but it does reduce the surface detail.
Stay in Control
It is necessary to verify modifications on low models. Adjust your sets according to the project specifications. Even faster printing can have great results when used properly.
Creative and Business Applications for 3D Printing
DIY Projects You Can Try Right Away
You can learn 3D printing even if you do not have any experience. Here are two easy and enjoyable projects you can try.
Custom Storage Solutions
Based on your specifications, create cable holders, USB thumb drives, or drawer dividers to enhance the functionality of a crowded workspace or kitchen.
Unique Home Décor
3D printing can be used to create various decorations, such as geometric planters, wall art, and customized coasters. It can also be used to create modular designs, such as hexagonal stacks of shelves.
Practical Everyday Tools
If you are frustrated with losing your keys, you can easily print a whistle or carabiner that is useful for outdoor camping.
Cosplay and Props
The revolutionary technology that is 3D printing is certain to delight costume enthusiasts – cosplays, props, and even costumes can be made in a matter of hours instead of taking weeks to sew. Using such a technology, you can recreate your favorite characters in their entirety in just a matter of hours.
Eco-Friendly Projects
You can now promote your sustainability agenda across the globe by printing cutlery sets, toothpaste squeezers, or water-saving faucet attachments. A small item like this is also a great way to show off one’s precious design abilities.
These projects are not just fun but also practical and adjustable, making them suitable for both gifts and individual use.
Turning Your 3D Printing Passion into a Business
Your 3D printing skills can help you earn money. Here’s how.
- Sell Custom Items: Offer phone cases, jewelry, or keepsakes online.
- Help with Prototypes: Print models for inventors and small companies.
- Supply Cosplay Parts: Create props or detailed costume pieces for fans.
- Make Spare Parts: Print missing or hard-to-find parts for gadgets.
- Work with Local Shops: Partner with businesses for displays or tools.
- Offer Subscriptions: Send fresh designs or files for monthly fees.
Keep it simple. Start small. Build your way to profit.
Troubleshooting Common 3D Printing Problems
There are a few minor issues with 3D printing, including layer separation, where layers don’t bond together. To prevent interruptions, ensure that the nozzle temperature matches your filament. Also, check the filament spool for tangles. Another issue is inconsistent extrusion. If the filament is tangled, it may be easier to unwind it than to heat the nozzle.
Any distortion in the bed will prevent the first layer from adhering properly. The best options are to use an automatic leveling sensor bob or frequently recalibrate the bed. Heating the bed will also prevent warping.
For the printer to run smoothly, cleaning its extruder and bed regularly is important. The printer’s manual also specifies how to lubricate the moving parts. Check for loose screws and bolts and tighten them. Make sure belts are not overly loose or worn out.
Clean the nozzle regularly to prevent blockages. If it is blocked, heat it and clear it with a tool. If it is worn out, get a replacement. Check the tube grip on Bowden printers and replace it if necessary.
To save time and improve printing, regularly update your printer’s firmware. Updates cause errors and enhance performance.
Troubleshooting Common 3D Printing Issues
Even with careful preparation, 3D printing can present certain challenges. Here are some common issues you may encounter and how to troubleshoot them:
| Issue | Possible Cause | Solution |
| Warping | Uneven bed temperature or poor bed adhesion | Ensure proper bed leveling and use a heated bed or adhesive surfaces to improve adhesion. |
| Stringing | Excessive filament oozing during travel moves | Adjust retraction settings to reduce the extrusion of filament during non-printing movements. |
| Layer Shifts | Mechanical issues or loose belts | Tighten belts, check for obstructions, and ensure the printer is on a stable surface. |
| Poor Surface Quality | Low layer resolution or inadequate cooling | Adjust slicing settings for higher resolution and enable cooling features for cleaner prints. |
By understanding these troubleshooting techniques, you’ll be able to overcome common obstacles and achieve successful 3D prints.
Wrapping Up
3D printing offers a wide range of possibilities, including rapid prototyping for industries or personalized creations. Unlike any other technology, it promotes innovation, reduces waste, and allows design freedom.
A 3D printer changes the way we create and produce, whether you’re a DIY person or a business owner. It’s a young revolution that combines creativity with productivity, defining the future of manufacturing. Make creativity’s boundaries disappear with 3D printing today.
Frequently Asked Questions (FAQs)
What are the main types of 3D printers?
The most popular types are FDM (Fused Deposition Modeling, uses plastic filament), SLA (Stereolithography, uses liquid resin for high detail), and SLS (Selective Laser Sintering, uses powder for durable parts).
What are STL and GCode files?
STL files define the 3D model’s shape. G-code files contain the specific instructions (movement, temperature, speed) that tell the printer how to build the model.
How is proper bed leveling achieved?
The recommended method is to use a sheet of A4 paper between the print bed and the nozzle. The sheet should feel snug when inserted, indicating the correct gap for material adhesion.
How should resin be stored?
Resin should be kept in a cool, dark location and a tightly sealed container to prevent spoilage from light and heat.
How should I maintain my 3D printer?
Clean the extruder and bed regularly, lubricate moving parts, check for loose screws/bolts, and regularly update the printer’s firmware for enhanced performance.