In this article, I am going to discuss what the 3d print fails. The 3D Printing Industry is expanding rapidly. Analysts predict the global shipment of midrange 3D printers will increase by 14% until 2025. Whether for fun or work, the possibilities are endless! Even the most experienced users encounter printing difficulties. If you are thinking of starting a 3d printing small business, choose the best 3d printer for small businesses. Often, we wonder why 3D prints fail and how to resolve them. Here are the ten most common 3D printing issues and easy solutions to keep your prints unblemished.
Read Relevant Article
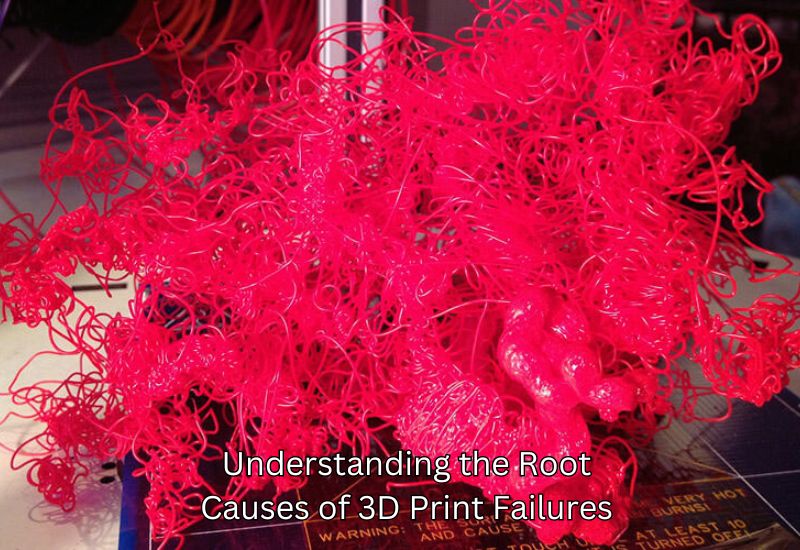
Understanding the Root Causes of 3D Print Failures
Technology has advanced greatly with 3D printing, but producing a perfect print can be difficult. Getting to the root of the problem of 3d print fails, can save you time, materials, and hassle. Factors such as printer setup, materials, and environmental conditions affect printing quality.
Printer Setup and Calibration
The bed of a printer must be correctly set up. If the bed is not up to standards or is misconfigured, it can cause problems like invasive webbing, poor extrusions, or failed prints. To avoid these problems like 3d print fails, leveling the print bed and configuring the extruder to the correct value must be done. Properly calibrating flow rate, print speed, and nozzle temperature settings ensure the prints remain constant. This low chance of over-extrusion or printed layers is weak.
The Environmental Impact of 3D Print Fails
A 3D printer’s location is also important. Conditions like temperature, humidity, and wind can ruin prints. High humidity can fracture or soften filament, while cold drafts can warp the item’s layers. Explore why 3d print fails. By keeping environmental factors stable, a seamless printing cycle can be achieved.
The Role of Quality Filament in Avoiding 3D Print Fails
Regularly inspecting your filament ensures it is dry and compliant with your printer’s specs. Poor filament can cause clogging, uneven extrusion, and poor surface finishes which is cause of 3d print fails. High-quality filament helps bond layers, creates fewer rough surfaces, and reduces printing failures.
The Importance of Regular Maintenance to Prevent 3D Print Fails
3D printers require some mechanical upkeep every now and then, whether cleaning out the nozzle or the printing bed or removing unwanted debris around them. Maintaining tight belts, mechanical 3D weakening is reduced, which eventually causes uneven printing or layer shifting.
Why Awareness Matters in 3D Print Fails
Diagnosing becomes easier when you understand how the setup, environment, and materials work with your printer. By understanding these challenges, you can take action before issues arise. Thus, instead of fixing problems, you can focus on enjoying the creative aspects of 3D printing.
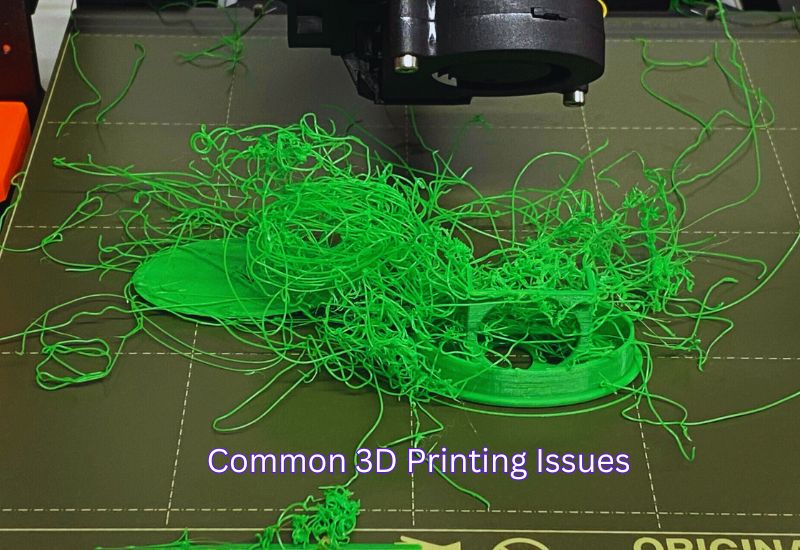
Top 10 Common 3D Printing Issues and Practical Fixes
1. Warping (Uneven Prints Curling Up from the Bed): Common 3D Print Fail
Cause: Material separates from the bed when it shrinks, resulting from layers cooling too quickly or not uniformly, and bed adhesion issues are also contributing factors.
Solution: To avoid notching, ensure the rotatable bed is leveled and heated according to the filament type, from 60-70 degrees Celsius to 100-120 degrees Celsius. Then, apply glue, painter tap, or a 3D printing adhesive. A brim can better fixate the print, but enclosing the 3D printer to mitigate temperature changes is necessary.
2. Stringing in 3D Printing: Causes and Fixes for Fine Plastic Threads Between Parts
Cause: Stringing occurs when filament leaks out of the nozzle while the nozzle moves between sections of a print. Excess materials leaked from the nozzle due to high temperatures or inadequate retraction.
Solution: Change the slicer retention options. Reduce oozing by reducing the nozzle temperature in five-degree increments. Gradually increase the retraction distance and speed until the stringing problems disappear. Keeping your filament dry in an airtight container will reduce the likelihood of tangles and stringing.
3. Layer Shifting (Misaligned Layers)
Cause: The layer shifting effect occurs when print layers are out of alignment, which creates a stepped effect. Loose belts, mechanical interference, and higher print speeds are common causes for 3d print fails.
Solution: Ensure every belt is properly secured and adequately taut. Look for objects on the printer that can interfere with its print head or bed. When printing complex jobs, try reducing the speed to maintain the fluidity of rotation on the axes. Periodic maintenance of mechanical components, such as rail lubrication, may prevent this.
4. Nozzle Clogs (Filament Does Not Extrude) – 3D Print Fails
Cause: A 3D printer’s nozzles tend to clog due to using oily and unclean filaments. Over time, the nozzles accumulate residue, dirt particles, and impurities.
Solution: Regularly clean your nozzle using a specialized cleaning filament or cold pull method. Use high-quality filament and keep the spool sealed to prevent clogs. If the nozzle clogs, gently use a needle or a nozzle-cleaning kit to unclog it.
5. Over-Extrusion: Causes and Solutions for 3D Print Fails
Cause: The printer deposits more filament than needed, which leads to Over-extrusion. The cause could be a slicer configuration error or an error in measuring the filament diameter.
Solution: Reducing filament flow by a few percent rather than completely in your slicer is best, as it can help avoid 3D print fails caused by excessive extrusion. Ensure you provide accurate spool input information and double-check the filament diameter to prevent issues with under-extrusion or over-extrusion. The reduced printing speed would also make filament deposition more precise, minimizing the chances of 3D print fails due to inconsistent flow.
6. Under-Extrusion: Gaps in Layers or Weak Parts – Common 3D Print Fails
Cause: A clogged nozzle or tangling of the spool is usually the cause of under-extrusion in FDM printers, which results in gaps or weak overall structures.
Solution: Check that the filament is free of knots and tangles to avoid 3D print fails. If the nozzle is partially blocked, clean it to ensure smooth extrusion. To encourage material flow and prevent issues, slightly raise the temperature (around 5 degrees Celsius). These steps can help improve print quality and reduce the likelihood of failed prints.).
7. First Layer Not Sticking in 3D Print Fails (Print Detaches from the Bed)
Cause: If the first layer is not adhered to the print properly because of insufficient leveling, an incorrect build surface, or a lack of adhesion, it might not adhere and can create 3d print fails.
Solution: The print bed needs to be leveled properly. Clean the surface with isopropyl alcohol to remove dust and grease. Apply glue or painter’s tape to increase adhesion. Nozzle height must also be set correctly.
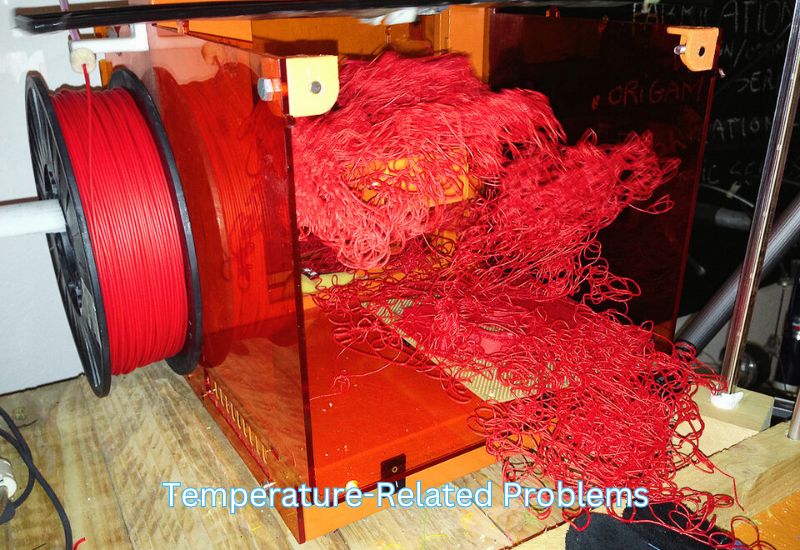
8. Temperature-Related Problems of 3D Print Fails: Overheating or Cooling Issues
Cause: While trying to cool hesitantly, finer details swamp, and weak structures are formed if models are too hot, even for a moment.
Solution: If you print with a fan, use filaments that require lower temperatures or increase your fan speed. ABS enclosures protect against drafts and other factors that can cause uneven cooling, such as excessive nozzle and bed temperatures.
9. Brittle or Moist Filament Causing Print Cracks or Breakage (3D Print Fails)
Cause: PLA and PETG fibers absorb moisture from their surroundings, which deteriorates their strength, leading to bubbles and blisters.
Solution: Store fibers in sealed containers with silica beads or a desiccant to keep moisture out. Consult the manufacturer about recommended heating capabilities before using a fiber drier or low-temperature home oven.
10. Fix Gaps in Top Layers of 3D Print Fails (Holes or Weak Top Surfaces)
Cause: The top of a print can suffer from gaps or weak surfaces due to insufficient top layers or low infill density.
Solution: Increase the infill density to at least 20% to better support the top layers. Add three to five layers to your slicer software. Check that your extruder functions properly, and adjust the extrusion settings if gaps persist.
Addressing these problems can improve the quality of individual prints and prevent future failures, saving time and materials.
Top 10 Common 3D Print Fails and Their Solutions
| Problem | Cause | Solution |
| Warping | Uneven cooling or poor bed adhesion | Level the bed, use a heated bed, and apply adhesive aids like glue sticks or painter’s tape. Consider using a brim or raft and enclosing the printer. |
| Stringing | Oozing filament during non-printing movements | Adjust retraction settings, lower nozzle temperature, and store filament in a dry container. |
| Layer Shifting | Loose belts or mechanical obstructions | Tighten belts, inspect for obstructions, and reduce print speed. Maintain mechanical parts regularly. |
| Nozzle Clogs | Filament residue or low-quality filament | Clean the nozzle regularly with a cold pull method and use high-quality filament. Store filament dust-free. |
| Over-Extrusion | Incorrect extruder settings | Adjust the retraction settings, lower the nozzle temperature, and store the filament in a dry container. |
| Under-Extrusion | Clogged nozzle or filament feed issues | Check for filament tangles, clean the nozzle, and slightly increase the print temperature. |
| First Layer Not Sticking | Improper bed leveling or unclean surface | Calibrate the bed, clean it with isopropyl alcohol, and use adhesive aids. Adjust nozzle height for optimal distance. |
| Temperature-Related Problems | Overheating or insufficient cooling | Use a cooling fan, adjust the fan speed, and ensure the correct temperature settings for the material. Consider using an enclosure to maintain stable temperatures. |
| Brittle or Moist Filament | Filament exposed to moisture | Store filament in airtight containers with desiccants. Dry filament in a dryer or oven if needed. |
| Gaps in Top Layers | Insufficient top layers or low infill density | Increase the number of top layers and infill density. Check the extruder function and adjust extrusion settings if necessary. |
This table provides a quick reference to effectively identify and address common 3D printing issues. Explore why 3d print fails.
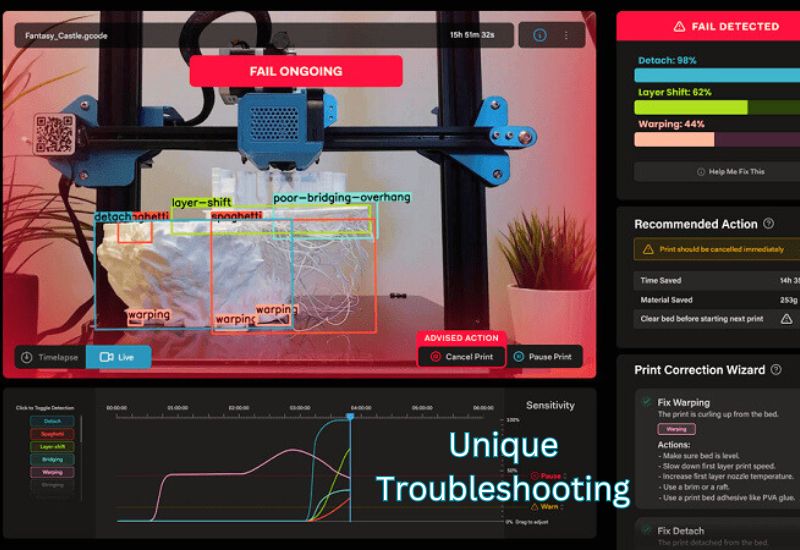
Unique Troubleshooting Tips for Advanced Challenges
Preventing Spaghetti Monsters (Mid-Print Disasters)
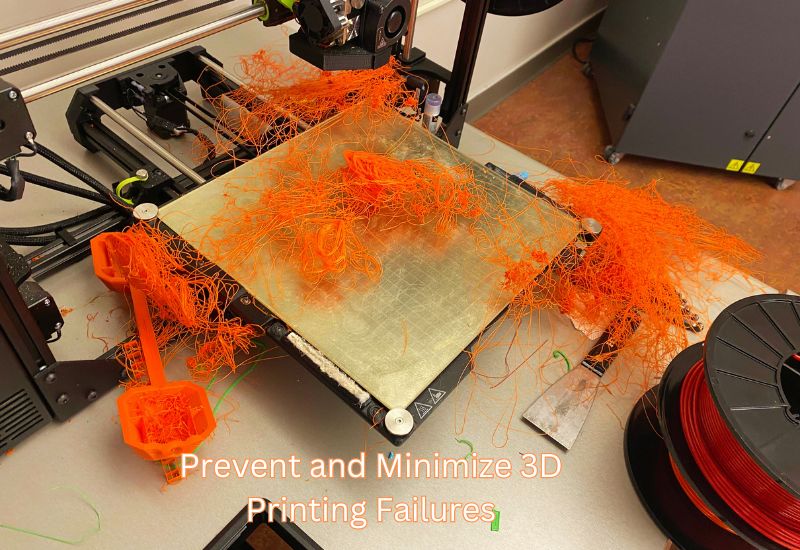
If you arrived at your workspace expecting a perfect print only to find ugly strings of filament covering the entire bed instead, you have encountered the evil “spaghetti monster.” This is one of the most common 3D print fails. It usually occurs when a model is lifted from the bed while it is being printed, which prevents the extruder from latching on. Hours were wasted, and a flurry of filament was discarded.
1. Watch the First Layers
The first few layers are crucial. Make sure they’re sticking well before leaving the printer unattended.
2. Clean and Prep Your Print Bed for Successful 3D Print Fails
Wipe the bed with isopropyl alcohol to remove dust and oils. Try glue sticks, painter’s tape, or specialized adhesives for extra grip.
3. Adjust Temperatures
Set the nozzle temperature within the filament’s recommended range. A simple temperature test can help find the right balance. Explore why 3d print fails.
4. Fix Retraction Settings
Improve filament control by fine-tuning retraction distance and speed in your slicer, avoiding excess stringing or blobs.
5. Calibrate Z-Offset
Ensure the nozzle isn’t too close or far from the bed. A proper Z-offset ensures smooth extrusion and strong attachment.
6. Slow Down Printing
Moderate speeds and a stable environment prevent print disruptions and help maintain proper adhesion.
Vibration and Ghosting (Ridges or Shadows on the Surface) in 3D Print Fails
Ghosting or ringing occurs when vibration from rapid movements transfers into the printhead or bed, especially around sharp corners, resulting in wavy patterns in 3D prints.
Main Causes
Ghosting occurs due to sudden direction changes, loose belts, and an unstable printer setup. Lightweight frames and high print speeds can exacerbate the issue.
Quick Fixes
- Stabilize the Printer
Place it on a solid surface or use anti-vibration mats to absorb movement. - Tighten Belts and Screws
Ensure belts are taut and all components are securely fastened. - Reduce Speed
Lower print speed, acceleration, and jerk settings to minimize vibrations. - Reinforce the Frame
Add weight or strengthen the frame to improve stability and reduce wobble. - Check the Printhead Setup
Use lighter components and inspect for loose parts causing extra movement.
With these adjustments, you’ll eliminate those ripples and achieve smooth, clean prints.
Proper Filament Storage for Longevity
When exposed to moisture, 3D printer filaments can become brittle and bubbly, leading to 3D print fails. Materials like nylon and TPU are prone to brittleness, while PLA can also be affected. The filament should be stored in zipped bags with silica gel or vacuum-sealed kits, such as those provided by eSun. Large quantities can be stored in airtight bins or cereal containers. Sunlu FilaDryer filament dryers extenuate filament moisture for continuous printing standards, helping to reduce 3D print fails.
Checking STL Files for Errors Before Printing
Printing STLs with open boundaries and intersecting faces often leads to 3D print fails. As a result, these flaws disrupt the slicer’s ability to interpret the model correctly. Consequently, the print may fail or be built incorrectly. In many cases, common errors that cause 3D print failures can be repaired for free using tools like Meshmixer’s Inspector or Netfabb. However, fixing them directly within the CAD program is the most effective approach. Ultimately, a well-prepared file reduces the chances of 3D print fails, saves material, and ensures a smooth, successful print job.
How to Prevent and Minimize 3D Printing Failures in the Future
Regular Maintenance Checklist for Your 3D Printer
Proper upkeep ensures your 3D printer runs smoothly. Here’s how:
- Clean the nozzle and bed: Heat and gently clean the nozzle to clear clogs. Wipe the bed with isopropyl alcohol to remove dust and oils.
- Check screws, belts, and pulleys: Tighten them to avoid movement issues or layer misalignment.
- Lubricate moving parts: Apply grease to rods and screws for smoother operation.
- Inspect key components: Clean fans and check wiring for wear to prevent overheating or failures.
Routine maintenance avoids breakdowns and keeps your prints seamless.
How to Choose the Right Filament for Your Project (3D Print Fails)
Picking the right filament improves your print quality.
- PLA: Affordable and beginner-friendly, great for prototypes but not heat-resistant.
- PETG: Durable, flexible, and ideal for functional parts like water-resistant components.
- ABS: Strong and heat-resistant but requires proper ventilation due to fumes.
For optimal results, select PLA for ease of use, PETG for durability, or ABS for robust functionality. Each material has its unique properties, but it’s essential to note that 3D printing failures can occur if the wrong material is used for your specific project. Ensure that the material matches your project’s needs to avoid issues such as warping or poor adhesion.
Importance of Optimal Environmental Conditions for 3D Printing (3D Print Fails)
Your workspace affects your prints more than you think.
- Room Temperature: Maintain a steady temperature between 60°F and 85°F. Too cold causes cracks; too hot softens the filament.
- Airflow: Avoid direct drafts; controlled ventilation prevents cooling or fumes buildup.
- Dust Management: Cover the unused printer and store filaments in airtight containers.
Set up in a stable, dust-free space to maintain print quality and prolong the life of your printer. Explore why 3D print fails.
Wrapping It Up
You should maintain it regularly, choose appropriate filaments, and set up the environment correctly to avoid 3D print fails. Consistency between the printer and the environment can prevent most print failures. Troubleshooting is sometimes necessary, but it’s not difficult once you learn how to use it. By identifying common 3D print fails and addressing them early, you can consistently get high-quality 3D prints with the right care and adjustments. Enjoy the process, keep printing, and keep learning!
Frequently Asked Questions
Why won’t the first layer of my print stick to the bed?
This is usually due to improper bed leveling, an unclean surface (oils/dust), or a lack of adhesion. Solution: Calibrate the bed, clean the surface with isopropyl alcohol, and apply an adhesive like glue or painter’s tape.
What causes the edges of my print to lift or curl up (Warping)?
Warping is caused by the material separating from the bed because layers are cooling too quickly or unevenly. Solution: Ensure the build bed is heated (60-120°C, depending on the filament), apply adhesive, and consider enclosing the printer or adding a brim in your slicer to mitigate temperature changes.
How do I fix “stringing” (fine plastic threads) between parts?
Stringing occurs when filament leaks, or “oozes,” from the nozzle while it moves between sections of the print. Solution: Adjust your slicer’s retraction settings (distance and speed) and try reducing the nozzle temperature in small increments.
What is the difference between Over-Extrusion and Under-Extrusion?
Over-extrusion means the printer deposits too much filament (causing blobs or rough surfaces), often due to incorrect slicer flow settings or mis-measured filament diameter. Under-extrusion means it deposits too little (causing gaps, weak layers, or thin parts), often due to a partial nozzle clog or a filament tangle.
How do I prevent my filament from tangling or becoming brittle?
PLA and PETG filaments absorb moisture from the air, causing them to degrade, become brittle, and lead to bubbles or blisters during printing. Solution: Store filaments in sealed containers with desiccant (silica beads) or use a dedicated filament dryer before printing.

Comments are closed.