
If you want perfect prints from your Anycubic Kobra 2 Max Enclosure, building a proper enclosure is no longer optional—it’s essential. As someone who has worked with dozens of machines over the years, I’ve learned that a high-quality enclosure can make or break your 3D printing results. The Kobra 2 Max offers high-speed performance, but without a controlled environment, issues like warping, stringing, and layer shifts are common, especially in rooms with poor airflow or fluctuating temperatures.
An enclosure helps maintain stable internal conditions, reduces noise, improves safety, and protects both the printer and the prints from dust and drafts. Whether you’re printing detailed models for a client or rapid prototyping for your next big idea, this upgrade will give you more consistent, professional-grade results. In fact, pairing a good enclosure with the best 3d printer for small business can greatly improve output quality and efficiency. In this guide, I’ll walk you through every step to create the ultimate Kobra 2 Max enclosure—from materials and design to upgrades and smart features—so you can unlock your printer’s full potential.
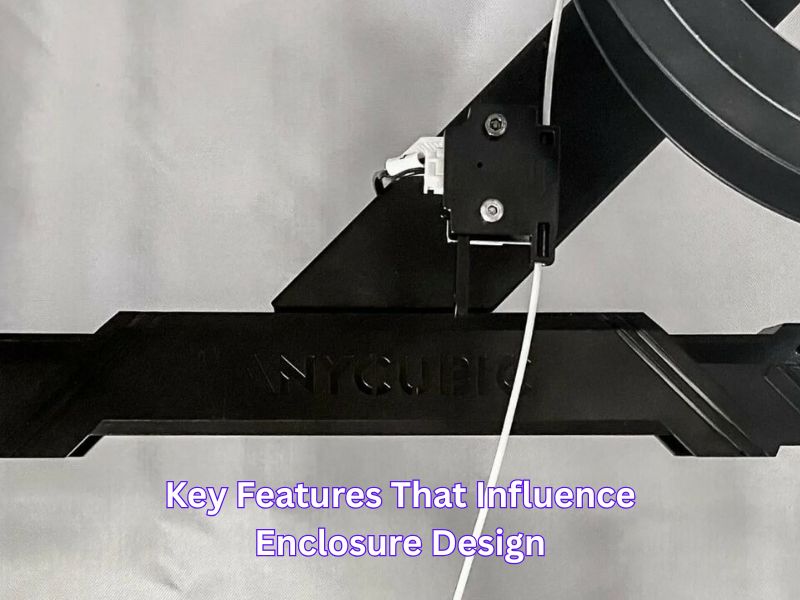
Anycubic Kobra 2 Max: Key Features That Influence Enclosure Design
Dimensions and Build Volume: Planning for Size and Space
The Anycubic Kobra 2 Max boasts a substantial build volume of 420 x 420 x 500 mm, translating to approximately 88 liters of printing capacity. When designing an Anycubic Kobra 2 Max Enclosure, it’s crucial to accommodate not only the printer’s dimensions but also additional space for airflow, cable management, and future upgrades. This ensures that the enclosure supports the printer’s performance and longevity.
High-Speed Printing: Managing Heat and Stability
With a maximum print speed of 500 mm/s, the Kobra 2 Max generates significant heat. An enclosure must effectively manage this heat to prevent issues like warping or layer separation. Incorporating ventilation systems, such as adjustable vents or active cooling fans, helps maintain a stable internal temperature. This becomes even more important when working on 3D Printing Pictures, where precision and detail are critical and temperature shifts can ruin fine features.
Auto-Leveling and Vibration Compensation: Ensuring Accurate Prints
The printer’s LeviQ 2.0 automatic leveling system and vibration compensation features enhance print accuracy. A well-constructed Anycubic Kobra 2 Max Enclosure further stabilizes the environment, minimizing external vibrations and drafts that could affect print quality. This contributes to consistent layer adhesion and overall print success.
Here’s a pros and cons of the Anycubic Kobra 2 Max:
| Pros | Cons |
| Massive Build Size | Proprietary Nozzle |
| – Build volume: 420 x 420 x 500 mm | – Not compatible with third-party nozzles |
| – Ideal for large prints or multiple parts | – Limits customization for different nozzle types |
| Speed | Massive Footprint |
| – Can print up to 500 mm/s | – Requires significant workspace |
| – Great for rapid prototyping | – Not suitable for small spaces |
| Auto Bed Leveling | Ugly Z Seams at Speed |
| – Ensures perfect leveling every time | – Visible Z-seams on high-speed prints |
| – Reduces setup and first-layer issues | – Affects aesthetics in large or fast prints |
| Flex Plate | |
| – Easy print removal with a flexible PEI surface | |
| – Good adhesion during printing |
This table helps visualize the key advantages and disadvantages of the Kobra 2 Max.
Step-by-Step Guide to Building Your Anycubic Kobra 2 Max Enclosure
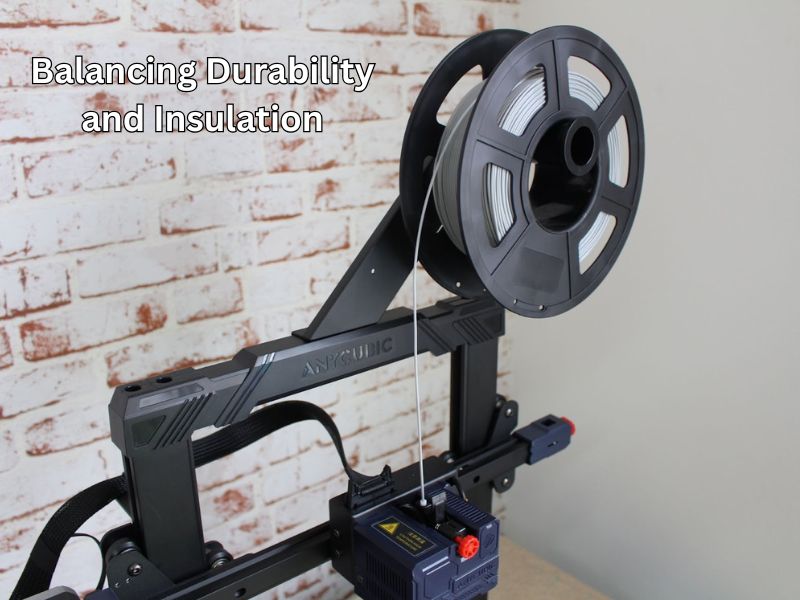
Selecting the Right Materials: Balancing Durability and Insulation
Choosing appropriate materials is vital for durability and thermal insulation. Acrylic panels offer clarity and good insulation properties, allowing you to monitor prints without opening the Anycubic Kobra 2 Max Enclosure. Aluminum frames provide structural strength and can support additional features like doors or lighting. Consider the balance between cost, ease of assembly, and insulation performance when selecting materials.
Designing for Accessibility: Doors, Windows, and Maintenance
Incorporate wide doors or removable panels to facilitate easy access for print removal and maintenance. Transparent windows enable monitoring of the printing process without disturbing the internal environment. Ensure that all access points are sealed properly to maintain temperature stability inside the Anycubic Kobra 2 Max Enclosure.
Ventilation and Airflow: Maintaining Optimal Temperature and Humidity
Effective ventilation is essential to manage heat and humidity. Install adjustable vents or small fans to promote airflow, preventing heat buildup. Adding filters can help block dust and airborne particles, protecting both the printer and the prints. This is especially crucial when printing with materials that emit fumes or require specific environmental conditions.
Lighting Solutions: Enhancing Visibility Inside the Enclosure
Integrate LED lighting to illuminate the print area, allowing for clear visibility during operation. Position lights to minimize glare and avoid creating hot spots that could affect the printing process. Proper lighting also aids in post-processing tasks and ensures safety during operation.
Assembling the Anycubic Kobra 2 Max
The Kobra 2 Max is easy to assemble, even with its large size. It arrives mostly assembled in two sections, and you only need a few screws and bolts. Four bolts secure the gantry, and a brace is added from the top to the back. The touch screen is attached with screws, and the spool holder snaps onto the base — making it even easier to install inside an Anycubic Kobra 2 Max Enclosure for better print control..
Note that the Kobra 2 Max has two Y-axis belts. Make sure both belts have the same tension for smooth printing. The assembly process should take around 30 minutes.
Leveling the Anycubic Kobra 2 Max
The Kobra 2 Max has automatic bed leveling with sensors that also set the Z height. There are no manual knobs; everything is controlled by the sensor. If the Z height is off, like in our test machine where the lower left corner was low, you can shim the bed with a few Post-It Notes to level it.
To level the bed, go to Control → Auto-level. The machine will home itself, heat up, and then probe 49 points in a grid across the bed.
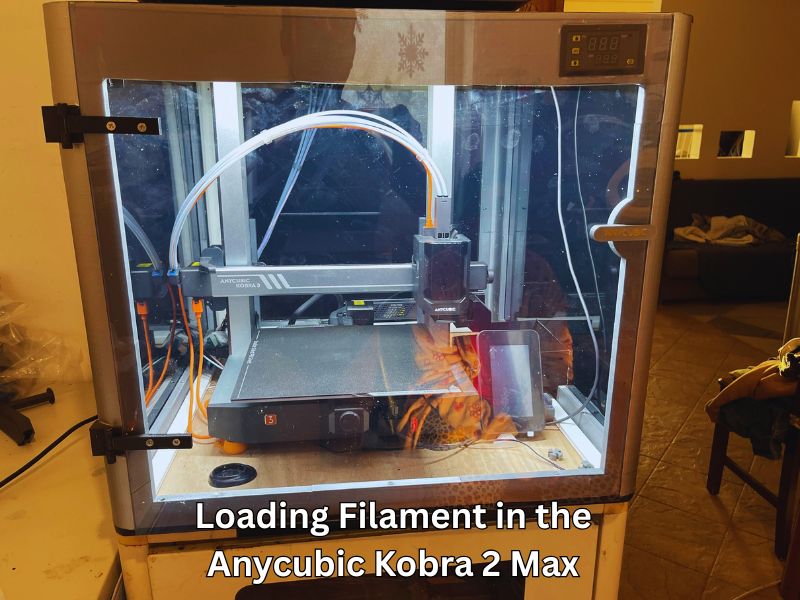
Loading Filament in the Anycubic Kobra 2 Max
To load filament, press “Prepare” on the main menu, then select “Filament.” Choose “Filament In” or “Filament Remove.” The printer will heat up to 230°C, which takes about 60 seconds. Place the filament spool on the holder, insert the filament into the sensor, and press “Filament In.” The printer will pull the filament into the extruder. If needed, you can manually push the filament through by releasing the tension on the extruder. Press “Stop” when the filament is coiled under the hotend. For smoother operation and temperature consistency, especially with high-temp materials, consider using a Anycubic Kobra 2 Max Enclosure.
To remove the filament, follow the same steps in reverse. Allow the hotend to heat, select “Filament Remove,” and let the printer pull the filament back. You can also manually pull it out of the Bowden tube after it exits the hotend.
Design of the Anycubic Kobra 2 Max
The Kobra 2 Max resembles the Kobra 2 but features improvements, including a more effective front-mounted blower on the hotend. It also comes with a metal PEI flexplate for easy print removal and a direct drive.
However, the bed is hard-mounted, and our test printer had a warped surface. I had to shim it with paper, which was disappointing for a new machine. The bed leveling system is promising, with the ability to automatically set Z height using a sensor in the back corner — something especially important when planning an Anycubic Kobra 2 Max Enclosure for stable and precise prints.
The Kobra 2 Max features a Wi-Fi antenna, but it is only compatible with the Anycubic slicer and app. It can’t connect to a network directly, which was a letdown.
This printer is large and won’t fit on standard counters, so measure your space first. It weighs 43 pounds and is difficult to move with the spool holder attached.
The Kobra 2 Max is a stable “bed slinger” with dual Z rods and wide Y-axis rods, supported by braces to keep the gantry steady. While the stepper motors are silent, the fans are audible, and it’s not the quietest printer around.
Another downside is the proprietary high-flow nozzle, which means you can’t experiment with third-party nozzles. The nozzle reaches up to 260°C, which is enough for most consumer materials. The bed can reach 90°C, but it’s not ideal for printing nylon or ABS without an Anycubic Kobra 2 Max Enclosure.
The 4.3-inch touch screen is easy to use and beginner-friendly, with logically organized menu options.
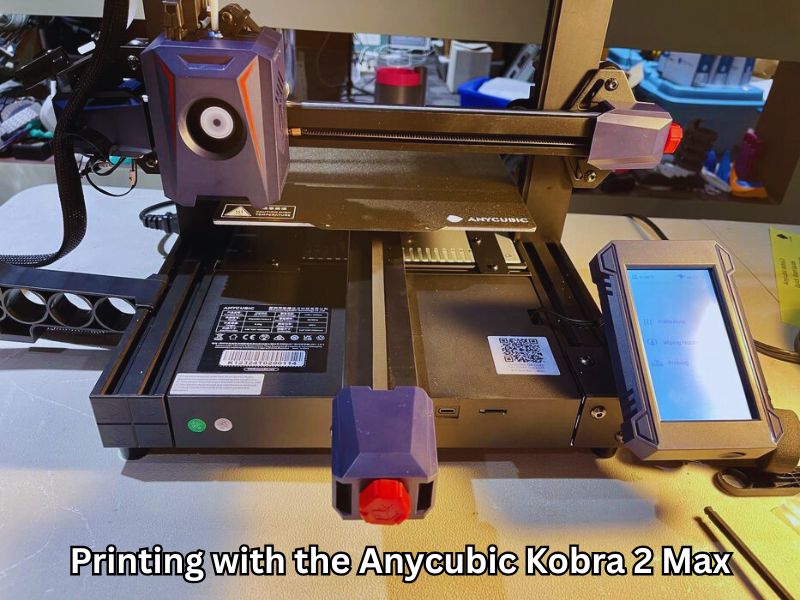
Printing with the Anycubic Kobra 2 Max
Although the Kobra 2 Max is a large printer, it can still produce smaller prints quickly. It comes with a sample filament spool, so you’ll need to stock up on more.
The printer is capable of fast printing, even for small objects. For example, it completed a speed test print (Speed Benchy) in just 18 minutes and 4 seconds, achieving good speed despite some minor layer imperfections. This makes it comparable to other fast printers, like the Bambu A1 Mini. To ensure optimal results, especially when pushing the printer’s speed capabilities, investing in a proper Anycubic Kobra 2 Max Enclosure is recommended to manage heat and improve print quality.
Enhancing Your Enclosure with Custom Mods and Upgrades
Silent Operation: Implementing Noise Reduction Techniques
To reduce operational noise, line the Anycubic Kobra 2 Max Enclosure with sound-dampening materials like foam panels. Replacing standard fans with quieter alternatives can further minimize noise levels, creating a more comfortable working environment. This is particularly beneficial in shared spaces or home offices where noise can be a concern.
Cable Management: Organizing for Safety and Efficiency
Organize cables neatly within the enclosure to prevent tangling and interference with moving parts. Use cable clips, channels, or ties to secure wiring, enhancing both safety and aesthetics. Proper cable management also facilitates easier maintenance and troubleshooting.
Incorporating a Filament Dry Box: Ensuring Material Quality
Maintaining filament dryness is crucial for print quality. Integrate a filament dry box within or adjacent to the Anycubic Kobra 2 Max Enclosure to protect filament from moisture, reducing issues like bubbling or inconsistent extrusion. This is particularly important when using hygroscopic materials such as nylon or PVA.
Testing and Fine-Tuning: Achieving Optimal Print Quality
Monitoring Temperature and Humidity: Using Sensors for Precision
Install temperature and humidity sensors inside the enclosure to monitor environmental conditions. Use the data to adjust ventilation or heating elements, ensuring optimal printing conditions. This proactive approach helps in maintaining consistent print quality over time.
Trial Prints: Assessing Enclosure Impact on Print Quality
Conduct test prints to evaluate the enclosure’s effectiveness. Look for improvements in print consistency, surface finish, and dimensional accuracy. Make necessary adjustments based on the results to fine-tune the enclosure’s performance. This iterative process ensures that the enclosure meets specific printing needs and material requirements.
Unique Additions to Elevate Your Enclosure
Smart Features: Integrating Remote Monitoring and Control
Enhance your Anycubic Kobra 2 Max Enclosure with smart features like remote monitoring, cameras, or integration with software such as OctoPrint. These additions allow you to oversee and control printing operations remotely, increasing convenience and productivity. Smart plugs can also enable remote power control, adding an extra layer of automation.
Aesthetic Customizations: Personalizing Your Enclosure
Personalize your enclosure to match your workspace or brand. Consider painting the frame, adding decals, or using colored panels to create an appealing and motivating environment. Customizations can also include adding logos or themed designs to reflect personal style or company branding.
Maintenance and Safety: Ensuring Longevity and Protection
Regular Cleaning: Keeping the Enclosure and Printer Debris-Free
Regularly clean the Anycubic Kobra 2 Max Enclosure‘s interior to prevent dust accumulation, which can affect print quality and mechanical components. Use soft brushes or cloths to clean surfaces and fans gently. Scheduled maintenance helps identify potential issues early, thereby extending the printer’s lifespan.
Safety Precautions: Preventing Hazards
Ensure proper ventilation to avoid overheating. Use fire-resistant materials for the enclosure to mitigate risks associated with prolonged printing sessions. Regularly inspect electrical connections and components for signs of wear or damage. Implementing safety protocols and emergency shutdown procedures adds an extra layer of protection.
Wrapping Up
Building a custom enclosure for your Anycubic Kobra 2 Max Enclosure enhances print quality, safety, and overall user experience. By carefully selecting materials, incorporating thoughtful design features, and properly maintaining the enclosure, you can unlock the full potential of your 3D printing endeavors. Sharing your enclosure designs and modifications with the 3D printing community fosters innovation and provides valuable insights for fellow enthusiasts.
Frequently Asked Questions
Why is an enclosure essential for the Anycubic Kobra 2 Max?
While the Kobra 2 Max is a high-speed printer, an enclosure is essential for:
Dust Protection: It protects the moving parts of the printer and the print itself from airborne dust and particles.
Improved Print Quality: It stabilizes the internal temperature and eliminates drafts, which are critical for preventing common print failures like warping, cracking, layer shifts, and stringing, especially when printing large objects.
Material Compatibility: It retains heat, which is crucial for high-temperature filaments like ABS and ASA. Without an enclosure, these materials often suffer from poor layer adhesion and warping.
Noise and Safety: It contains fumes and odors (particularly from ABS) and helps reduce operational noise, creating a safer and more comfortable working environment.
What are the key features of the Kobra 2 Max that influence enclosure design?
The enclosure must accommodate:
High-Speed Heat: The maximum print speed of 500 mm/s generates significant heat, which must be managed with proper ventilation to protect the electronics.
Large Build Volume: The printer has a substantial build volume of 420 x 420 x 500 mm (HWD).
External Movement: Since it is a “bed-slinger” style (the bed moves along the Y-axis), you must add significant extra depth (Y-axis) to account for the full forward and backward travel of the print bed and the connected rear cable harness.
What is the recommended size for a Kobra 2 Max enclosure?
Due to the printer’s movement and large size (physical machine dimensions are approx. 640 x 735 x 740 mm HWD), general recommendations are to add at least 100 mm of clearance on all sides, plus extra depth for the bed’s movement.
Professional Enclosure Sizes: Some commercial enclosures are designed to be much larger, such as 787 mm (W) x 813 mm (T) x 990.6 mm (D), to ensure comfortable fit, clearance for the spool holder, and space for mods.
Suggested Minimum Internal Dimensions: 600–700 mm (Width, Depth, and Height).
Should the power supply (PSU) and filament spool holder be inside or outside the enclosure?
PSU (Power Supply Unit): It should be moved outside the enclosure. The PSU is rated for a maximum ambient temperature of around 40°C. When printing ABS with a heated bed, the internal enclosure temperature can exceed this, which can significantly shorten the lifespan of the PSU and pose a safety risk.
Filament Spool Holder: It should be kept outside, ideally in a filament dry box. The stock spool holder will likely not fit or will be inconvenient inside the enclosure. Using a dry box (like a Sunlu S2) keeps hygroscopic filaments (e.g., Nylon, ABS) dry and feeds them via a reverse Bowden tube into the enclosure, which greatly improves print quality.
What smart upgrades are recommended for the enclosure?
For convenience and safety, consider integrating:
- Remote Monitoring: Install a simple web camera (or a Raspberry Pi running OctoPrint/Mainsail/Fluidd) to monitor prints remotely.
- Lighting: Integrate 24V LED lighting to properly illuminate the large print area, ensuring clear visibility for checking print progress.
- Fire Safety: Include a smoke or fire detector inside the enclosure as a critical safety measure.
Comments are closed.