
Introduction
3D printing is booming—and it’s no longer just for big manufacturers. In the U.S., the 3D printing market is projected to grow from $5.93 billion in 2024 to $34.28 billion by 2034, driven by a compound annual growth rate (CAGR) of 19.18%. As more hobbyists and small businesses enter this space, common problems like 3D Printing Issues with Pictures are essential.
Initial to troubleshooting and learning. This surge reflects a growing interest among hobbyists, entrepreneurs, and small businesses. As a 3D printing expert with years of hands-on experience, I’ve seen firsthand how this technology can revolutionize production processes—and how common 3D Print Issues with Pictures can help diagnose and solve problems quickly.
However, even seasoned users encounter challenges. In this guide, we’ll explore the top 10 common 3D printing issues—with pictures—and provide quick, effective solutions to keep your projects on track, whether you’re a hobbyist or using the best 3d printer for small business.
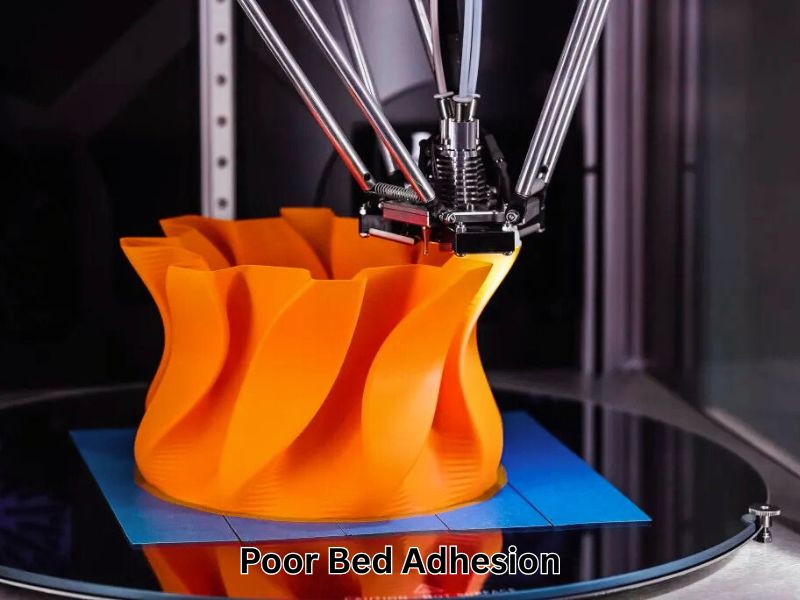
1. Poor Bed Adhesion: Why Prints Don’t Stick to the Build Plate and How to Fix It
A successful 3D print starts with a solid first layer. When that layer doesn’t adhere properly to the build plate, it can lead to warping, shifting, or complete print failure. Many of these problems fall under 3D Print Issues with Pictures, making them easier to identify and troubleshoot. Let’s examine the common causes of poor bed adhesion and explore practical ways to address them.
What Causes Poor Bed Adhesion in 3D Prints
1. Unleveled Build Surface or Misaligned Print Bed
If the print bed isn’t level, the nozzle may be too close or too far from the bed in different areas, leading to inconsistent adhesion. Ensuring a level bed is crucial for uniform first-layer contact.
2. First Layer Printed Too Far from the Plate
An incorrect Z-offset can cause the nozzle to be too high above the bed, resulting in the filament not properly adhering. Adjusting the nozzle height ensures the filament is slightly squished onto the bed for better adhesion.
3. Dust, Oils, or Grime on the Bed
Contaminants like dust or oils from fingerprints can prevent the filament from sticking. Regularly cleaning the bed surface is essential for optimal adhesion.
4. Incorrect Temperature or Material Mismatch
Different materials require specific bed temperatures for proper adhesion. For instance, PLA typically adheres well at 50–60°C, whereas ABS may require temperatures of 100–110°C. Using the wrong temperature settings can lead to adhesion problems, a common 3D print issue that often results in uneven first layers or warping.
How to Make the First Layer Stick Properly
1. Manually Level the Bed or Use Auto-Leveling Features
Regularly check and adjust the bed leveling to ensure consistent nozzle distance across the entire build plate. Many printers offer auto-leveling features to assist with this process.
2. Adjust Z-Offset to Optimal Height
Fine-tune the Z-offset so the nozzle is at the correct distance from the bed. A common method is to use a piece of paper between the nozzle and bed; you should feel slight resistance when moving the paper. This simple adjustment can help resolve many 3D Print Issues with Pictures, especially those related to poor first-layer adhesion.
3. Clean the Surface with Alcohol or Warm Soapy Water
Before each print, clean the bed with isopropyl alcohol or warm soapy water to remove any contaminants. Ensure the bed is dry before starting the print.
4. Use Adhesives Like Glue Stick, Hairspray, or Painter’s Tape
Applying a thin layer of adhesive can enhance bed adhesion, especially for challenging materials. Standard options include glue sticks, hairspray, or painter’s tape. Select the adhesive that best suits your specific filament and bed surface.
2. Warping: How to Stop Corners from Curling During 3D Printing
Warping is a common issue in 3D printing, where the corners of a print lift and curl away from the build plate, resulting in distorted parts and failed prints. It’s one of the most frustrating 3D print issues, often resulting in pictures that show curled edges and uneven bases.
What Causes 3D Prints to Warp at the Corners
- Rapid Cooling and Uneven Shrinkage: When the extruded filament cools too quickly, it contracts unevenly, causing the edges to lift from the build plate.
- Insufficient Bed Adhesion: A lack of proper adhesion between the first layer and the build surface can lead to warping.
- Ambient Temperature Fluctuations: Drafts or cool air in the printing environment can cause uneven cooling, contributing to warping.
Simple Ways to Prevent Warping
- Use a Heated Bed: Maintaining the bed at an appropriate temperature for the filament being used helps in keeping the base layers warm, reducing the chances of warping.
- Add a Brim or Raft: Implementing a brim or raft increases the surface area of the first layer, enhancing bed adhesion and minimizing warping.
- Maintain a Controlled Environment: Using an enclosure or placing the printer in a draft-free area helps maintain consistent ambient temperatures, thereby reducing the risk of warping, a common issue in standard 3D printing.
- Optimize Cooling Settings: Reducing or turning off the cooling fan for the initial layers allows the filament to adhere properly before it cools, helping to prevent warping.
- Clean the Build Surface: Cleaning the build plate with isopropyl alcohol can improve adhesion and reduce warping by removing dust and oils.
By understanding the causes and implementing these preventive measures, you can significantly reduce the occurrence of warping in your 3D prints.
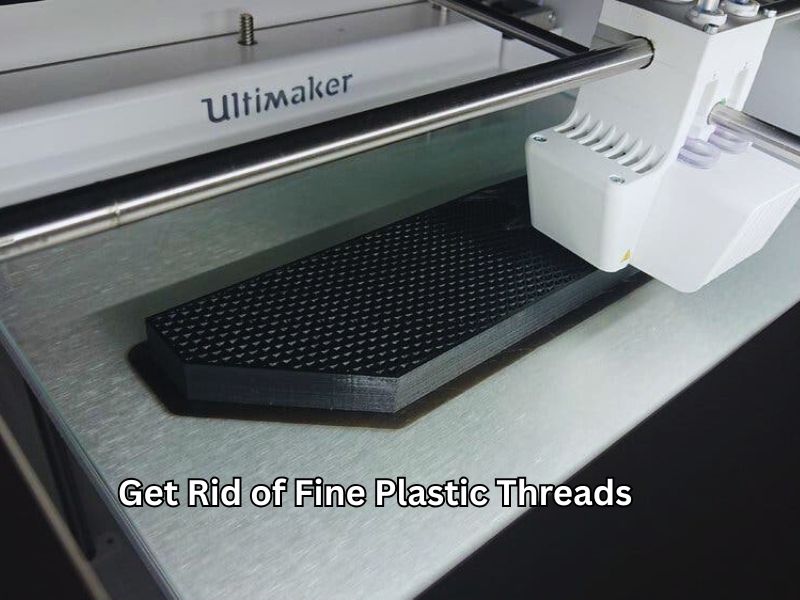
3. Stringing and Oozing: How to Get Rid of Fine Plastic Threads on 3D Prints
Stringing, often referred to as oozing, occurs when thin strands of filament are left behind between different parts of a 3D printed object. This issue is common in FDM printing and can detract from the quality of the final product, especially when creating Realistic 3D Models from Pictures, where detail and precision are crucial.
Why Stringing Happens During a Print Job
1. Printing Temperature Is Too High
When the nozzle temperature is set too high, the filament becomes overly fluid, increasing the likelihood of it oozing out during non-print movements. This excess flow can lead to unwanted strings forming between parts of the print, a common problem illustrated in 3D Print Issues with Pictures.
2. Retraction Settings Are Off
Retraction settings control how much filament is pulled back into the nozzle when the printer moves between different sections. If these settings are not optimized, the filament may continue to ooze, causing stringing.
3. Wet or Poor-Quality Filament
A filament that has absorbed moisture or is of low quality can cause stringing. Moisture in the filament can vaporize during printing, leading to bubbles and oozing.
How to Fix Stringing Fast
1. Lower Nozzle Temperature Gradually
Reducing the nozzle temperature in small increments (e.g., 5°C) can decrease the filament’s fluidity, minimizing oozing during travel moves. This adjustment can help resolve 3D Print Issues with Pictures by improving print quality. It’s essential to find the optimal temperature that balances flow and adhesion.
2. Enable and Adjust Retraction Settings
Activating retraction in your slicer software and fine-tuning the retraction distance and speed can significantly reduce stringing. For instance, direct-drive extruders may require a retraction distance of 0.5–2.0 mm, while Bowden setups may need up to 15 mm. Retraction speeds typically range between 20 and 100 mm/s. This adjustment is beneficial when troubleshooting 3D Print Issues with Pictures, as visual examples often reveal where retraction settings are failing.
3. Dry Filament Using a Filament Dryer or Airtight Container
Storing filament in a dry environment or using a filament dryer can prevent moisture absorption, which is a common cause of stringing. Ensuring the filament is dry before printing helps maintain print quality.
By addressing these factors—optimizing temperature, refining retraction settings, and ensuring filament quality—you can effectively eliminate stringing and achieve cleaner 3D prints.
4. Layer Shifting: Why Your Print Looks Misaligned and How to Fix It
Layer shifting occurs when the layers of a 3D print misalign, resulting in a skewed or distorted object. This issue can compromise the structural integrity and aesthetic quality of the print. Understanding the causes of 3D Print Issues with Pictures and implementing effective solutions can help ensure successful prints.
Common Causes of Layer Shifts in 3D Printing
- Loose Belts or Pulleys
Proper tensioned belts can slip during printing, causing the print head to misalign. Similarly, pulleys that are not securely fastened can lead to inconsistent movements. - Stepper Motors Skipping Steps
If the printer’s motors are overloaded or encounter obstructions, they may skip steps. This results in the print head not moving to the correct position, leading to layer shifts. - Excessive Print Speeds
Printing at high speeds can cause the printer to overshoot or miss steps, especially if the acceleration settings are too aggressive. This can lead to misaligned layers. - Obstructions in the Printer’s Path
Physical obstructions, such as tangled cables or debris on the rails, can impede the movement of the print head or bed, causing shifts in the layers and contributing to 3D printing issues.
Effective Solutions to Prevent and Fix Layer Shifting in 3D Printing
1. Tighten Belts and Secure Pulleys
Regularly inspect and adjust belt tension to ensure they are neither too loose nor too tight. Make sure pulleys are firmly attached to motor shafts to prevent slippage and maintain print accuracy.
2. Reduce Print Speed and Adjust Acceleration Settings
Lowering the print speed can minimize missed steps. Adjust acceleration and jerk settings in your printer’s firmware for smoother movements and to prevent sudden jolts that cause layer shifts.
3. Inspect and Clean Printer Components
Perform regular maintenance by cleaning rails and checking for debris. This ensures the print head and bed move freely without obstructions, reducing layer shifting issues.
4. Ensure a Stable Printing Environment
Place your 3D printer on a stable, vibration-free surface. Consider using vibration dampeners to reduce external disturbances that can lead to layer shifts.
5. Enable Z-Hop in Slicer Settings
Activate the Z-hop feature in your slicing software to lift the nozzle during travel moves. This prevents collisions with printed parts, a common cause of layer shifting in 3D prints.
Here’s a clear and organized table summarizing the Common Causes of Layer Shifts in 3D Printing and their Effective Solutions:
| Common Causes of Layer Shifts | Description | Effective Solutions | Solution Details |
| Loose Belts or Pulleys | Belts slipping due to improper tension; pulleys not securely fastened, causing inconsistent move. | Tighten Belts and Secure Pulleys | Regularly check belt tension and secure pulleys firmly to motor shafts |
| Stepper Motors Skipping Steps | Motors overloaded or obstructed, causing missed steps and misalignment | Reduce Print Speed and Adjust Acceleration Settings | Lower print speed and adjust acceleration/jerk settings for smoother motion |
| Excessive Print Speeds | High speeds causing overshoot or missed steps, leading to layer misalignment | Reduce Print Speed and Adjust Acceleration Settings | Same as above |
| Obstructions in Printer’s Path | Tangled cables or debris blocking print head or bed movement | Inspect and Clean Printer Components | Clean rails and remove debris regularly to ensure free movement |
| Vibrations or Unstable Printing Setup | Vibrations causing printer movement instability | Ensure Stable Printing Environment | Place printer on stable surface; use vibration dampeners |
| Nozzle Collisions During Travel Moves | Nozzle hitting previous layers can cause layer shifts | Enable Z-Hop in Slicer Settings | Activate Z-hop to lift nozzle during travel moves and avoid collisions |
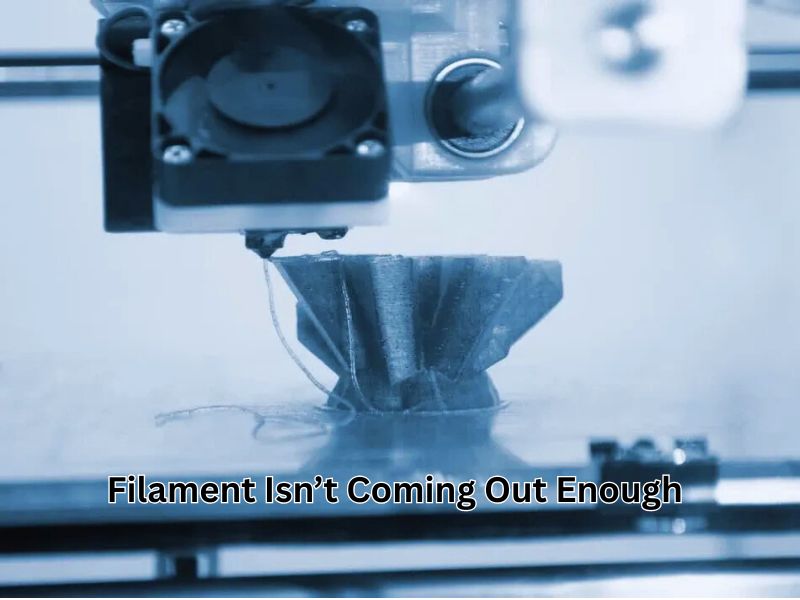
5. Under-Extrusion: Why Filament Isn’t Coming Out Enough and How to Solve It
Under-extrusion occurs when your 3D printer fails to supply enough filament, leading to weak, incomplete, or missing layers. This issue can stem from various factors, but with the right approach, it’s often straightforward to resolve, especially when identifying 3D Print Issues with Pictures for better diagnosis and correction.
Common Reasons Behind Under-Extrusion
1. Clogged or Partially Blocked Nozzle
Over time, debris or degraded filament can accumulate in the nozzle, restricting the flow of filament. This blockage can cause inconsistent extrusion or complete stoppage.
2. Incorrect Filament Diameter Settings
The printer will under-extrude if the slicer software is set to a filament diameter different from the one you’re using (e.g., 2.85mm instead of 1.75mm). This is a typical example of 3D print issues, accompanied by pictures that help users visually identify under-extrusion problems. Always verify that the filament diameter in your slicer matches the actual diameter of the filament.
3. Filament Slipping in the Drive Gear
The extruder’s drive gear may not grip the filament properly due to wear, debris, or insufficient tension on the filament. This slippage prevents the filament from feeding consistently, leading to under-extrusion.
Fast Fixes to Improve Extrusion
1. Clean or Replace the Nozzle
Perform a cold pull to remove any obstructions. If the blockage persists, consider replacing the nozzle to ensure smooth filament flow.
2. Verify and Adjust Filament Diameter Settings
Use calipers to measure the diameter of your filament and update your slicer’s settings accordingly. Accurate settings ensure the printer extrudes the correct amount of material.
3. Inspect and Maintain the Extruder
Check the drive gear for debris and clean it if necessary. Ensure the tension is appropriate to grip the filament without causing it to deform. If the gear is worn out, replace it to maintain consistent extrusion and avoid 3D print issues caused by uneven filament flow, as shown in the pictures.
By systematically addressing these areas, you can resolve under-extrusion issues and achieve high-quality 3D prints.
6. Over-Extrusion: How to Fix Prints with Too Much Plastic Output
Over-extrusion occurs when your 3D printer deposits more filament than necessary, resulting in issues such as blobs, stringing, and dimensional inaccuracies. This can compromise the structural integrity and aesthetic quality of your prints.
Why Over-Extrusion Happens During 3D Printing
- High Extrusion Multiplier: Setting the extrusion multiplier too high causes the printer to push out more filament than necessary.
- Incorrect Filament Diameter Settings: If the slicer software has incorrect filament diameter input, it miscalculates the amount of filament to extrude.
- Elevated Printing Temperature: Printing at temperatures higher than recommended can cause the filament to become too fluid, resulting in excessive flow.
- Software Misconfiguration: Errors in slicer settings, such as incorrect flow rates or extrusion widths, can result in over-extrusion.
Easy Solutions to Control Excessive Extrusion
- Adjust Extrusion Multiplier: Lower the extrusion multiplier in your slicer software by small increments (e.g., 2-5%) and test until the extrusion is accurate.
- Measure and Input Correct Filament Diameter: Use calipers to measure the diameter of your filament at multiple points, calculate the average, and input this value into your slicer settings.
- Reduce Printing Temperature: Lower the nozzle temperature in 5°C increments, testing each time, to find the optimal temperature that prevents over-extrusion without causing under-extrusion.
- Calibrate E-Steps: Ensure your printer’s firmware is correctly calibrated to extrude the right amount of filament per step.
Systematically addressing these factors can mitigate over-extrusion and achieve cleaner, more precise 3D prints.
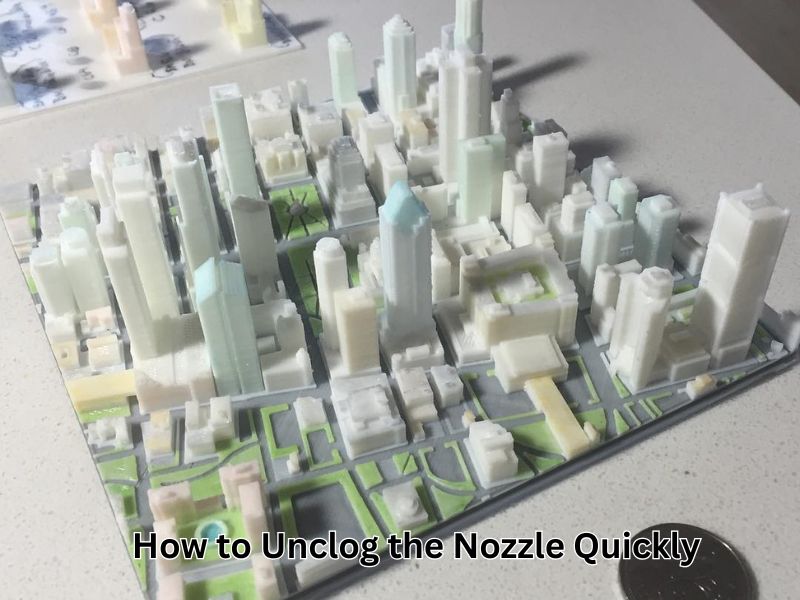
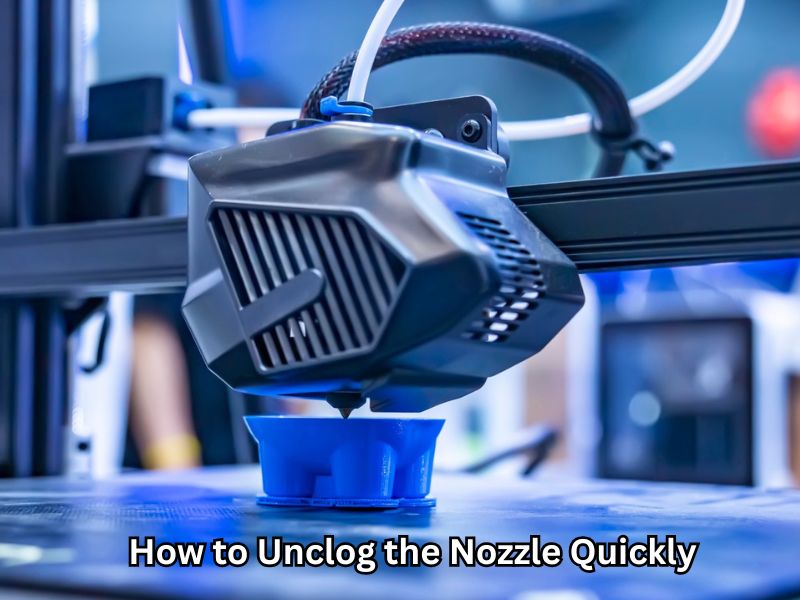
7. Clogged Nozzle: Why Nothing is Printing and How to Unclog the Nozzle Quickly
A clogged nozzle is a common issue that can halt your 3D printing projects. Recognizing the signs early and knowing how to address them can save time and materials.
Signs of a Clogged Nozzle:
- No filament extrusion: The printer operates, but no filament is deposited on the build plate.
- Inconsistent filament flow: Filament extrudes unevenly or in thin strands.
- Extruder motor clicking or skipping: The motor makes unusual noises due to resistance.
- Visible debris or burnt filament at the nozzle tip: Indicates residue buildup.
Common Causes:
- Low-quality or contaminated filament: Impurities can block the nozzle.
- Incorrect temperature settings: Printing at temperatures too low for the filament type.
- Frequent filament changes without proper purging can lead to residual filament hardening and subsequent blockages.
Effective Methods to Unclog the Nozzle:
- Cold Pull Technique:
- Heat the nozzle to the printing temperature of the filament.
- Insert a filament like nylon or a cleaning filament.
- Allow it to cool to approximately 100°C, then carefully remove it.
- This method can remove debris lodged inside the nozzle.
- Heat the nozzle to the printing temperature of the filament.
- Manual Cleaning with a Needle:
- Heat the nozzle to the appropriate temperature.
- Use a thin needle or a specialized nozzle cleaning tool to clear the blockage gently.
- Be cautious to avoid damaging the nozzle interior.
- Heat the nozzle to the appropriate temperature.
- Chemical Soaking:
- Remove the nozzle from the printer.
- Soak it in a solvent appropriate for the filament type (e.g., acetone for ABS).
- After soaking, use a soft brush to remove any remaining residue.
- Remove the nozzle from the printer.
- Thermal Cleaning:
- Use a heat gun to warm the nozzle externally.
- This can soften or burn away residual filament.
- Ensure safety precautions to prevent burns or damage.
- Use a heat gun to warm the nozzle externally.
Preventive Tips:
- Use high-quality filament: Reduces the risk of impurities causing clogs.
- Store filament properly: Keep it dry and free from dust.
- Regular maintenance: Clean the nozzle periodically, especially after using different types of filament.
- Proper temperature settings: Ensure the printer is set to the correct temperature for the filament in use.
By understanding the signs and employing these cleaning methods, you can maintain optimal printer performance and minimize downtime caused by nozzle clogs.
8. Ghosting or Ringing: Fixing Surface Wobbles and Echo Lines in 3D Prints
Ghosting, also called ringing, shows up as ripples or echo-like lines on the surface of your 3D print. These lines usually run parallel to sharp edges. They’re not just cosmetic flaws—they point to mechanical issues that affect print precision. Ghosting happens when the printer vibrates during sudden changes in movement.
What Creates Ghosting Effects on Printed Parts
- Vibrations from Fast Direction Changes
When the print head moves quickly and changes direction, it can cause the printer to shake. These tiny shakes show up as surface lines. - Loose Frame or Wobbly Printer Parts
If bolts, belts, or structural parts are not tight, vibrations increase. This makes ghosting more likely. - High Print Speed
Fast printing causes the printer to overshoot or bounce slightly. This motion creates unwanted echo patterns.
Simple Tips to Eliminate Ghosting
- Tighten All Bolts and Check Printer Stability
Make sure every screw and joint is firmly in place. This helps reduce vibration and shaking. - Add Rubber Feet or Place Printer on a Heavy Surface
Rubber pads absorb shock. A heavy table or solid surface keeps the printer from moving as it works. - Lower Print Speed for More Accurate Motion
Slower speeds reduce momentum and prevent overshooting. This leads to smoother lines and sharper edges.
Fixing ghosting doesn’t require fancy tools. With a few checks and adjustments, your prints will come out clean and professional.
9. Layer Separation and Cracking: Preventing Weak Spots Between Layers
Layer separation occurs when printed layers fail to adhere properly, resulting in cracks or weak spots. This reduces strength and ruins the final look.
Why Layers Don’t Stick Properly
- Low nozzle temperature: If it’s too cool, the filament won’t bond well.
- Cold environment: Drafts or a cool room can cause quick cooling and poor adhesion.
- Wrong layer height: Too high for your nozzle means less contact between layers.
How to Strengthen Layer Bonding
- Raise nozzle temperature slightly, staying within the filament’s safe range.
- Use an enclosure to keep prints warm and avoid sudden cooling.
- Use high-quality filament that’s known for its superior adhesion.
- Adjust layer height to about 80% of your nozzle size.
- Reduce fan speed for materials like ABS, which require slower cooling.
Fixing these helps your prints stay strong and clean—no more cracking or splitting.
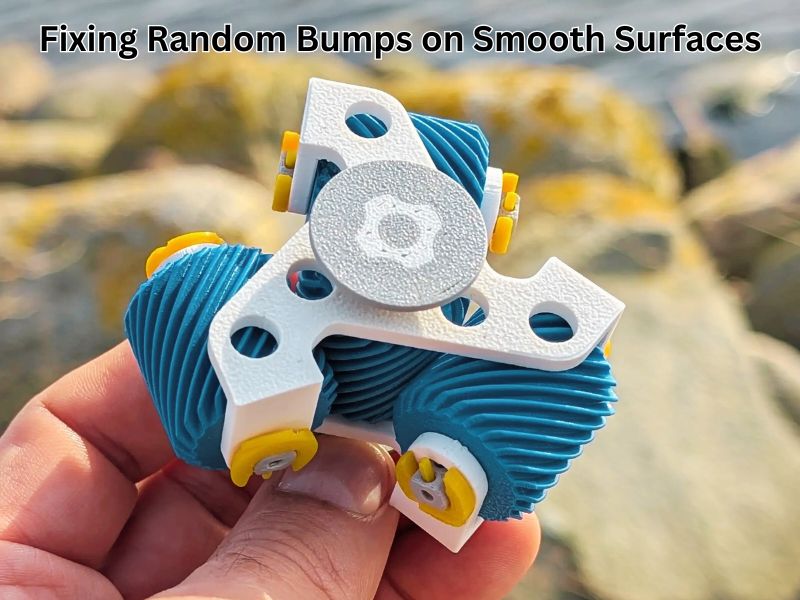
10. Blobs and Zits: Fixing Random Bumps on Smooth Surfaces
Blobs and zits are small bumps that appear on 3D prints, usually at layer start or stop points on outer walls. They occur due to sudden extrusion changes, poor retraction or coasting settings, and the location where the nozzle begins or stops.
Causes:
- Abrupt extrusion changes or pauses cause excess filament.
- Incorrect retraction and coasting settings are leading to oozing.
- Start/stop points are placed on visible outer walls.
How to Fix Them:
- Adjust retraction distance and speed to reduce oozing.
- Enable “coast at end” or “wipe nozzle” in your slicer to relieve nozzle pressure.
- Move seam locations to less visible areas to conceal imperfections.
These tweaks help keep your print surfaces clean and smooth.
Wrapping up
Mastering 3D printing involves understanding and addressing common issues, such as poor bed adhesion, warping, stringing, layer shifting, under- and over-extrusion, nozzle clogs, ghosting, layer separation, blobs and zits, and bridging failures. By implementing the solutions provided in this guide, you can enhance print quality and efficiency. Regular maintenance, proper calibration, and thoughtful slicer settings are essential for achieving consistent success. Remember, troubleshooting is an integral part of the learning process—each challenge presents an opportunity to refine your skills and achieve better results in your 3D printing endeavors.
Frequently Asked Questions
Why won’t my first layer stick to the print bed, causing my print to fail?
Poor bed adhesion is the most frequent issue. A successful print requires the first layer to “squish” slightly onto the build plate.
Use Adhesives: Apply an adhesion aid like a glue stick, painter’s tape, or specialized adhesive spray, which can provide a stickier surface for the first layer.
Check Bed Leveling and Z-Offset: The nozzle must be at the correct height. If the bed is unlevel or the Z-offset is too high, the filament won’t make sufficient contact. Re-level the bed (manually or automatically) and fine-tune the Z-offset so there is a slight drag when moving a piece of paper between the nozzle and the bed.
Clean the Build Plate: Oils from fingerprints, dust, or old adhesive residue can prevent adhesion. Clean the surface thoroughly with isopropyl alcohol or warm, soapy water.
Adjust Temperatures: Ensure the bed temperature is set to the manufacturer’s recommendation for your filament (e.g., 50–60°C for PLA, 100–110°C for ABS).
What is warping, and how can I stop the corners of my print from lifting?
Warping occurs when the filament cools down too quickly and unevenly, causing internal stress that pulls the corners or edges of the print up from the build plate.
Reduce Cooling for Initial Layers: For the first few layers, reduce or turn off the part cooling fan to ensure the plastic layers have time to bond well before cooling.
Use a Heated Bed and Enclosure: Maintain a consistent temperature. A heated bed keeps the base of the print warm, and an enclosure shields the print from drafts and sudden temperature changes, which is especially important for materials like ABS.
Add a Brim or Raft: In your slicer software, add a brim (a single-layer skirt attached to the print) or a raft (a disposable base layer). These features increase the surface area and adhesion, anchoring the print more securely.
How do I get rid of fine strings or “hairs” left between different parts of my print (stringing)?
Stringing or oozing happens when molten filament leaks out of the nozzle while the print head is moving over open space between print features.
Dry Your Filament: Wet filament (containing absorbed moisture) can vaporize in the hot end, causing bubbling and oozing. Dry your spool using a filament dryer or a convection oven at a low temperature to remove moisture.
Optimize Retraction Settings: Increase the retraction distance (how far the filament is pulled back) and/or the retraction speed. This creates a vacuum inside the nozzle to stop the molten plastic from leaking during travel moves. Bowden-style extruders typically require longer retraction distances than direct-drive systems.
Lower the Nozzle Temperature: If the temperature is too high, the filament will be overly fluid. Lower the nozzle temperature in small increments (e.g., 5°C) until stringing is minimized.
Why are there gaps in my print, or why does the filament look thin and weak (under-extrusion)?
Under-extrusion means the printer is not pushing out enough filament. This results in weak layer bonding, gaps between perimeters, and incomplete layers.
- Check for a Clog: The most common cause is a partial or complete nozzle clog. Perform a “cold pull” or use a specialized needle to clear the blockage, or replace the nozzle.
- Verify Extruder and Spool Feed: Ensure the filament spool moves freely and the filament drive gear does not slip or grind the plastic. Adjust the tension on the extruder mechanism if needed.
- Correct Slicer Settings: Verify that the filament diameter (1.75mm or 2.85mm) and the extrusion multiplier (or flow rate) in your slicer software are correct and calibrated for your printer and material.
Why are my print layers misaligned, causing the object to look skewed (layer shifting)?
Layer shifting occurs when the X or Y axis loses its position during the print, causing subsequent layers to be offset from the previous ones.
- Tighten Belts and Pulleys: Check the tension on the X and Y axis belts. They should be taut but not overly tight. Ensure the pulleys are securely fastened to the stepper motor shafts and not slipping.
- Reduce Print Speed: Excessive print speed or high acceleration/jerk settings can cause the stepper motors to skip steps, especially on sharp directional changes. Slow down the print speed to reduce inertia.
- Inspect the Printer’s Path: Look for any physical obstructions, debris, or tangled cables that could briefly block the movement of the print head or bed, which is enough to throw the axes out of alignment.