
Using the Anycubic Kobra 2 Max slicer the right way makes a huge difference in print quality and speed.
After years of hands-on experience with 3D printers, I’ve found that the Anycubic Kobra 2 Max Slicer is where the magic really happens. Whether you’re just starting or aiming for pro-level results, fine-tuning your slicing settings is essential.
In this guide, I’ll walk you through every step—from beginner basics to advanced tricks—so you can get the most out of your Anycubic Kobra 2 Max, which many consider the best 3d printer for small business use.
Learn how to use the Anycubic Kobra 2 Max Slicer for precise 3D printing with easy settings and optimal results.
Related internal pages:
- anycubic-kobra-3-max/
- anycubic-kobra-2-max/
- anycubic-kobra-3-max-combo/
- how-to-use-3d-printer-software/
- anycubic-kobra-s1-3d-printer/
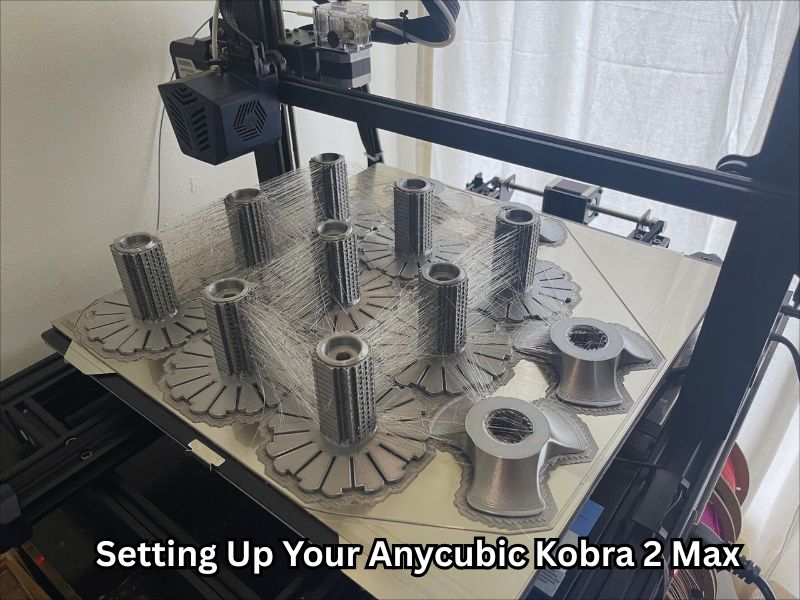
Setting Up Your Anycubic Kobra 2 Max for Success
Understanding Your 3D Printer’s Components and Features
Before diving into slicing, it helps to know your machine. The Anycubic Kobra 2 Max is built for serious print jobs. It comes with a large build volume (420×420×500 mm), dual Z-axis design, and auto bed leveling. You also get a fast processor and a direct drive extruder, which work together for smoother, quicker prints. These features directly affect your Anycubic Kobra 2 Max Slicer decisions—from speed settings to support placement.
Key Features That Affect Slicing and Print Results
Some features matter more than others when slicing. For example, high-speed capability needs balanced retraction and acceleration. If you want to Print Unique 3D Family Portraits, features like auto-leveling help maintain a clean first layer, and the dual Z-axis keeps tall prints steady. Understanding how each part works within the Anycubic Kobra 2 Max Slicer makes fine-tuning easier and more effective.
Installing and Configuring the Right Slicer Software
How to Install Anycubic Slicer, Cura, and PrusaSlicer
You have options when it comes to slicers. Anycubic Slicer works out of the box. Cura and PrusaSlicer need a bit of setup. Choose “Add Printer,” select or create a custom profile, and input the Kobra 2 Max’s dimensions and nozzle size. It takes just a few minutes, and you’re ready to slice.
Best Printer Settings for Kobra 2 Max
After installation, adjust the key settings in the Anycubic Kobra 2 Max Slicer. Set the build size to 420×420×500 mm. Use a 0.4 mm nozzle unless you’ve changed it. Adjust print speed to suit the material—start with 100 mm/s, then increase as needed. Retraction distance and speed also matter for clean prints, especially with flexible or high-temp filaments.
Importing and Customizing Printer Profiles for Better Prints
How to Import Prebuilt and Community Profiles
You don’t have to start from scratch. Many experienced users share tested profiles. You can import them through your Anycubic Kobra 2 Max Slicer settings menu. Once loaded, double-check values like layer height, speed, and temperature to match your setup and filament.
Adjusting Profiles for Different Materials and Quality Levels
Each filament needs different settings. PLA prints best between 190–210°C. ABS needs higher temps and a heated bed. PETG requires careful tuning to reduce stringing. For high detail, use thinner layers and slower speeds. For strength or speed, go thicker and faster. Always tweak profiles to suit your goals.
Navigating the Slicer Interface: Tools and Features Explained
Mastering your slicer software is key to better prints. Whether you’re using Anycubic Slicer, Cura, or PrusaSlicer, understanding the layout and core tools helps you save time and avoid failed prints.
Exploring the Interface of Popular Slicers
Anycubic Slicer offers a simple layout made for Anycubic printers. You’ll find a main 3D view, easy tools to move or scale your model, and quick-access print settings.
Cura is beginner-friendly but flexible. The left side handles model tools. The right side is where you adjust settings like layer height, infill, and materials.
PrusaSlicer provides a clean workspace with standard controls, while also offering advanced mode for deeper exploration. It’s great for users who want more control without extra clutter.
Tips to Customize Your Workspace
- Rearrange toolbars to match your workflow.
- Use keyboard shortcuts for faster edits.
- Save profiles for your favorite settings to save time.
Understanding Key Slicing Settings and How They Affect Your Prints
Understanding the purpose of each setting helps you achieve better results and minimize waste. Let’s break down the most important ones:
Layer Height
This controls how thick each printed layer is. A lower height provides smoother detail, but it takes longer—a taller height prints faster but with less detail.
Infill Density
This determines the solidity of the inside of your print. Higher density means more strength. Lower density saves time and filament. For simple models, low infill works fine.
Print Speed
Faster prints save time, but you may lose detail or get rough edges. Slower speeds usually give cleaner, stronger prints. Adjust the speed balance according to your project needs.
Temperature Settings
Nozzle and bed temperature affect how well your filament sticks and flows. Every material has a sweet spot. Use the correct settings for your filament to avoid stringing or warping.
Fine-Tuning Slicer Settings for Optimal Print Quality
Calibrating Your Printer for Different Filaments
Each filament type behaves differently. That’s why it’s essential to adjust your printer settings before starting a new project.
Start by checking the nozzle temperature. PLA usually works best around 200°C, while PETG or ABS may need higher heat. If the temperature is too low, layers won’t bond well. Too high, and you’ll see oozing.
Next, dial in the flow rate. Too much filament causes blobs and over-extrusion. Using too little ink leads to gaps in your print. A simple cube test helps find the right balance.
Lastly, retraction settings are key. Retraction helps pull the filament back during moves. This avoids messy strings and blobs.
Use calibration prints, such as temperature towers and retraction tests. These help you fine-tune for smooth results.
Adjusting Retraction Settings to Prevent Stringing
Stringing appears as small spiderwebs between parts of your print. It’s a common issue, but easy to fix.
First, check your retraction distance. Start with 1.5 mm and test small changes from there. Then try adjusting the retraction speed. Around 40 mm/s is a good starting point.
If you still see stringing, your print temperature may be too high. Try lowering it by 5–10 degrees.
Fine-tuning these settings will give you much cleaner prints with fewer post-processing headaches.
Implementing Supports and Adhesion Techniques
Supports help your model stay strong during printing, especially for overhangs or angled parts. Use them only where needed to reduce cleanup time.
When sticking your print to the bed, try adding a brim for a better grip. It’s great for models with small contact points. A raft is particularly useful for tricky filaments or large prints that tend to warp.
Getting your first layer right is half the battle. Good adhesion means fewer failed prints and smoother results.
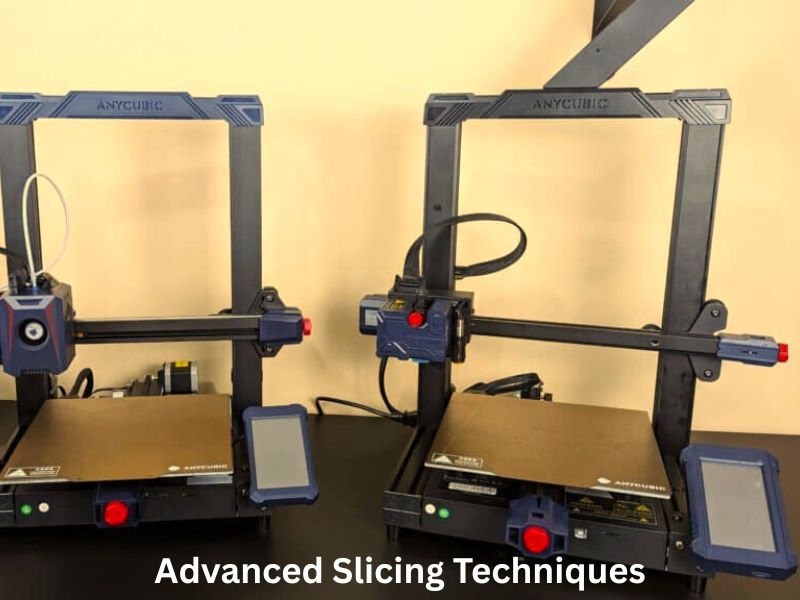
Advanced Slicing Techniques for Experienced Users
Leveraging Custom G-Code for Better Print Control
Writing Custom Start and End G-Code Scripts
Custom G-code lets you control precisely how your printer starts and finishes each job. You can set nozzle temperatures, move the bed to specific spots, and prime the nozzle before printing. This ensures a clean first layer and smooth print flow.
Automating Tasks Like Nozzle Wiping and Bed Leveling
You can include commands in your start script to automate nozzle wiping and bed leveling. These small steps help prevent clogs, improve adhesion, and reduce failed prints, especially for longer jobs.
Using Variable Layer Heights for Higher Detail
How to Set Variable Layer Heights in Your Slicer
Variable layer height means your printer uses thin layers for detailed parts and thicker layers for the rest. Most slicers, including OrcaSlicer, let you apply this automatically or manually adjust layer thickness where needed.
Benefits of Variable Layer Height for Complex Prints
Using thinner layers for curves and fine features improves detail without increasing the total print time too much. It also makes the surface finish smoother and can save material in low-detail areas.
Exploring Pressure Advance and Input Shaping
Why These Advanced Settings Improve Print Quality
Pressure advance helps your printer adjust for delays in filament flow during fast moves. This reduces blobs and stringing on corners or sharp edges.
Input shaping tackles vibration and ringing, which often show up when printing at higher speeds. It works by smoothing motion before the printer moves, making details crisper.
How to Tune Pressure Advance and Input Shaping in Your Slicer
To use pressure advance, print a test model and fine-tune based on the cleanliness of the corners. Input shaping requires some additional setup—you may need to test for your printer’s vibration frequency and then apply the correct setting in your slicer or firmware.

Here is a clear summary of the Advanced Slicing Techniques for Experienced Users when using the Anycubic Kobra 2 Max:
Advanced Slicing Techniques Table for Anycubic Kobra 2 Max Users
| Technique | What It Does | How to Use It | Key Benefits |
| Custom Start and End G-Code Scripts | Controls printer actions at the beginning and end of a print | Set nozzle temp, bed position, and add nozzle priming in slicer’s G-code section | Clean first layer, fewer clogs, better adhesion |
| Automated Nozzle Wiping and Bed Leveling | Automates routine steps before each print | Add nozzle wipe and leveling commands in start G-code | Reduces failed prints, improves print quality |
| Variable Layer Height | Uses thin layers for detail, thicker ones elsewhere | Enable in slicer settings or adjust layer heights manually | More detail in curves, smoother finish, reduced print time |
| Pressure Advance | Adjusts for filament flow lag during fast moves | Print test models, tweak settings based on corners and extrusion consistency | Reduces stringing and corner blobs |
| Input Shaping | Reduces printer vibration and ringing | Identify resonance frequency, apply settings in slicer or firmware | Smoother motion, sharper edges, better quality at high speeds |
Troubleshooting Common Slicing and Printing Issues with Anycubic Kobra 2 Max
Common Print Problems and Quick Fixes
- Warping (Corners lifting off the bed):
- Raise bed temperature for better adhesion
- Apply glue stick or masking tape to the bed surface.
- Enable a brim or raft in slicer settings.
- Avoid cold air or sudden room temperature changes
- Raise bed temperature for better adhesion
- Layer Shifting (Misaligned layers):
- Check and tighten belts on all axes.
- Ensure pulleys are secure and aligned.
- Clean and lubricate linear rails for smooth movement
- Lower print speed to reduce vibration and movement errors
- Check and tighten belts on all axes.
- Under-Extrusion (Weak or missing layers):
- Clean the nozzle to remove any clogs.
- Confirm the correct filament diameter in the slicer settings.
- Adjust extrusion multiplier for proper flow.
- Keep hotend temperature stable throughout the print.
- Clean the nozzle to remove any clogs.
Optimizing Slicer Settings for Large Prints on the Kobra 2 Max
Make Large-Scale Printing Faster and More Efficient
- Increase layer height to 0.2 mm or more to speed up prints
- Use low infill density (around 10%) to save material and time.
- Turn on adaptive layer height to improve surface detail only where needed.
- Limit support usage to essential areas to cut waste and cleanup time.
- Control print bed temperature and reduce fan speed on first layers to avoid warping
- Double-check model orientation for better stability and fewer supports.
Unique Insights You Won’t Find in Most Slicer Guides
Custom Filament Profiles: One Setting Doesn’t Fit All
- Filaments differ by brand and color, affecting print quality.
- Create and save custom profiles for each filament type.
- Adjust print temperature, bed heat, and fan speed per filament.
- Label profiles clearly for easy selection and switching.
- Results: saves time, reduces failed prints, and keeps prints consistent.
Why a Filament Profile Library Matters
- Organizing profiles speeds up your workflow.
- Avoids repeated trial-and-error for new filaments.
- Ensures reliable and high-quality prints every time.
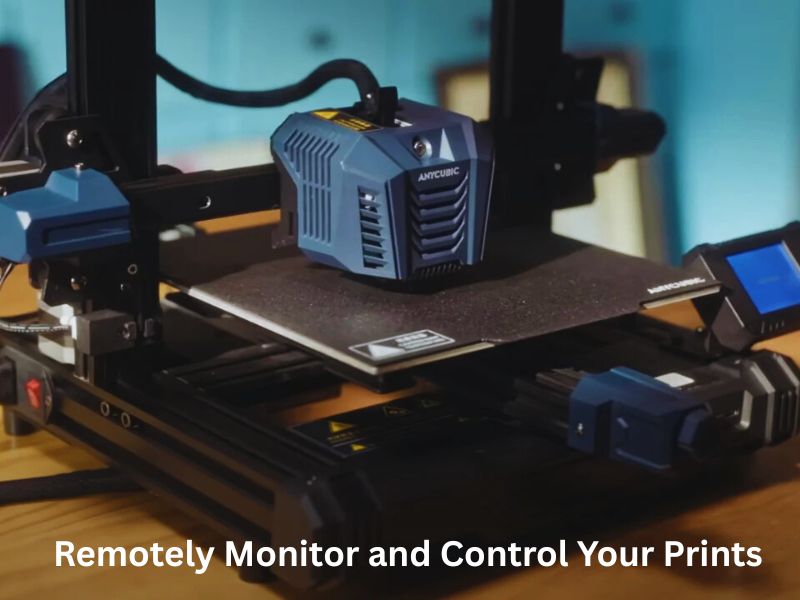
How to Remotely Monitor and Control Your Prints Like a Pro
Tools to Monitor Prints Remotely
- Use remote control tools to start, pause, or stop prints from anywhere.
- Monitor print status remotely.
- Plugins can add features like failure detection and live video feeds.
Set Up Real-Time Notifications and Webcam Feeds
- Get alerts on your phone or email when prints finish or fail.
- Connect a webcam for live streaming your prints.
- It helps catch problems early, saving time and materials.
Wrapping Up
Using the Anycubic Kobra 2 Max Slicer well can make a big difference in your 3D printing projects. Whether you’re just starting or have some experience, customizing your settings and learning new features will help you get consistent, high-quality prints.
Taking the time to understand your slicer and experimenting with filament profiles or remote monitoring can save you time and reduce errors. This guide gives you the tools to print like a pro and enjoy every step of your 3D printing journey.
Frequently Asked Questions
Which slicing software works best with the Anycubic Kobra 2 Max?
The Kobra 2 Max is officially supported by Anycubic Slicer, which is based on PrusaSlicer. It is also highly compatible with PrusaSlicer, Cura, and OrcaSlicer. Many users and community guides suggest that PrusaSlicer or OrcaSlicer tend to yield superior print quality for the Kobra series when compared to default Cura profiles, though all are viable options once properly configured.
Where can I find the official printer profiles for Cura or PrusaSlicer?
Official, pre-tuned configuration profiles for the Anycubic Kobra 2 Max (and the Kobra 2 series) are provided by Anycubic. You can usually find them:
On the “Firmware & Software” page of the official Anycubic website. These profiles are essential for correctly setting the machine limits and enabling high-speed printing features.
On the USB drive or SD card that came with your printer.
How can I achieve the advertised high print speeds (e.g., 300 mm/s or more)?
While the printer is advertised for high speeds, simply changing the overall print speed setting is often not enough. To safely increase speed:
Slicer Profiles: Use the official or community-tuned high-speed profiles in Anycubic Slicer or PrusaSlicer, as they generally have better defaults than Cura for this machine.
Volumetric Flow is Key: The actual high speed is limited by the hotend’s volumetric flow (the amount of filament it can melt per second). You must tune this setting and ensure your filament can keep up.
Stability: High speeds (above 160 mm/s) can cause the large print bed to shake significantly. Ensure your printer is on a stable, heavy surface to prevent layer shifts and quality reduction.
What advanced settings are essential for maximizing print quality on the Kobra 2 Max?
As a high-speed printer with a Klipper-based system, two advanced settings are crucial and are generally tuned during the printer’s setup:
- Input Shaping: This setting compensates for machine vibrations (resonance) that occur at high speeds. It dramatically reduces “ghosting” or “ringing” (wavy lines near corners) on your prints, leading to sharper details.
- Pressure Advance: This setting adjusts the filament flow in advance of a change in movement speed, especially when approaching sharp corners. This prevents blobs at the start of a line and gaps at the end, resulting in cleaner corners and better dimensional accuracy.
Can I install third-party firmware like ‘pure’ Klipper on the Anycubic Kobra 2 Max?
While the Kobra 2 Max runs on a custom, Klipper-based firmware, installing standard, third-party Klipper is generally unsupported by Anycubic and may void your warranty. While some experienced users in the community have attempted to convert the printer to ‘pure’ Klipper for maximum control, it is a complex process. You should only attempt this if you are familiar with firmware flashing and custom G-Code manipulation.
Comments are closed.