 Skip to content
Struggling with failed 3D prints? You’re not alone. If you’ve ever asked yourself, why do my 3D prints keep failing, the answer usually points to simple problems like poor bed adhesion, incorrect settings, or minor mechanical issues that are easy to miss.
After years of trial, error, and troubleshooting countless machines, I’ve learned how small changes can make a huge difference.
In this post, we’ll break down the top 10 shocking reasons your 3D prints keep failing—and how to fix each one fast. Whether you’re printing at home or running a workshop with the best 3D printer for small business, these tips will help you get cleaner, stronger, and more reliable results.
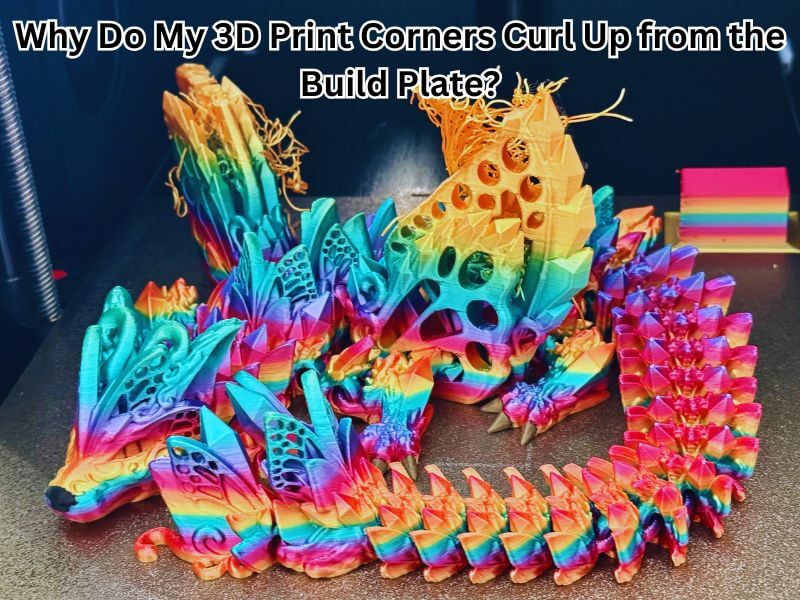
1. Warping: Why Do My 3D Print Corners Curl Up from the Build Plate?
Warping occurs when the corners of your 3D print lift or curl away from the bed. It’s one of the most frustrating 3D printing problems, especially if you’re printing large or sharp-edged objects. This issue usually shows up during the first few layers.
What Causes Warping in 3D Prints
- Plastic cools too fast and contracts unevenly
As hot filament cools, it shrinks. If it cools unevenly, the corners start to lift. - Bed adhesion is weak or uneven
When the first layer doesn’t stick properly, parts of the print begin to warp or peel. - Cold or drafty rooms make the situation worse
Sudden temperature drops or airflow can cause the print to cool too fast, especially at the edges.
How to Prevent and Fix Warping Fast
- Use a heated bed with the right temperature
A warm bed helps the first layer stick and slows down cooling for better results. - Apply glue stick, painter’s tape, or build plate adhesives
These create a textured surface that helps your filament grip better during the print. - Use an enclosure to reduce drafts and temperature swings
Enclosures help maintain a stable printing environment, especially useful when printing materials like ABS.
2. Layer Separation: Why Are My 3D Prints Splitting Between Layers?
Layer separation, or delamination, happens when the layers of your print don’t bond well. It often leads to cracks, weak spots, and failed prints. If you’ve seen your 3D model split right down the middle, you’re not alone. This issue can also ruin detailed projects like a 2D Picture to 3D Print for Home Decor, where clean layering is essential for quality results.
This issue is common among beginners and even experienced users. The good news? It’s usually easy to fix.
Why Prints Split or Crack Between Layers
- Low print temperature doesn’t allow layers to fuse properly.
- Cooling fans blowing too strong or too early cool the layers too fast.
- Moisture in the filament causes steam bubbles and weak adhesion.
- High layer height prevents layers from bonding with enough surface area.
- Cold ambient temperature or drafts can cause uneven cooling and splits.
What to Do When Layers Don’t Stick Together
- Raise the nozzle temperature slightly for stronger bonding.
- Slow down or delay fan speed during the first few layers.
- Dry your filament using a filament dryer or sealed dry box.
- Lower the layer height to increase contact between layers.
- Use an enclosure to keep print temperatures consistent.
With these simple changes, you’ll stop layer splitting and fix the real reasons behind why do my 3d prints keep failing.
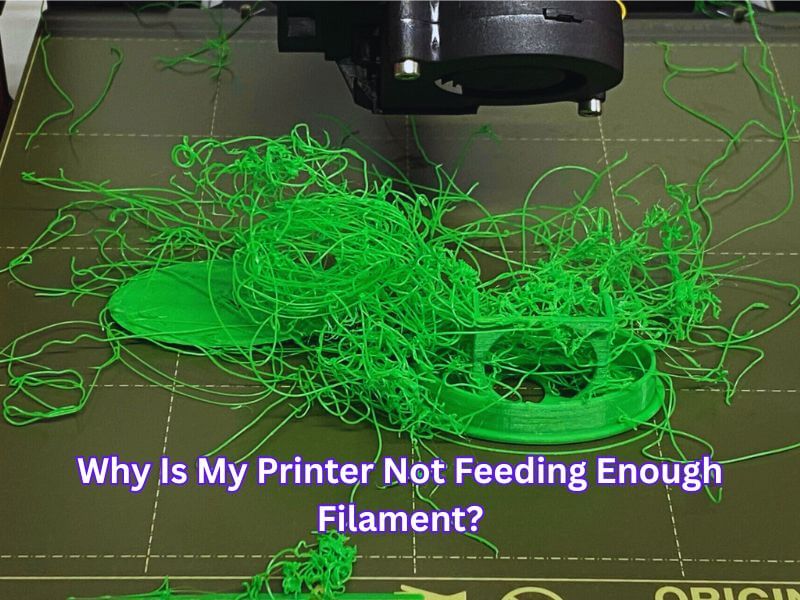
3. Under-Extrusion: Why Is My Printer Not Feeding Enough Filament?
Have you ever noticed gaps, thin layers, or missing sections in your prints? That’s often under-extrusion—when your 3D printer doesn’t push out enough filament. It’s one of the most frustrating 3D printing problems, but thankfully, it’s fixable.
What Causes Under-Extrusion in 3D Printing?
Clogged or Dirty Nozzle
A partially blocked nozzle limits the amount of filament flowing through. This happens from leftover debris or printing at the wrong temperature.
Slipping or Grinding Filament
If the extruder gear can’t properly grip the filament, it slips. This means the printer isn’t feeding filament smoothly.
Incorrect Flow Rate Settings
If your slicer’s flow rate is too low or the filament diameter is off, it leads to low filament output.
How to Fix It Fast
- Clean or Replace the Nozzle to clear blockages and improve flow.
- Increase the Flow Rate slightly in your slicer to match your filament.
- Check the Extruder Tension and confirm filament diameter is entered correctly.
Fixing under-extrusion early can improve strength, detail, and the overall look of your 3D prints. A few small tweaks go a long way. If you’ve been wondering, “why do my 3D prints keep failing,” under-extrusion is often one of the biggest culprits.
4. Over-Extrusion: Why Is My 3D Printer Outputting Too Much Material?
Too much plastic coming out of your nozzle? That’s called over-extrusion—and it’s more common than you think. It often makes people ask, why do my 3d prints keep failing, especially when they see blobs, bulges, or stringy messes on their model. The good news? It’s fixable with a few quick tweaks.
What Causes Over-Extrusion in 3D Printing?
Flow Rate Set Too High
Your slicer may be instructing your printer to extrude more filament than necessary. This results in swollen layers and disorganized details.
Filament Diameter Setting Is Wrong
If your slicer assumes your filament is thicker or thinner than it actually is, the printer will extrude the wrong amount.
Nozzle Temperature Too Hot
When your nozzle runs hotter than necessary, the filament flows too easily and builds up in unwanted spots.
How to Fix Over-Extrusion Fast
1. Lower the Flow Rate
Go into your slicer settings and reduce the flow rate by 2–5%. Print again and check the results.
2. Measure Your Filament
Use a caliper to measure your filament in several spots. Enter the average diameter into your slicer to get more accurate prints.
3. Drop the Nozzle Temperature
Reduce the temperature by 5°C at a time. Too much heat can cause the filament to ooze out uncontrollably.
5. Stringing: Why Do My Prints Have Thin Hairs Between Gaps?
If your 3D prints have tiny hair-like threads between gaps, that’s called stringing. It happens when melted filament leaks out while the nozzle moves across open spaces. Why do my 3D prints keep failing with stringing issues? The answer usually lies in your retraction settings or a nozzle that’s too hot.
What Causes Stringing?
- Retraction settings are too low or off: Filament keeps oozing during travel moves without proper retraction.
- Nozzle temperature is too high: Too much heat makes the filament too runny, causing it to drip.
- Travel speed is too slow: The slow nozzle movement gives the filament more time to leak out.
How to Fix Stringing Quickly
- Turn on and adjust retraction: Gradually increase the retraction distance and speed to minimize oozing.
- Lower the nozzle temperature: Drop it in small steps until you find the right balance.
- Speed up travel moves: Faster non-print moves help stop filament from leaking.
By fine-tuning these settings, you can reduce stringing and get cleaner, smoother 3D prints every time.

6. Layer Shifting: Why Are My 3D Print Layers Misaligned?
Layer shifting occurs when a new layer fails to align correctly with the one below it. This creates a noticeable misalignment, making your print look like it’s slipped sideways.
What Causes Layer Shifting?
- Loose or worn belts can disrupt the movement of the print head. If they’re loose or damaged, the printer can lose its position, causing layers to shift.
- Printer vibrations or instability: If your printer isn’t sitting steady, even small shakes can cause the layers to shift out of place.
- Stepper motors skipping steps: Motors may miss steps if they don’t receive enough power or encounter resistance, resulting in misaligned layers.
How to Fix Layer Shifting:
- Tighten your belts and make sure their tension is even on both sides. Replace belts if they look worn out.
- Place your printer on a stable, level surface to reduce vibrations during printing.
- Lubricate rods and rails, and inspect the motion system for any blockages or dirt that could cause resistance.
By tackling these issues, you can stop layer shifting and improve the accuracy of your 3D prints.
7. Clogged Nozzle: Why Is No Filament Coming Out of the Nozzle?
If your 3D printer suddenly stops extruding mid-print, a clogged nozzle is likely the reason. Several things can cause this common issue:
- Burned filament builds up when temperatures are too high.
- Dust or dirt from poorly stored filament gets stuck in the nozzle.
- Cheap or low-quality filament melts unevenly, leading to jams.
These clogs prevent filament from flowing, which ruins prints and wastes time.
How to Clean a Blocked Nozzle Quickly
You can fix a clogged nozzle without too much hassle:
- Try a cold pull using nylon or cleaning filament to remove debris.
- Carefully insert a thin needle into the heated nozzle to push out the blockage.
- Soak the nozzle in acetone (for ABS) or heat it up to soften and clear the jam.
- Always use high-quality, dry filament to prevent future issues.
Regular cleaning and the use of high-quality materials can help keep your nozzle clear and your 3D prints looking great.
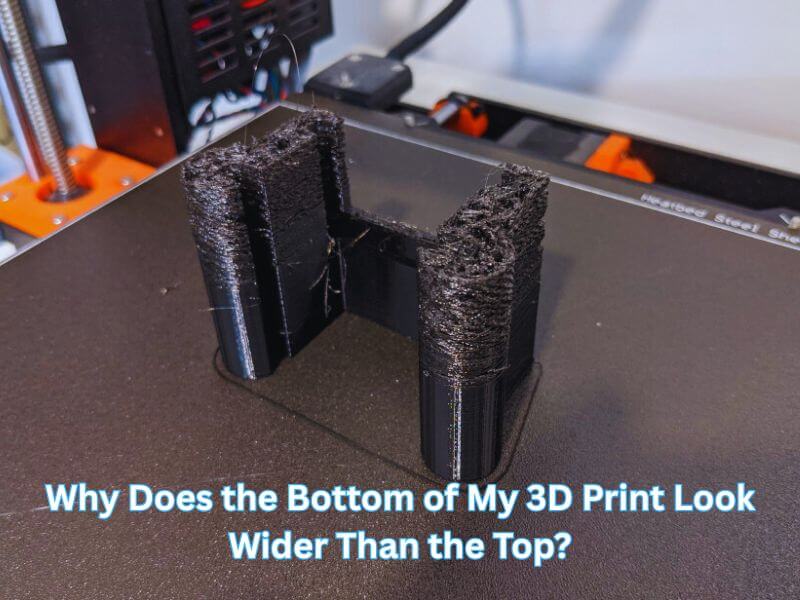
8. Elephant’s Foot: Why Does the Bottom of My 3D Print Look Wider Than the Top?
If the base of your print looks squished or flares out, you’re likely dealing with “elephant’s foot.” It’s a typical 3D printing problem, especially in the first few layers.
What Causes a Bulging Base on 3D Prints?
This issue usually happens when:
- The nozzle starts too close to the print bed
- The heated bed is too hot and softens the first layers.
- There’s not enough cooling early in the print.
These factors cause the filament to spread out before it hardens, creating that widened base.
How to Fix Elephant’s Foot in 3D Printing
To stop this from happening:
- Raise your Z offset slightly to give the first layer room to breathe
- Lower the bed temperature by 5–10 degrees to firm up the bottom layers
- Turn on the cooling fan after the first layer finishes
- Add a small chamfer to the bottom edge of your design for a cleaner look
- Use “elephant foot compensation” if your slicer offers it
Fixing this improves accuracy, helps with part fitting, and gives your prints a more professional finish, especially when using the best 3D printer for small business setups. It’s a key step if you’re still asking yourself, “why do my 3d prints keep failing?”
9. Ghosting or Ringing: Why Do Echoes Appear Around Corners in My 3D Print?
Ever seen faint ripples or echo-like lines near corners or sharp features in your 3D prints? That’s called ghosting or ringing. It’s a standard answer to the question: Why do my 3d prints keep failing unexpectedly? It happens when your printer vibrates during rapid changes in direction, leaving surface defects on your model.
Why Surface Ripples Show Up in Your 3D Prints
Ghosting is usually caused by:
- Fast print head movement
- Loose belts or wobbly frame parts
- High acceleration or jerk settings
These mechanical issues or slicer settings can create visible waves or echoes across the print surface.
Tips to Get Smooth, Clean Surfaces
Here’s how to stop ghosting fast:
- Lower your print speed slightly to reduce vibrations
- Tighten all belts, screws, and frame connections.
- Reduce acceleration and jerk values in your firmware or slicer.
These simple tweaks can give your prints a smoother finish and help avoid frustrating print failures.
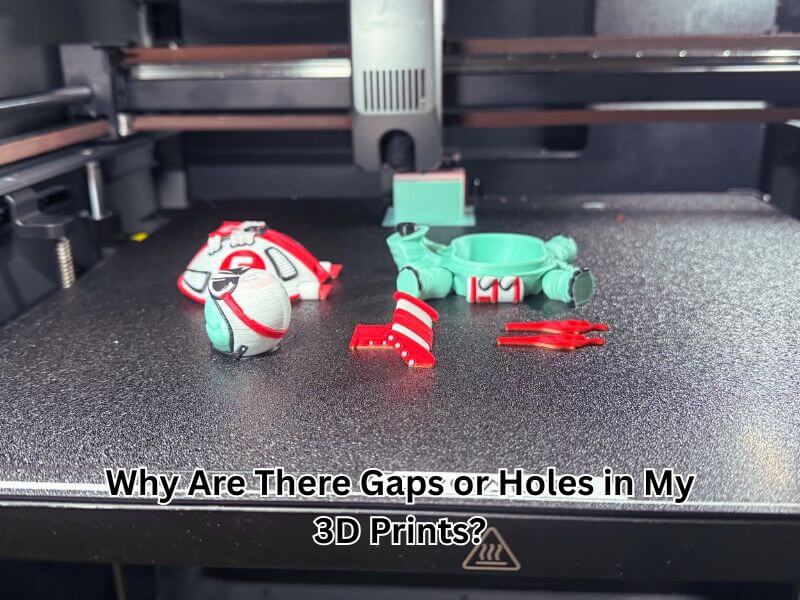
10. Infill and Top Layer Issues: Why Are There Gaps or Holes in My 3D Prints?
Noticing gaps or holes on the top of your 3D prints? You’re not the only one. These weak spots often stem from poor internal support or overlooked slicer settings.
Common Causes of Weak Top Surfaces or Sparse Infill
Infill is too low:
When your infill percentage is below 15%, the top layers have nothing solid to rest on. This leads to sagging and gaps.
Not enough top layers:
Top layers build your final surface. If there are too few, they won’t cover the infill properly, leaving thin spots.
Poor infill-to-wall connection:
If the nozzle doesn’t slightly overlap the infill and perimeters, separation lines will form, and the surface will be weak.
How to Make Your Prints Solid and Strong
- Boost your infill to at least 20% for better internal support.
- Use five or more top solid layers to give your surface proper thickness and strength.
- Enable infill overlap in your slicer settings to improve bonding between walls and inner structure.
- Slow down the top layer speed to allow smooth filament placement.
- Ensure optimal cooling to help the plastic set quickly and remain level.
These minor adjustments can significantly improve print quality. Whether you’re using a hobby machine or the best 3D printers for small businesses, understanding why my 3D prints keep failing helps you make solid top layers that lead to professional results.
Wrapping Up
3D print failures can be frustrating, but most issues have straightforward solutions. Small changes often lead to significant improvements, from bed adhesion to infill gaps. If your prints fail, take a step back and check your basics.
Tuning your settings, keeping your machine clean, and using quality filament go a long way. Whether you’re a hobbyist or running the best 3D printers for a small business, it’s normal to ask why your 3D prints keep failing.
Success comes with practice and patience. Stay curious, troubleshoot carefully, and you’ll see better, more consistent results—one layer at a time.
Frequently Asked Questions
Why won’t my print stick to the bed, or why are the corners curling up (Warping)?
Causes
Poor Adhesion: The nozzle is too far from the bed (incorrect Z-offset), the print bed is dirty, or the surface is not level. Warping: Uneven and rapid cooling causes the plastic to shrink and pull away from the heated bed, especially in large prints.
Solutions
Clean & Level: Thoroughly clean the print bed (e.g., with isopropyl alcohol) and re-level the bed, ensuring the nozzle is set to the correct initial height (Z-offset).
Adjust Temperature: Use the recommended heated bed temperature for your filament (e.g., 60-65°C for PLA).
Increase Adhesion: Apply a bed adhesive like a glue stick or hairspray.
Use an Enclosure: For materials like ABS, use an enclosure to maintain a stable, warm ambient temperature and prevent drafts.
Why are my prints too weak, too blobby, or why is no filament coming out?
Causes
Under-Extrusion: Not enough filament is coming out (leading to weak, gapped layers). This is often due to a clogged nozzle, incorrect flow rate, or wet/tangled filament.
Over-Extrusion: Too much filament is coming out (leading to blobs, bulging, or messy surfaces). This is usually due to a flow rate set too high or an incorrect filament diameter setting in the slicer.
Clog: A full blockage prevents any material from flowing.
Solutions
Calibrate: Calibrate your extruder’s E-steps and set the Flow Rate (Extrusion Multiplier) correctly, typically adjusting by 2-5% until walls look correct.
Check Settings: Ensure the filament diameter in your slicer matches the filament you are using (e.g., 1.75mm).
Clear Clogs: Perform a “cold pull” or use a thin needle to manually clear the nozzle while heated to the filament’s melting temperature.
Dry Filament: Store filament in a dry environment and use a filament dryer if moisture is suspected (wet filament causes popping/oozing).
Why does the bottom of my print flare out (Elephant’s Foot), or why are there ripples near corners (Ghosting)?
Causes
Elephant’s Foot: The first few layers are squished because the nozzle is too close to the bed, or the heated bed is too hot, causing the soft plastic to spread out under the weight of the layers above.
Ghosting/Ringing: Vibrations caused by rapid changes in the print head’s direction (at a corner) are echoed onto the surface layers.
Solutions
Fix Elephant’s Foot: Slightly increase your Z-offset to give the first layer more room. Lower the bed temperature by 5-10°C after the first layer or two. If available, use “Elephant’s Foot Compensation” in your slicer.
Reduce Ghosting: Lower the overall print speed and, more importantly, reduce the Acceleration and Jerk settings in your slicer or firmware. Ensure all frame connections and belts are tight.

Comments are closed.