
Cura is one of the most popular slicing software tools in the 3D printing world. Trusted by hobbyists and professionals alike, it transforms digital 3D models into precise instructions that guide printers to create physical objects. Its user-friendly interface and powerful features make it a go-to choice for anyone looking to streamline their 3D printing process.
Proper slicing is the backbone of successful 3D printing. It determines the quality, strength, and accuracy of your final print. Without the right slicing settings, even the best 3D printer can produce subpar results. From layer height to infill density, every detail matters when it comes to achieving perfection.
In this article, we’ll share practical tips to help you master Cura and elevate your 3D printing game. Whether you’re a DIY enthusiast or a business owner searching for the best 3D printer for small business operations, these insights will guide you toward flawless prints every time.
Understanding Cura Basics
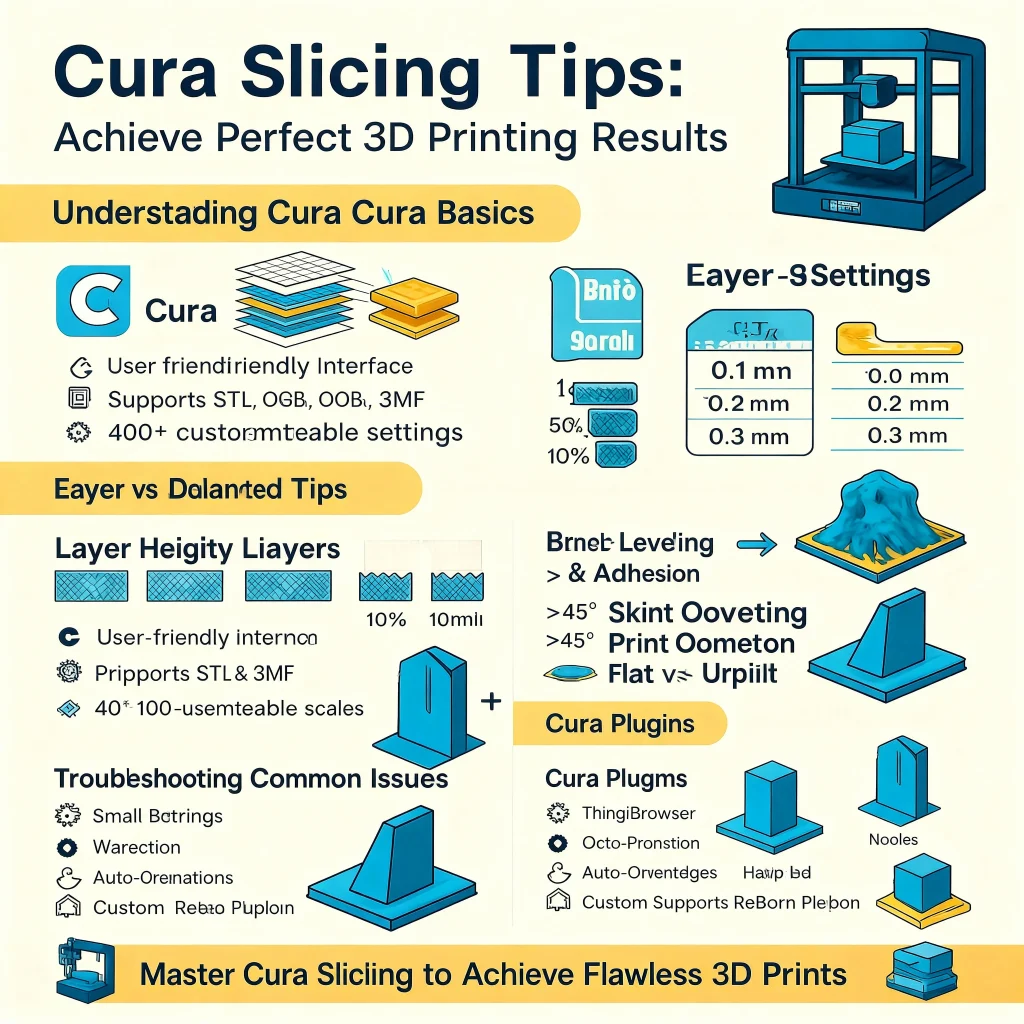
Cura is a free, open-source slicing software developed by Ultimaker. It’s widely recognized for its simplicity and versatility, making it a favorite among 3D printing enthusiasts and professionals alike. Whether you’re a hobbyist or running a business, Cura offers tools to streamline your 3D printing process.
One common challenge many users face is 3D Printer Warping, where the edges of a print lift from the build plate during printing. For example, a large ABS part might start curling at the corners due to uneven cooling, leading to distorted shapes and failed prints. Cura helps reduce this issue with features like adjustable bed adhesion settings, draft shields, and temperature controls.
One of Cura’s standout features is its user-friendly interface. It’s designed to cater to both beginners and advanced users. With just a few clicks, you can prepare your 3D model for printing. The software supports multiple file formats, including STL, OBJ, and 3MF, ensuring compatibility with most 3D printers on the market.
At its core, Cura works by slicing your 3D model into thin horizontal layers. These layers are then converted into G-code, which serves as the instructions for your printer. This process ensures that your printer knows exactly how to build your model, layer by layer, with precision and efficiency.
Cura also offers over 400 customizable settings, allowing users to fine-tune their prints for optimal quality. From adjusting layer height to selecting infill patterns, the software provides the flexibility needed to achieve professional results.
Essential Cura Settings for Perfect Prints
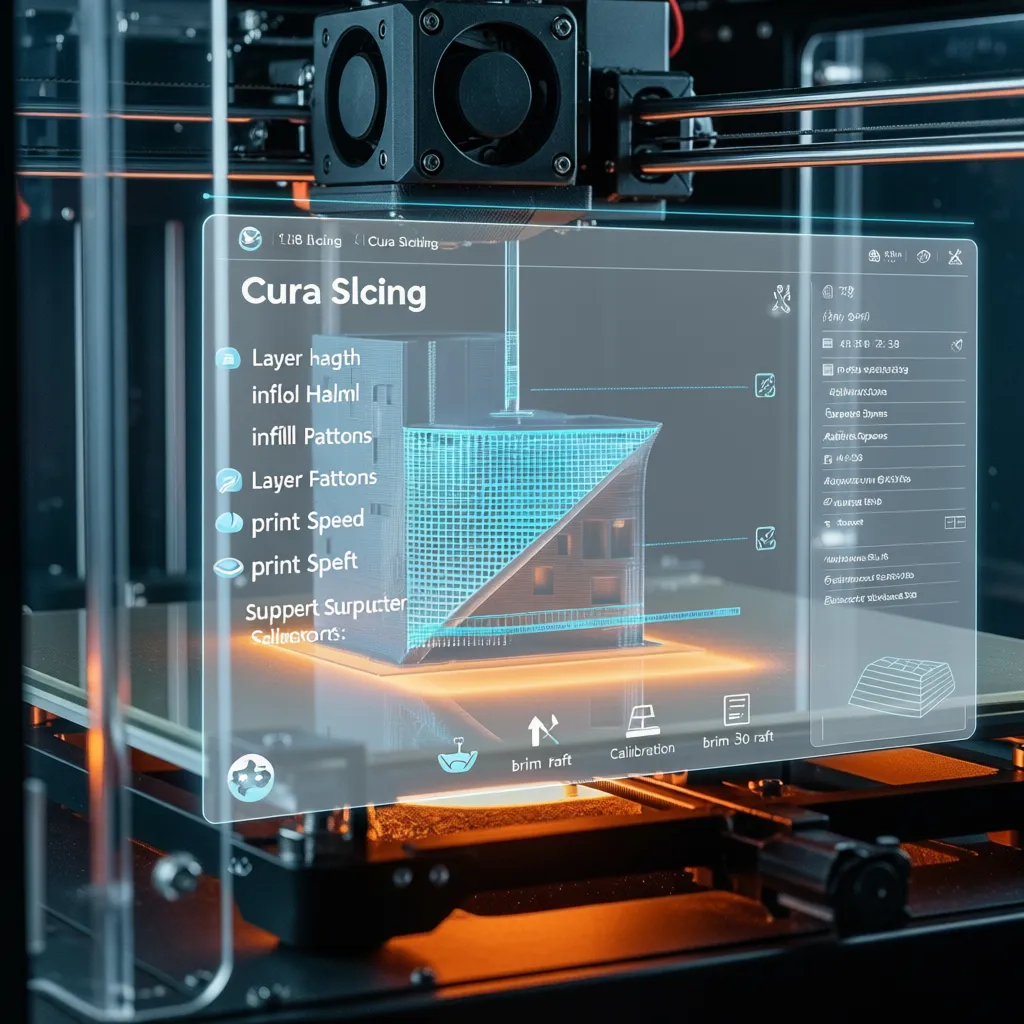
When using Cura, understanding and optimizing key settings can make a significant difference in the quality of your 3D prints. Let’s explore three critical settings—layer height, infill density, and print speed—and how they impact your results.
1. Layer Height: The Foundation of Print Quality
- What It Is: Layer height refers to the thickness of each horizontal layer that builds your 3D print. It’s measured in millimeters (e.g., 0.1mm, 0.2mm).
- Why It Matters: This setting directly affects the level of detail and smoothness of your print. Thinner layers create finer details but take longer to print, while thicker layers are faster but less precise.
- How to Use It:
- Low Layer Height (0.1mm or less): Ideal for intricate designs, such as miniatures or decorative items, where surface smoothness and detail are critical.
- Medium Layer Height (0.15mm-0.2mm): A balanced option for most prints, offering good detail without excessive print times.
- High Layer Height (0.3mm or more): Best for functional prototypes or large models where speed is more important than detail.
- Pro Tip: Match the layer height to your nozzle size. For example, a 0.4mm nozzle works best with layer heights between 0.1mm and 0.3mm.
2. Infill Density: Balancing Strength and Material Use
- What It Is: Infill density determines how much material is used to fill the interior of your print. It’s expressed as a percentage (e.g., 20%, 50%, 100%).
- Why It Matters: Infill affects the strength, weight, and material usage of your print. Higher densities make parts stronger but heavier and more expensive to produce.
- How to Use It:
- Low Density (10-20%): Perfect for decorative models or lightweight objects where strength isn’t a priority.
- Medium Density (30-50%): Suitable for functional parts that need moderate strength, such as enclosures or tools.
- High Density (70-100%): Necessary for mechanical components or parts that will endure heavy loads or stress.
- Pro Tip: Experiment with infill patterns like grid, cubic, or gyroid. For example, gyroid offers excellent strength while using less material, making it a great choice for functional parts.
3. Print Speed: The Trade-Off Between Time and Quality
- What It Is: Print speed controls how fast the print head moves while extruding filament, measured in millimeters per second (mm/s).
- Why It Matters: Faster speeds reduce print time but can compromise quality, especially on detailed models. Slower speeds improve precision and adhesion but increase print duration.
- How to Use It:
- Low Speed (40-60mm/s): Ideal for detailed prints, small models, or materials like ABS that require careful cooling.
- Medium Speed (60-80mm/s): A good balance for most prints, offering decent quality without excessive time.
- High Speed (80-100mm/s): Best for large, simple models where detail isn’t critical.
- Pro Tip: Adjust speed settings for specific parts of the print. For example, use a slower speed for outer walls to improve surface finish and a faster speed for infill to save time.
By fine-tuning these Cura settings, you can achieve the perfect balance of quality, strength, and efficiency for your 3D prints. Start with the recommended settings, then experiment to find what works best for your specific project. Remember, every model is unique, so don’t hesitate to tweak and test until you get the results you want.
Advanced Tips for Better Results
Ready to take your 3D prints from good to great? Let’s dive into some advanced tips. These settings in Cura can make a huge difference. You will see better quality, strength, and appearance in your models.
Use Supports Effectively
Supports are extra structures your printer builds. They hold up parts of your model that hang in the air. Without them, overhanging parts can droop or fail.
A good rule of thumb is the 45-degree rule. Any part of your model with an angle over 45 degrees usually needs support. This prevents the plastic from printing on nothing. Cura has a setting called “Overhang Angle” for this. You can adjust it based on your printer’s abilities.
Cura offers different types of supports. “Normal” supports build straight up. “Tree” supports grow like branches around your model. They use less material and are often easier to remove. Tree supports are great for complex shapes and figures. You can also choose where supports go. “Touching Buildplate” only creates supports that start from the print bed. “Everywhere” will build supports on top of your model if needed. Start with “Touching Buildplate” to protect your model’s surface.
Master Bed Leveling and Adhesion
A successful print starts with a great first layer. Your print needs to stick firmly to the build plate. If it doesn’t, your print can shift or warp, leading to failure. This is where adhesion settings come in.
Cura gives you three main tools for build plate adhesion:
- Skirt: A skirt is an outline printed around your model. It doesn’t touch the print. It helps prime your printer’s nozzle. This ensures the filament is flowing smoothly. It also lets you check if the bed is level before the real print begins.
- Brim: A brim is a series of lines attached to the base of your model. It increases the surface area of the first layer. This gives your print a much better grip on the bed. Brims are perfect for tall, thin models or parts with small corners. They help prevent warping by holding the edges down.
- Raft: A raft is a complete base that prints underneath your model. Your model then prints on top of this plastic platform. Rafts provide the strongest adhesion. They are ideal for models with very small footprints. They also help with warped or uneven print beds. The raft creates a perfectly flat surface for your model.
Using these adhesion settings gives your print a solid foundation.
Optimize Print Orientation
How you place your model on the build plate matters a lot. This is called print orientation. It affects both the strength and the final look of your part. Slicing software like Cura lets you rotate your model on all axes.
For strength, think about how the part will be used. FDM prints are strongest along their printed layers. They are weakest between the layers. If a part needs to withstand force, orient it so the layers are not taking the direct stress. Laying a part flat often makes it stronger than standing it up.
For aesthetics, orientation can hide layer lines. Curved or sloped surfaces tend to show layer lines more clearly. Try to place your model so that important visual surfaces are printed vertically. Also, try to position your model to minimize supports. Sometimes, a simple rotation can eliminate the need for supports on an overhang. This saves material and gives you a cleaner surface finish. Always try to print on a flat side for the best stability and results.
Troubleshooting Common Issues
Even with the best slicing settings, 3D printing can sometimes go awry. Here are solutions to three common problems—stringing, warping, and under-extrusion—to help you achieve flawless prints.
1. Stringing
Stringing occurs when thin strands of filament stretch between parts of your print, creating a web-like mess. This often happens due to excess filament oozing during travel moves.
Solution:
- Adjust Retraction Settings: Increase the retraction distance and speed in Cura. This pulls the filament back into the nozzle during travel.
- Lower Printing Temperature: High temperatures can cause filament to ooze. Reduce the nozzle temperature slightly to minimize this.
- Enable Travel Avoidance: Use Cura’s “Combing Mode” to keep travel moves within the print, reducing stringing.
2. Warping
Warping happens when the edges of your print lift off the build plate, leading to distorted parts. It’s common with materials like ABS and nylon.
Solution:
- Use a Heated Bed: Set the bed temperature according to the filament type. For ABS, 90–110°C works well.
- Improve Bed Adhesion: Apply a glue stick, painter’s tape, or a specialized adhesive to the build plate.
- Enable Brim or Raft: Add a brim or raft in Cura to anchor the print and prevent warping.
3. Under-Extrusion
Under-extrusion occurs when the printer doesn’t release enough filament, leaving gaps in your print.
Solution:
- Check the Nozzle: Ensure the nozzle isn’t clogged. Clean it if necessary.
- Increase Flow Rate: Adjust the flow rate in Cura to ensure enough filament is extruded.
- Verify Filament Quality: Poor-quality filament can cause inconsistent extrusion. Use high-quality materials for better results.
Leveraging Cura Plugins
Cura’s plugin marketplace is a treasure trove for 3D printing enthusiasts. It offers a wide range of add-ons to enhance your slicing experience, streamline workflows, and unlock new possibilities. Whether you’re a beginner or a seasoned pro, these plugins can make your 3D printing journey smoother and more efficient.
What is the Cura Plugin Marketplace?
The Cura plugin marketplace is an integrated platform where users can browse, download, and install plugins directly within the Cura interface. These plugins expand Cura’s functionality, allowing you to customize your slicing process to suit your specific needs. From improving print quality to saving time, there’s a plugin for almost every challenge.
Must-Have Plugins for Cura
Here are a few standout plugins that can elevate your 3D printing game:
- ThingiBrowser
This plugin integrates Thingiverse and MyMiniFactory directly into Cura. You can search for 3D models and import them without leaving the software. It’s a time-saver for those who frequently browse for designs. - OctoPrint Connection
Perfect for remote printing, this plugin connects Cura to OctoPrint. It allows you to send sliced files directly to your printer, monitor progress, and manage multiple printers—all from the comfort of your workspace. - Calibration Shapes
This plugin simplifies printer calibration by providing pre-designed shapes like temperature towers and retraction tests. It eliminates the need for manual G-code editing, making calibration quick and hassle-free. - Auto-Orientation
Struggling with overhangs? This plugin automatically adjusts your model’s orientation to minimize the need for supports. It’s a great tool for reducing print time and material usage. - Custom Supports Reborn
Take control of your supports with this plugin. It lets you create custom support structures tailored to your model, reducing waste and post-processing time.
How Plugins Enhance the Slicing Experience
Plugins transform Cura from a robust slicer into a fully customizable tool. They allow you to:
- Automate repetitive tasks, saving time and effort.
- Improve print quality with advanced calibration and support options.
- Streamline workflows by integrating external tools like OctoPrint.
- Customize settings for unique projects, ensuring optimal results.
Getting Started with Plugins
Installing plugins is simple. Open the Cura marketplace, browse the available options, and click “Install” on your chosen plugin. Restart Cura, and you’re ready to go. With the right plugins, you can turn Cura into a powerhouse of efficiency and creativity.
Summery
Mastering Cura slicing is a key step toward achieving flawless 3D printing results. Throughout this guide, we’ve explored essential settings, advanced tips, and troubleshooting techniques to help you optimize your prints. By understanding Cura’s features and experimenting with its settings, you can unlock your 3D printer’s full potential.
Remember, 3D printing is as much about creativity as it is about precision. Don’t hesitate to try new configurations, test different materials, and refine your approach. Each adjustment brings you closer to perfecting your craft.
Frequently Asked Questions (FAQs)
Why does Cura remove parts of my model during slicing?
This issue often occurs when the model has walls thinner than the nozzle size or insufficient resolution. Solutions include scaling up the model, using a smaller nozzle, or increasing wall thickness in the slicer settings.
What are the best Cura settings for high-quality prints?
Key settings include a smaller layer height for detail, proper infill density for strength, and optimized print speed. Adjusting these settings based on the material and model can significantly improve print quality.
How can I fix adhesion problems on the build plate?
Use adhesion methods like brims or rafts. Ensure the bed is level, clean, and at the correct temperature for the filament being used.
What is the purpose of Cura’s infill patterns, and which one should I use?
Infill patterns balance strength, material use, and print time. For example, “Gyroid” offers high 3D strength, while “Grid” is great for 2D strength and speed.
How do I troubleshoot stringing and blobs in my prints?
Stringing can be reduced by adjusting retraction settings and lowering print temperature. Blobs may result from incorrect flow rates or pauses during printing, which can be fixed by using plugins like Arc Welder.
What are Cura plugins, and how can they improve my slicing experience?
Plugins like Arc Welder, Linear Advance, and custom supports enhance Cura’s functionality. They help reduce G-code size, improve print quality, and add advanced features for better results.