
How to Make 3D Models for Printing: According to industry experts, the 3D printing market is expected to grow to 24.31 billion dollars by 2021, which reflects a growing interest in this technologically advanced process. It presents an ideal opportunity for companies and individuals to explore 3D modeling for printing.
My expertise in 3D printing allows me to tell you there are countless opportunities for creative and customized sexual followers when they design their own specific models. The ability to create a 3D model is essential for virtually everyone, whether they are casual users or business people.
How to make 3D models for printing: Use software: Blender, Tinkercad, or SketchUp. Make the model solid, manifold, and fits.
Related internal pages:
- sovol-sv03-3d-printer-review/
- how-to-create-3d-models-for-printing-free/
- how-to-use-3d-printer-software/
- how-to-choose-a-3d-printer/
- bambu-lab-a1-mini-the-perfect-entry-level-3d-printer-desktop-3d-printer-a1-series/
Choosing the Right Software for 3D Modeling
User-Friendly Software for Beginners
TinkerCAD is ideal for those who are new to 3D modeling. Its interface is very straightforward, making it easy for anyone to use. With just a few basic shapes, you can build your models. TinkerCAD can be used from any location since it is web-based. Your work is saved, so you don’t have to worry about it.
You will find many tutorials and guides to help you learn. For now, TinkerCAD is great for creating simple models you can print. Using TinkerCAD for assets is a good point-and-click program for beginner 3D modeling, especially if you’re looking to pair it with the best 3d printer for small business setups.
Advanced Tools for Complex Designs
Autodesk Fusion 360 and Blender both serve an excellent purpose for complex 3D design. Fusion 360 offers generative design, which provides artificial intelligence assistance in finding possible design concepts. So it provides a simulation feature to test the designs before making any real ones. Multi-axis machining enhances the accuracy and reduces production time in this case.
Depending on the model, Blender can take over modeling from multiple angles. Blender’s images are realistic, thanks to its rendering capabilities that maintain visual projects. It also offers free-form modeling with T-spline, allowing for the creation of hand-held models with precise control over their shape. Since Blender is open-source software, the community keeps it up to date, helping users create better designs that can help them make money from a 3D printer.
Each has its own strengths, but Fusion 360 is unique in that it offers simultaneous use of CAD, CAM, and CAE functions. Blender is capable of handling models and renderings with a good degree of artistic complexity. Also, they blend well with complex design jobs, making for a great combination.
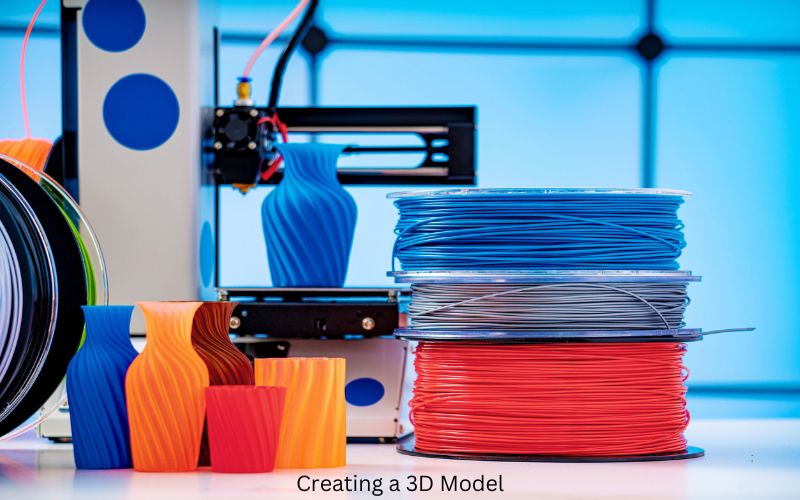
Key Steps in Creating a 3D Model
Initial Design Concepts
Start your 3D modeling process by conceptualizing as many ideas as possible, regardless of their feasibility. Ask yourself questions starting with ‘What if’ and let your imagination run wild. ‘What if my model has more than one function?’ Or how about it being designed so that it can easily be disassembled?
Imagine how you would use or modify a cereal box as inspiration for a design. Create a list of all the ways you could use or change it.
Your next step should be to create rough sketches of your ideas. Before you begin working in the computer, make sure that there are no design flaws, such as size or shape. Sketching is an essential step before 3D modeling, as it allows you to create more complex designs.
Using CAD Software Effectively
The following tips can make learning CAD software easier for novices:
- Learn Keyboard Shortcuts: To speed up your work, use shortcuts. They allow you to carry out tasks without having to navigate through menus.
- Use Layers: Layers allow you to compartmentalize different sections of your design. They allow you to edit them and provide a separate view for each section.
- Create Templates: Layers allow you to compartmentalize different sections of your design. They allow you to edit them and provide a separate view for each section.
- Find Online Help: You can find many guides and forums on the internet. These guides offer handy tips and help from other CAD users.
- Practice Often: Repeatedly using CAD will improve your skills. Taking time to practice regularly ensures that you gradually learn its different features and tools.
You would definitely improve your CAD skills and output if you combined this info with the protocols above.
Impact of Material Choice on the Final Print
For a better understanding of how various materials and objects will impact the final result, consider how they will affect:
| Material | Aesthetic Impact | Functional Impact |
| PLA | Bright colors, smooth surface | Ideal for decorative models without stress |
| ABS | Matte finish, paintable | Handles higher temperatures and impacts |
| PETG | Glossy, translucent options | Good for water resistance and chemical exposure |
| TPU | Many color options | Great for flexible parts |
| Nylon | Limited colors, tough surface | Suitable for gears and moving components |
Choosing the right material requires balancing the aesthetics of the object, its form and function, its size, and the printing conditions.
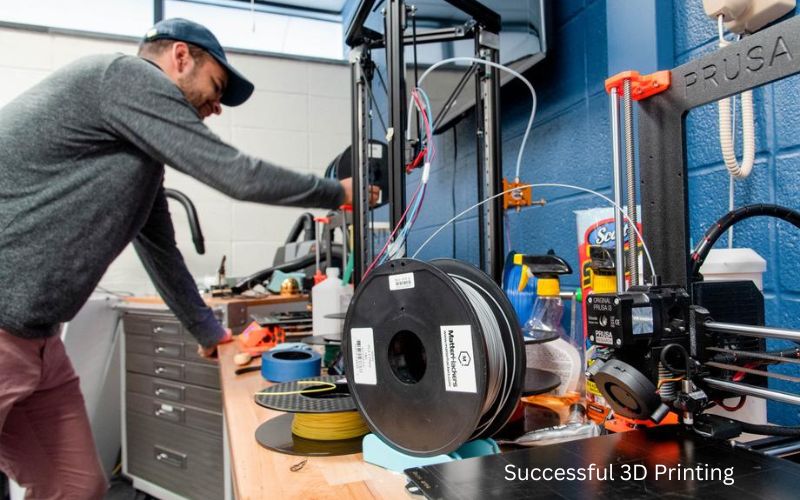
Designing for Successful 3D Printing
Understanding Design Constraints
To create a successful 3D print, certain design limitations must be considered, such as overhangs and wall thickness.
Overhangs: Keep It Supported
If overhangs lack support, they tend to droop. Here are three ways to deal with overhangs:
- Limit Angles: To maintain print stability, keep the angles at 45 degrees or less.
- Add Supports: The print won’t fail if you use supports when the angle is steep or there are a lot of overhangs.
Wall Thickness: Get It Right
Wall thickness affects the strength and appearance of your print:
- Stick to Basics: Use a minimum of 1.2mm for most projects to ensure a robust print.
- Match Material: Materials vary in flexibility. Thicker walls are required for more flexible materials.
You must adjust those above so that you will produce strong and aesthetically pleasing 3D models.
Optimizing Models for Printability
The key to successful prints is 3D models prepared correctly. For instance, make sure your model has solid geometry. In other words, it is a solid that has no holes. It is best to reduce material and time costs by removing the model’s shell. If the model is not thick, printing will proceed more quickly.
Be careful with the overhanging features. Be cautious with angles exceeding 50 degrees, as they may be visually supported. Short, flat bridges can be printed without support if they are sufficiently short. Finally, ensure that your model parts are well-interconnected, allowing you to control the number of errors and produce a neat and high-quality print.
Pre-print Adjustments for Optimal Outcomes
To achieve the best results, editing information before printing is essential. Here is a table to assist you:
| Adjustment Type | Reason | Optimal Settings |
| Wall Thickness | Ensures strength and avoids breakage | Set based on printer capability and model requirements |
| Supports | Prevents collapse of overhangs | Add supports for angles over 45 degrees |
| Orientation | Reduces supports, increases strength | Balance print time with structural performance |
Tips:
- Consider the material’s shrinkage and the printer’s resolution if seams or gaps need to be avoided.
- Make sure the tolerances for the parts are accurate after printing. These details are vital to achieving a quality final product.

Unique Design Features to Experiment
Incorporating Moving Parts
You don’t have to put them together later on. Here are some tips to enable you to create these models correctly.
- Air Gaps: A good suggestion is to design the gaps to be two times the thickness of the print layers so that they won’t stick together when the part is printed.
- Design Tips: Plan your parts using the software. Make sure they are coordinated and can fit together. Consider how different components will interact with each other.
- Support Materials: Water-soluble materials facilitate correct part printing and do not restrict movement.
- Finishing Touches: After printing, sand surfaces to reduce friction. Some moving parts may benefit from some lubricant.
The model can be created on a 3D printer in just a few easy steps, allowing for movable elements.
Creating Textured Surfaces
Create textures on your 3D prints to enhance their aesthetics and to increase grip or airflow. Below are some simple techniques for designing textural surfaces.
Benefits of Texturing
Wood or leather textures can be replicated. Textures offer a variety of touches, can conceal imperfections on surfaces, and can even incorporate company logos.
Tools for Creating Textures
- Blender: This free, open-source software offers robust texturing tools and modeling capabilities.
- Mudbox: Known for its advanced sculpting and texturing features, Mudbox is ideal for high-resolution projects.
- ZBrush: Popular among professionals, ZBrush excels in creating detailed textures for complex models.
- SolidWorks: While primarily used for industrial design, SolidWorks can incorporate textures for more comprehensive projects.
Practical Tips for Applying Textures
- Texture Depth: Test different depths starting with 1 mm.
- Texture Size: Ensure uniformity by using “hexes per inch” as a unit of measurement.
- Software Application: Using GrabCAD Print, you can easily adjust textures before or during slicing.
- Test Curved Surfaces: Make sure textures look good on curves by testing them.
You can enhance both aesthetics and usability by utilizing the above 3D printing techniques.
Preparing Your Model for Printing
Exporting the Right File Formats
Choosing the right file format for your 3D printed model is crucial. STL and OBJ are the two basic formats available.
It is a simple file that contains a triangle-based mesh. Many 3D printing applications and devices support STL. It can be used with simple single colored prints. STL format can be easily converted from TinkerCAD and several other CAD applications.
In contrast, OBJ files offer more complexity and color and texture mapping capabilities. This allows them to create more complex models, which require more than just shape, but more comprehensive representation. In order to get those details in the exported OBJ files, you will likely have to perform some additional process.
Tips for Exporting:
- Check Support: Make sure your 3D printer can use your chosen file format.
- Fix Errors: Use tools to check for mistakes in your model before printing.
- Pick Right Format: Use STL for basic prints and OBJ for detailed ones.
Remember, the right format helps ensure a successful 3D print.
Using Slicing Software
In 3D printing, slicing software such as Cura translates digital objects into G-code commands that 3D printers can read, which instruct them on how to assemble each layer.
Its user-friendly interface makes it popular with many users. There are also several options available to modify the infill percentage, layer height, or printing head speed, thereby improving print quality while reducing printing time.
High-quality prints can only be achieved with good slicing; Cura’s interface is easy to understand for new designers. You can import models and settings, then generate G-code, ensuring your printer works smoothly and your models are perfectly accurate. No matter whether you’re a novice or a pro, you cannot function effectively without Cura.
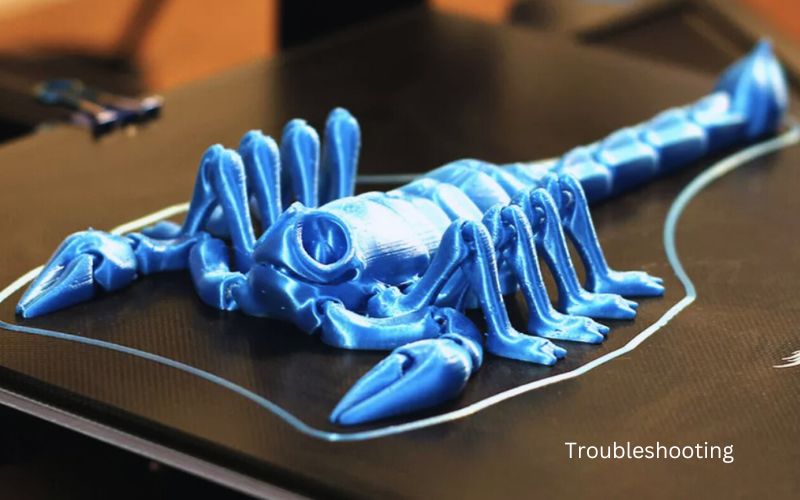
Troubleshooting and Tips for Beginners
Common Modeling Mistakes to Avoid
There are a few tips which will help you avoid making the same mistake over and over again when creating a 3D model for printing:
- Excessive Overhangs: It is best to construct your model in a way that avoids excessive overhangs, otherwise, provide support to the printer.
- Improper Wall Thickness: Thin walls are prone to breakage. However, if they are too thick, you will end up overusing materials. Aim for a moderately thick component to achieve both strength and flexibility.
- Incorrect Mesh Resolution: To produce a high-quality print, it is essential to balance a good resolution with a good print speed.
- Inaccurate Scaling: Verify the model’s dimensions before beginning the project to avoid the consequences of oversized or undersized prints.
- Ignoring Material Guidelines: Ensure a successful print by adhering to these tips. Every material has its own temperature and cooling requirements.
Future printing and 3D models will be smoother and more accurate with these suggestions in mind.
Improving Your 3D Printing Skills
Here are some real, practical techniques to help you improve your 3D printing skills:
- Calibrate Your Printer: Check that your printer is configured correctly. Level the build plate and set the nozzle height. Also make sure maintenance is done regularly.
- Design Smart: When developing your design ideas, remember the constraints of your printer. Start with basic forms and progress to more intricate designs as you improve.
- Try Different Materials: Experimenting with different filaments is essential. Testing facilitates knowing which filament is most effective.
- Use Slicer Software: Slicing software enhances print quality. Additionally, adjust parameters like infill and speed for optimal results.
- Join Online Communities: Look for community forums or groups dealing with 3D printing. They can provide assistance and advice.
- Keep Learning: You can learn about 3D modeling and 3D printing online by taking courses.
- Print Often: The more you practice by printing, the more you will learn and improve.
As people gain experience with 3D printing, these tips will surely help. Also, be open to new ideas and enjoy the experience.
Wrapping Up
As a result of 3D printing, concepts can be transformed and real-world objects can be made. Whether you’re a beginner or an advanced user, it’s a great asset. This innovation paves the way for new ways to make. Try it out and discover your joy. Whether for entertainment or work, 3D printing aids in completing tasks.
Frequently Asked Questions
What are the best software options for 3D modeling, depending on my skill level?
Beginner: Start with TinkerCAD (web-based and user-friendly) or SketchUp for simple designs and learning the basics.
Advanced: Use Autodesk Fusion 360 (for engineering, CAD, CAM, and generative design) or Blender (for artistic, complex, and free-form modeling/sculpting).
What file format should I use to prepare my 3D model for printing?
Most 3D printers and slicing software primarily use the STL (.stl) format, as it is simple and triangle-based. For models requiring color and complex texture mapping, the OBJ (.obj) format is a better choice.
Should I use sharp 90-degree corners in my design?
It is generally best to avoid sharp corners, as they can weaken the part and affect print accuracy. Instead, use fillets (rounded corners) or chamfers (angled edges) at the base and on vertical corners. This reduces stress concentration points, improves stability, and helps mitigate the Elephant’s Foot effect (the spreading of the first layer) at the base.
What is the purpose of slicing software, and which ones are commonly used?
Slicing software (like Cura or PrusaSlicer) takes your digital STL or OBJ model and converts it into a series of printable layers, generating G-code. This G-code contains all the instructions for the 3D printer, including print speed, temperature, and nozzle movements.
How does the orientation of my model on the print bed affect the final result?
The print orientation determines where layer lines fall, which significantly affects the part’s strength and surface finish.
- Strength: Parts are typically weakest along the layer lines (Z-axis). Orient the part so that the main stress or force is applied in the X and Y axes, perpendicular to the layers, for maximum strength.
- Surface: Vertical surfaces may show a “staircase effect.” Orient the part to hide aesthetically critical surfaces or to place necessary support structures on non-critical surfaces.