
3D technology was on track to grow by $ 24.8 billion in 2016, so now is the right time for one to begin their 3D printing endeavors. It is essential to correctly set up your best 3D printers for small businesses, regardless of whether you are working on a fun or professional project. With my years of experience working with 3D printing, I am ready to assist you in setting everything up. Bring your ideas to life by opening your imagination. Learn now how to set up a 3d printer.
Read More
Artillery M1 Pro Review – example printer
Creality Ender 3 Pro – beginner printer setup
How to 3D Print Something from a Picture – practical project
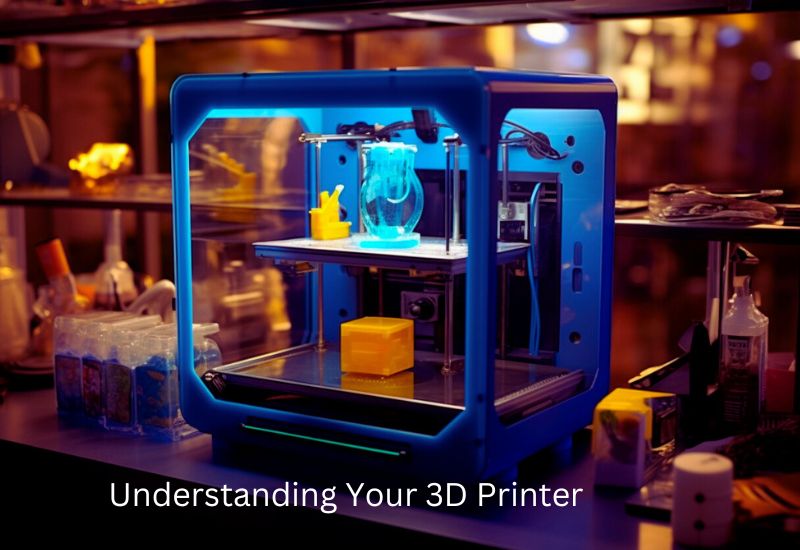
Understanding Your 3D Printer
Types of 3D Printers and Kits
The variety of 3D printer options can feel overwhelming. However, understanding the types of kits available can help you choose the one that works best for you.
- Fully Assembled 3D Printers:
Fully assembled 3D printers are plug-and-play, perfect for beginners seeking hassle-free setups. Though pricier, they save time and simplify printing. - Semi-Assembled 3D Printer Kits:
Semi-assembled kits have partial assembly and setup instructions, requiring some bolting and wiring. They’re affordable and ideal for intermediate users. - DIY 3D Printer Kits:
DIY kits are the most customizable and cost-effective option, but they require technical skills and patience. They are ideal for hobbyists who enjoy hands-on projects and want to learn the inner workings of their machines.
Tips for Choosing a Beginner-Friendly Printer:
- Look for printers with positive reviews for ease of setup, such as the Creality Ender 3 or Anycubic Kobra.
- Opt for fully or semi-assembled models if you’re new to 3D printing.
- Consider features like auto-leveling and touchscreens for a smoother learning curve.
- Start with a printer supporting PLA filament—it’s beginner-friendly and forgiving.
Tools and Accessories You’ll Need
To set up and maintain your 3D printer, having the right tools and accessories on hand is essential. Here’s what you’ll need to get started.
Basic Tools:
- Screwdrivers: A Phillips and flathead set for tightening screws and bolts.
- Pliers: Helpful for holding parts and cutting filament.
- Cutting Tool: A sharp blade or wire cutter to trim filament or modify parts.
- Cleaning Cloths: These keep your printer’s bed and nozzle free of dust and debris.
Necessary Accessories:
- Filament: PLA is great for beginners due to its ease of use and cost-effectiveness.
- Lubricants: Use printer-safe lubricants, like silicone grease, to keep moving parts smooth.
- Safety Gear: Wear safety goggles when working with heated components or trimming filaments. A pair of heat-resistant gloves is also proper.
- Spare Parts: Some printers include spare parts, such as nozzles or bed-leveling springs. Keep them close for quick replacements.
With proper tools and accessories, you can ensure smoother printing processes that save you time and hassle. Learn now how to set up a 3d printer.
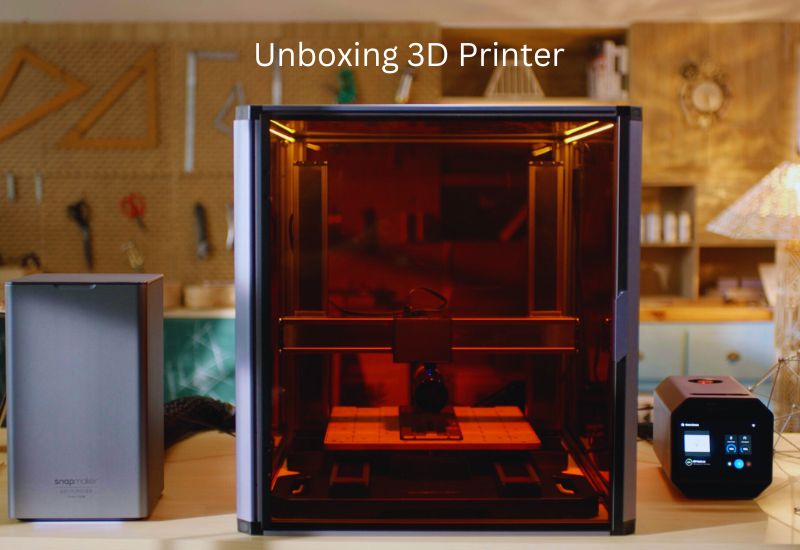
1: Unboxing Your 3D Printer
Unboxing a 3D printer can be exciting, but it requires careful handling to prevent damage. Here’s how it should be done:
Inspect and Check Components
Check everything off the packing list as you remove each component of your 3D Picture Printer. Take care of the box and read the rulebook. If anything is missing or damaged, please get in touch with the manufacturer immediately. Place screws and small parts in containers, and don’t toss the packaging until you’ve confirmed that all items are included.
Tips to Stay Organized
- Use labeled containers: Place screws and small components in labeled cups or bowls.
- Keep cables neatly coiled: Use twist ties or rubber bands to keep wires from tangling.
- Take photos: If everything looks complicated, snap pictures of how the parts were packed. They can be helpful references later.
- Save the manual: Place it in a visible spot to avoid losing it during assembly.
Choose an Ideal Workspace
Select a flat, sturdy surface, such as a desk, to ensure a stable assembly process. Pay attention to details and provide enough light. Select an area away from dust, temperature changes, and sunlight to prevent deformation or damage. Learn now how to set up a 3d printer.
Additional Precautions
- Avoid extreme temperatures: Locate the workspace away from direct sunlight and heating vents to maintain stable conditions.
- Keep the space clutter-free: Clear the area of unrelated items to prevent distractions or misplaced components.
- Plan for power access: Place the setup close to an outlet. You’ll need it to power up and test.
Follow these steps to make your unboxing experience as smooth, efficient, and hassle-free as possible. Stay organized—you’re already halfway there!
2: Assemble the Printer Frame
Setting up your printer frame is a crucial step that lays the foundation for successful 3D printing. Here’s how to do it precisely.
Step-by-Step Assembly Instructions
The Creality Ender 3, Anycubic i3 Mega, and the others require you to assemble their frames using the parts they come with. To simplify the process, follow these steps:
- Unpack and Organize Parts
Carefully unbox and organize components, ensuring nothing is missing. Use the manual for a quick inventory check. - Attach the Base and Vertical Frame
Start by assembling the base for stability. Securely attach the vertical frame using the provided screws and brackets, tightening them gently with a wrench or screwdriver. - Install the Gantry and Horizontal Rails
Attach the gantry to the vertical frame, then fit the horizontal rails on top to ensure smooth printing motion. - Connect Belts and Extruder Mounts
Install the belts for the X and Y axes, ensuring the extruder mount glides smoothly along the rails. - Secure with Screws
Fasten screws securely by hand first, then use your tool for a half-turn. Avoid overtightening to prevent damage.
Tips to Avoid Common Mistakes
- Don’t Rush the Process
Skipping steps or hurrying can lead to misalignments that may affect print quality later. Work methodically, checking each connection. - Loosen Up Before Tightening
If a part doesn’t align perfectly, loosen the adjacent screws slightly, realign it, and then tighten again. Forcing it into place could damage the parts. - Refer to Your Manual Frequently
While the general approach is similar across models, your 3D printer’s manual might have specific instructions or warnings.
Double-Check the Frame for Stability
Once assembled, the stability of your printer frame is vital for accuracy in your final builds. To ensure a sturdy and upright frame, take these additional measures:
- Use a Spirit Level
Use a level to check the frame’s horizontal and vertical alignment. Adjust as needed to prevent tilting, which helps reduce vibrations for cleaner prints. - Tighten Uneven Connections
If parts wobble, locate the loose screws or bolts and tighten them properly, ensuring the frame remains aligned. - Test Movement
Move the gantry and extruder head across the rails. All movements should be smooth, with no jerks or friction. Learn now how to set up a 3d printer.
3: Connect Electrical Components
Properly connecting the electrical components of your 3D printer is essential for safe and efficient operation.
Attach Wires and Cables
- Match Labels: Use the manual to identify ports and match them with labeled or color-coded cables (e.g., “extruder” or “motor”).
- Secure Connections: Insert cables firmly into their respective ports, ensuring a snug fit to avoid malfunctions.
- Double-Check Setup: Compare your work with the wiring diagram in the manual to confirm accuracy and avoid errors.
Check Voltage Settings
- Locate Voltage Switch: Find the slider or toggle on the power supply.
- Set Correct Voltage: Ensure the switch is set to 110V for the USA.
- Verify Before Powering: Double-check the setting to prevent hardware damage.
Taking time to secure wires and verify voltage ensures your printer runs smoothly and safely. Learn now how to set up a 3d printer.
4: Level the Print Bed
A level bed is crucial for ensuring your 3D prints stick and maintain accuracy. Here’s how to do it manually or automatically:
Manual Bed Leveling
- Use a Calibration Tool
Place a sheet of paper under the nozzle. Adjust until the paper slides with slight resistance. - Adjust Screws at Each Corner
Tighten or loosen the screws under the bed, ensuring consistent resistance at all corners. - Check the Center
Move the nozzle to the center and test the resistance. Repeat adjustments if needed for even leveling.
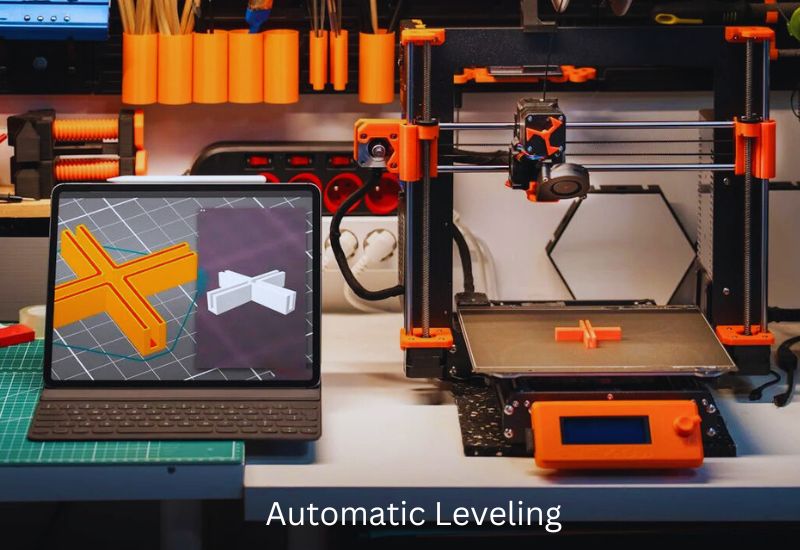
Automatic Leveling (If Available)
- Activate Auto-Leveling
Use your printer’s menu to start the auto-leveling feature. - Follow Instructions
The printer measures the bed height using its sensor and adjusts automatically. - Test the Setup
Print a small test design to ensure proper bed adhesion.
Regardless of the method, recheck bed leveling periodically to maintain optimal print quality. Learn now how to set up a 3d printer.
5: Calibrate the Printer
Why Calibration Matters
It is essential for accurate printing and operational correctness. It facilitates the efficient cooperation of components, such as the extruder and bed, thereby improving print quality by providing more definition and reducing minor defects. Calibrated printers also use less material, prevent failed prints, and minimize device depletion. Learn now how to set up a 3d printer.
XYZ Axis Alignment
Proper XYZ alignment guarantees accurate dimensions and prevents motion errors during printing. Follow these steps:
- Stabilize the Frame
- Tighten all screws to ensure the frame is securely in place and level.
- Test Axis Movements
- You can request a 100-mm move along the X, Y, or Z axis via the printer menu and measure the movement using calipers.
- Adjust Steps
- To fine-tune axis settings in the printer menu, use (Desired Distance / Actual Measured) x Current Step Value = New Step Value.
- Check Belts
- Ensure belts are snug—neither too tight nor too loose. This promotes precise movement.
- Reprint and Verify
- Print a test cube and measure its dimensions. Adjust as needed to ensure accuracy.
- Level the Bed
- Use a sheet of paper to measure the nozzle distance at various points on the bed. Adjust screws to achieve uniform leveling.
Accurate calibration reduces printing errors and helps your printer perform reliably for all your projects. Explore how to set up a 3d printer.
6: Load the Filament
Loading filament is a straightforward process when done correctly. Here’s how to get it set up efficiently.
How to Load Filament Correctly
- Heat the Nozzle
Preheat your printer’s nozzle to the recommended temperature of your filament. For PLA, this is usually around 190-220°C. - Cut the Filament Tip
Cut the end of the filament at a 45-degree angle. The angled tip slides smoothly into the extruder, preventing jams. - Feed the Filament
Insert the filament into the extruder, guiding it gently until you feel resistance at the nozzle. For Bowden setups, ensure it flows through the Bowden tube without catching. - Test Flow
Extrude a small filament manually to verify smooth flow and remove any remnants from previous prints.
Best Filaments for Beginners
Polylactic Acid (PLA) is one of the most popular options for beginners since it is easy to work with, melts at a low temperature, and can be used with various printers. Additionally, PLA is quite affordable, allowing you to experiment with it and refine your techniques before moving on to ABS or PETG.
From PLA to unlocking the hidden potential of your 3D printer, learn how to load filament efficiently. Explore how to set up a 3d printer.
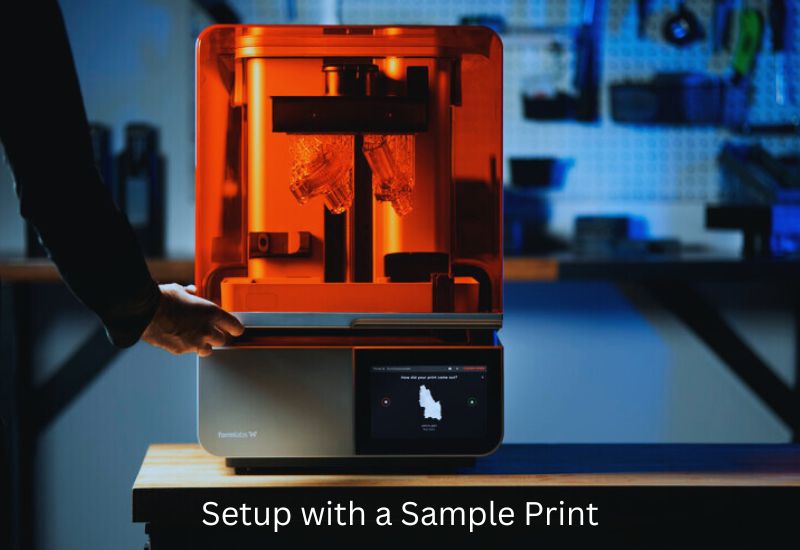
7: Test Your Setup with a Sample Print
Test your setup on a sample print to ensure it runs smoothly. Simple, successful tests boost confidence and identify setup issues.
Choosing a Simple Design
Start with a basic configuration and a pre-sliced model provided with your printer. If there are no sample files, find free sites such as Thingiverse for starter files if the models, including calibration cubes, have been adjusted to your machine’s setup and do not need to be adjusted further in the slicer. Explore how to set up a 3d printer.
Monitor the First Print
Pay close attention as your printer begins:
- Bed Adhesion: Ensure the first layer sticks firmly to the bed. If not, re-level the bed or adjust the nozzle height.
- Print Quality: Watch for consistent lines without gaps or stringing. Adjust temperatures if needed.
- Filament Flow: Confirm steady extrusion. Fix clogs or reload the filament if interruptions occur.
- Nozzle Movement: The nozzle should glide smoothly without dragging or hesitating.
Once printing is complete, inspect your result. Identifying imperfections early helps fine-tune your setup before larger projects. Explore how to set up a 3d printer.
8: Maintain and Lubricate Your Printer
Why Maintenance Matters
Most mechanical devices require regular maintenance; your 3D Printer is no different. Smooth motion is essential to achieving better printing quality in sufficiently lubricated devices. When this is not done, crucial components, such as the Z-axis rod and guide rails, may wear out, resulting in mechanical or printing issues. 3D Printers that are regularly lubricated run more efficiently and quietly, making them more durable. Explore how to set up a 3d printer.
Key Areas for Lubrication
- Z-Axis Lead Screw: Lubricate to maintain vertical motion stability.
- Steel Rods and Guide Rails: Apply lubricant to ensure smooth sliding movements.
- Bearing Points: Add lubrication to steel tracks for smooth operation, following manufacturer recommendations for PTFE-based lubricants.
Simple Cleaning Tips
- Clean Surfaces: Wipe rods, rails, and the print bed with rubbing alcohol to remove dust and grease.
- Remove Debris: Use compressed air for fans and brushes for extruder buildup.
- Keep it Tidy: Regularly clear filament scraps and failed prints to avoid jams.
A consistent maintenance routine ensures excellent print quality and reliable performance for every project. Explore how to set up a 3d printer.
9: Update Firmware and Software
Keep Your Firmware Up-to-Date
Updating your 3D printer’s firmware ensures optimal performance, bug fixes, and access to new features. Here’s how to do it efficiently:
- Check for Updates
Visit the manufacturer’s website and download the latest firmware compatible with your printer model. - Prepare Your Printer
Format an SD card or connect your printer via USB, depending on the update method required. Then, add the firmware file to your device. - Install the Firmware
Restart the printer with the firmware in place. It will automatically update or prompt installation instructions on the screen. For USB updates, use tools such as the Arduino IDE. - Recalibrate Settings
Post-update and recalibrate bed leveling, temperatures, and other settings, as some configurations may reset.
Beginner-Friendly Slicing Software
Proper slicing software simplifies your workflow and optimizes print quality. Here are two great options:
- Ultimaker Cura
It is free, versatile, and beginner-friendly. Download it, add your printer profile, and adjust infill and print speed settings. Then, slice and save your file for printing. - PrusaSlicer
It is ideal for beginners and advanced users. It supports various printers and materials. To use it, simply install the software, select your printer, adjust the settings, and then export the sliced file.
Stay updated and use reliable software to enhance your 3D printing experience effortlessly! Discover how to set up a 3d printer.
10: Explore and Start Printing
Finding Creative Designs
Once your 3D printer is set up, we can start experimenting! First, check known sites such as Thingiverse and Printables for free models. You can download them as decorative items or useful gadgets. MyMiniFactory has complex miniatures and Sketchfab has elaborate ones, so if you want more options, you should get licenses first, because some models have restrictions on how they can be used. Discover how to set up a 3d printer.
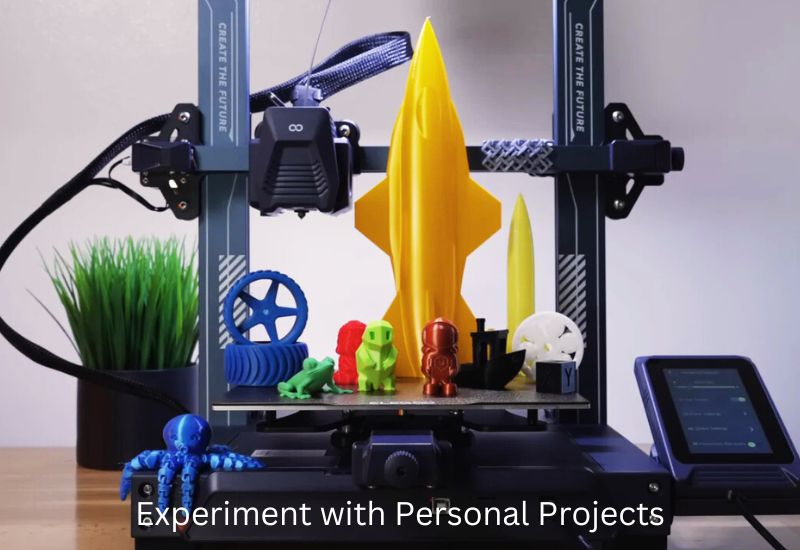
Experiment with Personal Projects
3D printing reaches a new level when users create their own models. How do you create your own models? For beginners, TinkerCAD is an easy-to-use web-based 3D application, and once they gain confidence, Fusion 360 can be used. To get started, everyone should create simple keychains or coasters to explore new shapes. After a while, you might develop customized tools, gifts, or just decorative pieces. The only limit is your fantasy!
Wrapping Up
The first time using your 3D printer is thrilling, and you can fabricate household items or print almost any design you envision. There are endless possibilities with the correct configuration. One can enhance their creativity by expressing ideas, improving their ability to devise solutions, and even creating unique gifts. As one’s imagination reaches new horizons in reality, whether for leisure or greater purposes, it proves how far it can go. Discover how to set up a 3d printer. Get started with 3D printing today!
Frequently Asked Questions
What are the main types of 3D printer kits, and which is best for a beginner?
There are three main types:
DIY Kits: Most customizable but require technical skills and patience, ideal for hobbyists who enjoy hands-on projects.
Fully Assembled: Plug-and-play, perfect for beginners seeking a hassle-free setup.
Semi-Assembled: Requires some bolting and wiring, suitable for intermediate users.
What are the essential tools and accessories needed for setup?
Beyond what comes with the printer, you should have screwdrivers (Phillips and flathead), pliers, a cutting tool (for filament), and cleaning cloths. You’ll also need filament (PLA is recommended for beginners), printer-safe lubricants, and safety goggles.
What is the most critical step when connecting the electrical components?
You must locate the voltage switch (a slider or toggle) on the power supply and ensure it is set to the correct local voltage (e.g., 110V for the USA). Failing to verify this setting before powering on can cause hardware damage.
How do I fix a filament jam or clog?
You should pause the print, heat the nozzle to the standard printing temperature for the filament, and then gently remove the blockage using the tools provided with the printer or by following the manufacturer’s instructions.