
I’ve been using Blender for 3D printing for years—both in hobby projects and small business work. If you’re just starting out, here’s a simple truth: how to use Blender for 3D printing can seem tricky at first, but Blender can take you from idea to print-ready model without expensive software. You’ll need to set it up right—adjust the units, enable a built-in print add-on, and fix a few model issues.
This quick guide will show you how to prepare models in Blender step by step, so your 3D prints come out clean, strong, and accurate. Whether you’re printing at home or using the best 3d printer for small business, this is your starting point.
Why Choosing Blender Over Traditional CAD Tools Gives U.S. Makers a Budget-Friendly 3D-Printing Edge
If you’re getting started with 3D printing, learning how to use Blender is an important skill. Blender offers a huge advantage for makers in the U.S. It’s completely free and open-source, which means you don’t have to worry about expensive software fees. This saves money that you can spend on materials or upgrading your printer.
Blender combines modeling, checking, and exporting your 3D files all in one place. This all-in-one setup makes learning faster and smoother, eliminating the need for multiple programs. Plus, Blender has a built-in 3D-Print Toolbox that helps you spot and fix common printing issues before they become a problem.
On top of that, the Blender community is huge and very active. You can find tons of tutorials, forums, and advice anytime you hit a snag. This support makes troubleshooting quick and less frustrating for both beginners and experienced users—especially when working with a 3D Picture Printer that requires fast model fixes.
Choosing Blender gives you a powerful, budget-friendly way to create print-ready 3D models without breaking the bank.
Setting Up Blender for Print Accuracy—Units, Grid, and Add-ons in Five Minutes
Getting Blender ready for 3D printing is easier than you think. With a few simple steps, you can ensure your models turn out the right size and print perfectly.
Download the Latest Blender Version and Turn On the 3D-Print Toolbox Add-on
Start by downloading the newest stable Blender version. Then, open Blender and go to Edit > Preferences > Add-ons. Search for “3D-Print Toolbox” and check the box to activate it. This handy tool helps check your model for common printing problems and makes exporting easier.
Change Units to Millimeters and Adjust the Grid to Match Your Printer
Next, go to the Scene Properties panel (looks like a cone). Under Units, switch the system to Metric and set the scale to 0.001 to work in millimeters. This matches most 3D printers’ settings. Also, adjust the grid size in the viewport to reflect this scale, so you see your model’s real size.
Save a Custom Startup File for a Clean Workspace Without Camera and Lights
For a tidy workspace, delete the default camera and lights in the 3D view. Then, go to File > Defaults > Save Startup File to keep this setup every time you open Blender. This makes modeling smoother without distractions.
Fast Modeling Techniques That Keep Your 3D Models Manifold and Watertight
When designing for 3D printing in Blender, it’s important to make sure your models are solid and error-free. Manifold and watertight models print more efficiently and save time.
Using Box, Curve, and Boolean Methods to Prevent Problem Edges
Start by building your design with simple shapes like boxes and curves. These basics are easier to control and less likely to create messy edges. When learning how to use Blender for 3D printing, it’s important to use Blender’s Boolean tool carefully when combining parts. It helps join or cut shapes, but watch out for tiny gaps or overlapping faces that can cause print errors.
Checking Wall Thickness, Overhangs, and Sharp Edges in Real Time
Always check if your model’s walls are thick enough to print without breaking. Thin walls often cause weak prints. Also, look for overhangs—parts that hang out in the air—because they may need support material. Sharp edges can be fragile, so consider softening them slightly for stronger prints.
Using Decimate, Remesh, and Solidify Modifiers to Save Filament and Strengthen Prints
Blender has great tools to optimize your models for printing. If you’re learning how to use Blender for 3D printing, modifiers like Decimate reduce complex meshes, cutting down print time and file size. Remesh helps clean up messy models by creating smoother, even surfaces. The Solidify modifier adds thickness to thin parts, making your print more challenging and more reliable.
How Solidify Helps You Hollow Out Models to Save Material
Want to save filament? Use the Solidify modifier to hollow your design. Hollow prints use less plastic and finish faster, but still keep their strength where it counts.
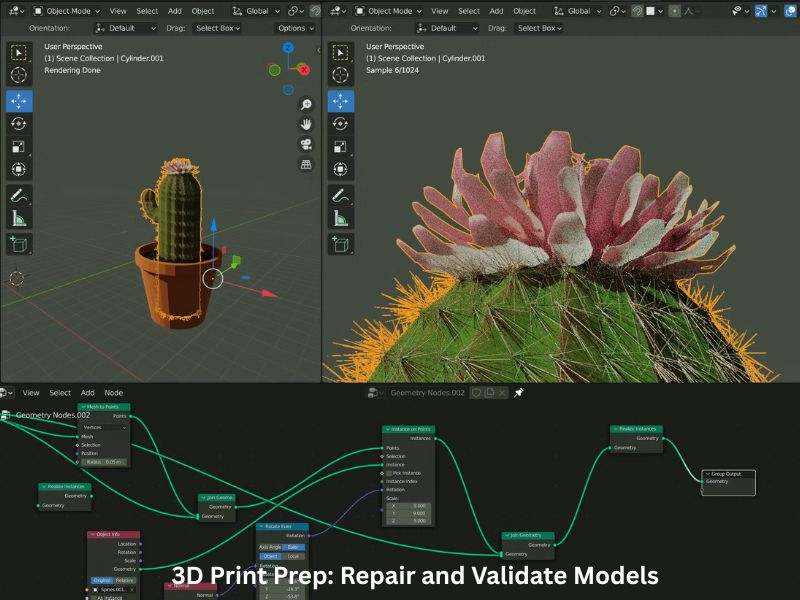
Repair and Validation: Make Sure Your Model Is Ready for 3D Printing
Before printing, double-check your model for common issues that can ruin a print.
Spotting Non-Manifold Edges, Flipped Normals, and Problem Areas
Non-manifold edges happen when Blender gets confused about what’s inside or outside your shape. Flipped normals are when the faces point inward instead of outward. Both can cause your print to fail. Also, watch for intersecting or overlapping parts, as they can confuse the slicer software.
Quick Fixes with Blender’s 3D-Print Toolbox and Simple Manual Tricks
Blender’s 3D-Print Toolbox add-on is a lifesaver when learning how to use Blender for 3D printing. It can find and fix many errors with a click, like making your model manifold again. But sometimes, you’ll want to go in manually, zooming close and cleaning up small problems for the best results.
Using Edge-Length Overlay to Measure and Ensure Perfect Fits
If your print has parts that need to fit together—like hinges or snap-ons—use Blender’s edge-length overlay. It helps you measure exact sizes so everything fits just right after printing.
Exporting Correctly—Locking Real-World Scale in STL or 3MF
Getting your model’s scale right before printing is super important. Follow these simple steps to avoid surprises:
- Apply all transforms before export so slicers read true size
Always select your model and press Ctrl + A to apply all transforms. This resets scale, rotation, and position so your slicer sees the real size. - Choose STL vs. 3MF and include unit metadata to avoid scale surprises
STL files are common but don’t store units. Set Blender’s units to millimeters to keep size consistent. If you want to keep unit info and color, export as 3MF using an add-on. - Re-import and slice a quick test cube to verify the export
After export, bring the file back into Blender or your slicer and check the dimensions. Slice a simple test print to ensure everything aligns perfectly.
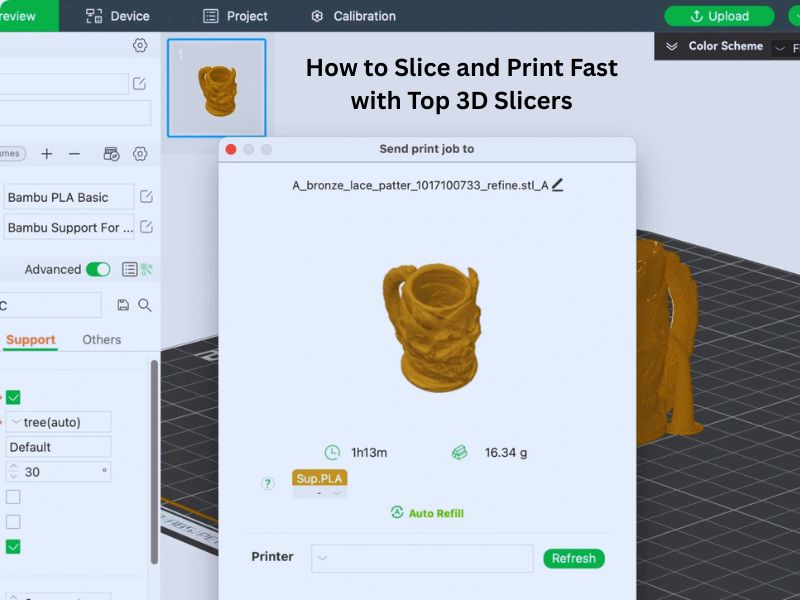
Quick Slicing and First Print—Going from STL to PLA in Cura, PrusaSlicer, or Bambu Studio
Once your model is ready, slicing prepares it for printing:
- Import, select material profile, and preview layers
Open your slicer, import the file, select the appropriate material profile (e.g., PLA), and review each layer carefully for any issues. - Adjust layer height, infill, and supports based on earlier mesh checks
Fine-tune settings like layer height and infill density. Add supports where needed to prevent drooping or failed prints.
Post-Processing Essentials—Cleanup and Finish for Professional Results
Cleaning up your print is key to great-looking results:
- Safe support removal, sanding, and priming
Remove supports gently to avoid damage. Sand rough spots smooth, then apply primer if you plan to paint. - Simple painting workflow if you exported vertex colors
If your model has vertex colors, use light coats of paint to keep details sharp and vibrant.
Bonus Sections Competitors Don’t Cover (Extra Value You Can’t Miss)
Take your Blender skills further with these advanced tips:
- Harnessing Blender Geometry Nodes to create parametric, user-customizable models on demand
Geometry Nodes let you build flexible, adjustable models without starting from scratch every time. This is great for making custom products quickly. - Automating batch mesh repairs and STL exports with a five-line Python script—perfect for print farms
If you handle many files, a short Python script can fix common mesh problems and export them automatically. This saves time, especially when managing multiple printers.
Troubleshooting cheat-sheet—quick fixes for the five most common Blender-to-3D-print errors
Starting with Blender for 3D printing can come with some hiccups. Don’t worry—these fast fixes will help you solve the most common issues and get your prints just right.
Model prints too small? Double-check the unit scale before exporting
Blender’s default unit is meters, but most 3D printers expect millimeters. If you skip this step, your print might come out tiny or oddly sized. When learning how to use Blender for 3D printing, always set your units to millimeters and apply any transformations before exporting your file. This keeps your model’s size true from Blender to your printer.
Slicer shows holes or gaps? Use “Make Manifold” and check your normals
Holes occur when your model isn’t completely sealed, which slicers struggle to handle. If you’re learning how to use Blender for 3D printing, Blender’s “Make Manifold” tool can fix these gaps automatically. Also, make sure your model’s normals—the directions faces point—are all facing outward. Flipped normals can confuse slicers and lead to print errors.
File size too large? Try the Decimate modifier to reduce polygons without losing detail
A huge file can slow down slicing and clog your printer’s memory. The Decimate tool helps shrink your model’s polygon count while keeping its shape. This speeds up slicing and reduces print time without compromising quality.
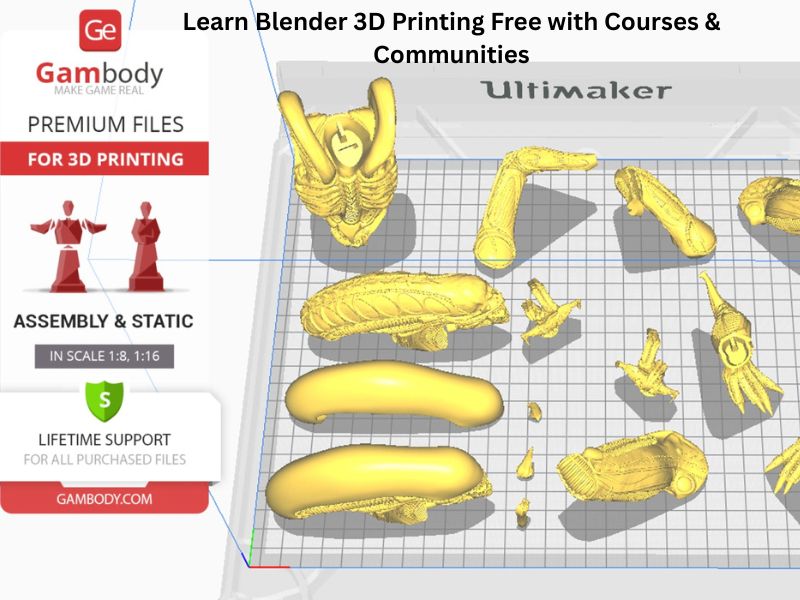
Next steps—free learning resources and active communities to boost your Blender 3D printing skills
Blender and 3D printing can feel overwhelming at first. Luckily, there are great free courses and helpful communities ready to support you.
Explore free courses like PrintLab and Blender Studio’s 3D Printing tutorials
These beginner-friendly courses break down complex steps into easy lessons. They guide you through everything from modeling basics to export settings. If you want to learn how to use Blender for 3D printing, following these courses will make your Blender 3D printing journey smoother and faster.
Join forums, Discord groups, and Reddit communities for quick advice
Do you need help or feedback on using Blender for 3D printing? Places like Blender Artists Forum, Blender Discord servers, and the r/3Dprinting subreddit have passionate users ready to assist. Getting involved lets you learn from real experiences and avoid common mistakes.
Final Thought
Blender gives you a cost-free and straightforward way to create 3D print-ready models, whether you’re a beginner or running a small business. Learning how to use Blender for 3D printing starts with setting your units right, cleaning your model with Blender’s tools, and exporting files that slicers understand. Take your time to test and adjust before the final print. With some practice and helpful resources, you’ll gain confidence and make better prints every time. Dive in, keep experimenting, and enjoy turning your digital designs into real-world creations.
Frequently Asked Questions
Why should I use Blender for 3D printing instead of traditional CAD software?
Blender offers a significant advantage as it is free and open-source, saving you expensive software fees. It is an all-in-one tool that handles modeling, model checking, and file exporting. Its community support and built-in features (like the 3D-Print Toolbox add-on) make it highly capable for preparing print-ready models.
What is the most critical setup step for dimensional accuracy?
You must change the default scene units to match the scale of your 3D printer. Go to Scene Properties > Units and set the system to Metric and the unit scale to 0.001 to work in millimeters (mm). This ensures your model imports into the slicer software at the correct size.
What does it mean for a model to be “watertight” or “manifold”?
A model must be watertight (or manifold) to be 3D printed successfully. This means the model forms a closed volume with no holes, gaps, intersecting faces, or single-dimensional planes. Every edge must be connected to exactly two faces. Non-manifold geometry confuses the slicer software and can lead to print failure.
How do I ensure my model is strong enough to print?
You must check the wall thickness. For Fused Deposition Modeling (FDM) printers, a recommended minimum thickness is generally 1–2 mm. Use the Solidify Modifier to easily give volume and consistent thickness to thin surfaces or to hollow out a model to save material.
What is the maximum overhang angle I should design for without requiring supports?
The maximum angle that a 3D printer can reliably print without support structures is generally 45 degrees from the vertical axis. Designing features with a shallower angle (less than 45 degrees) can help minimize the need for post-processing support removal.