Creating a personalized 3D photo lamp using lithophane 3d printing is a rewarding project for both beginners and seasoned makers. With just a 3D printer, some filament, and a cherished photo, you can craft a unique lamp that brings your memories to light. If you’re considering starting a small business, investing in the best 3d printer for small business can help you turn this hobby into a profitable venture. This guide will walk you through each step, from selecting the perfect image to assembling your lamp, ensuring a smooth and enjoyable experience.
Getting Started with Lithophane 3D Printing
Essential Tools and Materials You’ll Need
3D Printer (FDM/FFF Type) An FDM (Fused Deposition Modeling) or FFF (Fused Filament Fabrication) 3D printer is ideal for beginners. These are user-friendly and commonly available models, such as the Creality Ender 3 or Anycubic i3 Mega. They work great for lithophane 3d printing due to their precision and reliability.
PLA or PETG Filament PLA is easy to print with and ideal for beginners. PETG offers more durability, making it suitable for designs that require extra strength. Use light-colored filament for better light diffusion in your lithophane.
LED Light Source (e.g., LED Strip or Lamp Base) An LED light source is essential for illuminating the lithophane. LED strips or lamp bases work well, lighting without generating excess heat.
Computer with Internet Access A computer is necessary for preparing and slicing the 3D model. Access to the internet helps you download files and use online lithophane 3d printing generators.
Choosing the Right Image for Your Lithophane
Importance of High-Contrast Images Choose images with good contrast for the best 3D printing results. High-contrast images make light and dark areas stand out, helping to create a clearer lithophane.
Recommended Image Dimensions and Formats For high-quality results, use images with at least 300 DPI and in formats like JPEG or PNG. For lithophane 3D printing, match the image dimensions to the size of the lithophane you want to print for the best clarity.
Avoiding Images with Too Much Detail or Noise Avoid images that are overly detailed or noisy. Such images may not print well, resulting in a less defined lithophane. Clear, simple photos work best.
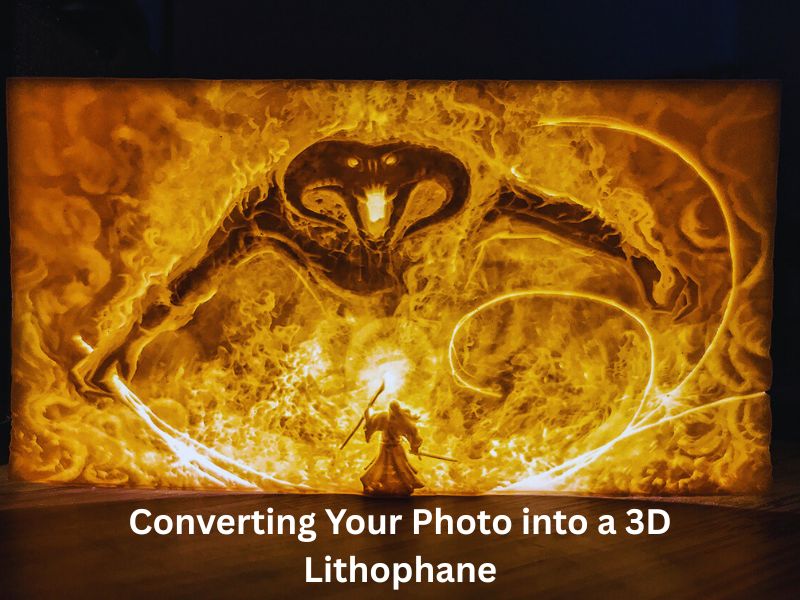
Converting Your Photo into a 3D Lithophane
Using Online Lithophane Generators
Online lithophane generators are simple to use and help convert your images into printable 3D models. Here’s a quick guide on how to use them:
Step-by-Step Guide on Using Tools Like 3DP Rocks Lithophane Generator or ItsLitho
Upload Your Image: Start by uploading the image you want to convert.
Adjust Image Settings: Modify the brightness, contrast, and dimensions to ensure the image is clear and suitable for 3D printing.
Select Model Type: Choose the shape (flat, cylindrical, etc.) for your lithophane.
Generate the Model: The generator will process the image and create a 3D model in STL format.
Download the File: Save the STL file to your computer, ready for printing.
Adjusting Settings for Optimal Results
Brightness and Contrast: Ensure there’s enough contrast to distinguish fine details.
Dimensions: Set the correct size based on your printer’s capabilities.
Thickness: Adjust the thickness to achieve the desired depth and light diffusion.
Orientation: Choose how the model will be printed (flat or curved).
Saving Your File in STL Format
Once you’re happy with the settings, download the file in STL format, which is compatible with most 3D printers.
Alternative Methods: Using CAD Software
To gain more control over the design, you can create your lithophane 3d printing model from scratch using CAD software like Fusion 360 or Blender.
Overview of Software Options Like Fusion 360 or Blender
Fusion 360: A professional CAD tool for detailed modeling and simulation.
Blender: A free 3D modeling software for creating custom designs.
Basic Steps to Create a Lithophane from Scratch
Import Your Image: Convert your image to grayscale and import it into the software.
Create a Plane: Generate a base plane for your lithophane.
Displace the Image: Apply the image as a texture and use displacement to create depth variations based on brightness.
Refine the Model: Smooth the design to ensure it’s suitable for 3D printing.
Export the Model: Save the final design as an STL file.
When to Choose This Method Over Online Generators
Opt for CAD software if:
You need custom shapes or advanced design features.
Your project requires a more detailed or intricate model.
You want greater control over the final output.
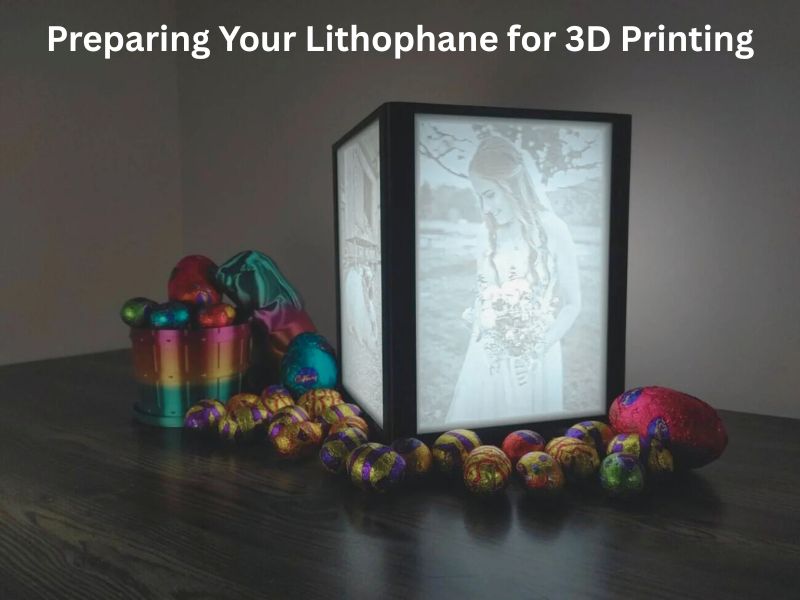
Preparing Your Lithophane for 3D Printing
Slicing the Model for Your 3D Printer
Using Slicing Software (e.g., Cura, PrusaSlicer):
Layer Height: Use a fine layer height, such as 0.12 mm, to capture intricate details.
Wall Perimeters: Increase the number to 99 or more to ensure a solid structure.
Infill Density: For a solid print, set the infill to 100% or use 99% infill with multiple wall perimeters.
Print Speed: Reduce print speed to 20–35 mm/s to enhance detail accuracy.
Temperature Settings: For PLA, set the bed temperature to 60–65°C for the first layer, then 55°C for subsequent layers.
Tips for Reducing Print Time and Material Usage:
Use a 0.4 mm Nozzle: This standard size balances detail and speed.
Print Vertically: Position the lithophane upright to minimize the need for supports and reduce print time.
Optimize Shell Settings: Adjust wall thickness and infill to balance strength and material efficiency.
Troubleshooting Common Printing Issues
Dealing with Warping and Adhesion Problems:
Use a Heated Bed: Maintain a consistent bed temperature to prevent warping.
Apply Adhesive: Use a glue stick or painter’s tape to improve bed adhesion.
Enable Brims or Rafts: These can help with adhesion, especially for small or intricate prints.
Ensuring Consistent Extrusion:
Check Extruder Calibration: Ensure the extruder is properly calibrated to avoid under or over-extrusion.
Monitor Filament Quality: Use high-quality filament to prevent inconsistencies in extrusion.
Adjusting Print Settings for Different Filament Types:
PLA: Use standard settings with a heated bed.
ABS: Increase bed temperature and consider an enclosure to reduce warping.
PETG: Adjust print speed and temperature settings to accommodate the material’s properties.
By carefully preparing your lithophane model and addressing common printing challenges, you can achieve high-quality results with your lithophane 3d printing projects that showcase the intricate details of your design.
Assembling Your 3D Photo Lamp
Attaching the Lithophane to the Light Source
Choosing the Right Lamp Base or Fixture
Selecting the appropriate lamp base is crucial for both aesthetics and functionality. In lithophane 3D printing, choosing the right base helps showcase the design effectively. Opt for a base that complements the size and shape of your lithophane. For instance, cylindrical bases work well with cylindrical lithophanes, while square bases suit square or rectangular designs. Ensure the base is sturdy enough to support the weight of the lithophane and has provisions for mounting or securing it. The right combination of lamp and lithophane enhances the impact that a 3D Picture Printer Can Instantly Transform into a glowing piece of art.
Securing the Lithophane to the Base
To attach the lithophane securely:
Use Adhesive: Apply a strong adhesive, such as E6000 or hot glue, to the edges of the lithophane.
Position Carefully: Align the lithophane with the light source, ensuring the image faces outward and is centered.
Press Firmly: Hold the lithophane in place for a few minutes to allow the adhesive to set.
Allow to Dry: Let the adhesive cure completely before moving the lamp to prevent shifting.
Ensuring Proper Alignment for Optimal Lighting
Proper alignment ensures the best visual effect:
Center the Lithophane: Ensure the lithophane is centered on the base to prevent uneven lighting.
Adjust Angle: If the base allows, adjust the angle of the lithophane to direct light as desired.
Check Stability: Gently shake the lamp to ensure the lithophane is securely attached and doesn’t wobble.
Wiring and Installing the LED Light
Safety Precautions When Handling Electrical Components
Safety is paramount when working with electrical components:
Unplug Power Sources: Always disconnect power sources before handling electrical parts.
Use Insulated Tools: Employ insulated tools to prevent accidental short circuits.
Check for Damage: Inspect wires and components for any visible damage before use.
Connecting the LED Strip or Bulb to a Power Source
To wire the LED:
Prepare the LED: If using an LED strip, cut it to the desired length.
Attach Wires: Solder or connect wires to the LED terminals, ensuring correct polarity.
Connect to Power: Attach the other ends of the wires to a suitable power source, such as a USB adapter or battery pack.
Secure Connections: Use electrical tape or heat shrink tubing to insulate and secure connections.
Testing the Light to Ensure Functionality
Before final assembly:
Power On: Connect the power source and turn on the LED.
Check Illumination: Ensure the LED lights up and the lithophane is evenly illuminated.
Adjust Position: If necessary, adjust the position of the LED or lithophane to achieve desired lighting effects.
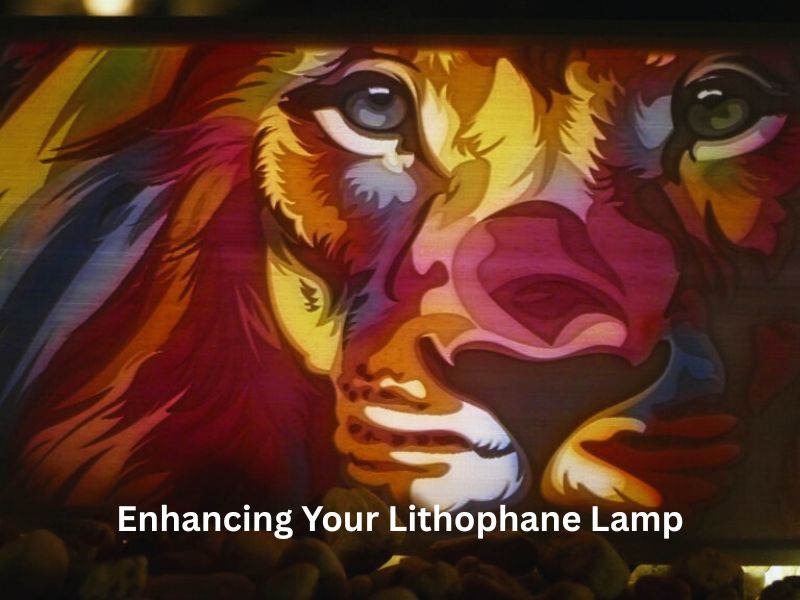
Enhancing Your Lithophane Lamp
Adding a Diffuser for Even Lighting
Materials Suitable for Diffusers
Consider using materials that diffuse light effectively to achieve a soft, uniform glow. Common choices include:
Acrylic Sheets: Opt for frosted or matte finishes to scatter light evenly.
Polycarbonate Panels: Durable and impact-resistant, suitable for various designs.
Translucent PLA: When 3D printing, select translucent filament to allow light diffusion.
Frosted Glass: Provides a classic, elegant look with excellent light scattering.
DIY Methods to Create a Diffuser
Creating a diffuser can be a simple DIY project:
3D Printing: Design a diffuser that fits snugly around your lithophane.
Repurposing Materials: Use items like frosted plastic containers or acrylic sheets cut to size.
Sanding: For existing clear materials, lightly sand the surface to create a frosted effect that diffuses light.
Benefits of Using a Diffuser
Incorporating a diffuser offers several advantages:
Even Lighting: Eliminates harsh spots, providing a consistent glow.
Enhanced Aesthetics: Softens the lamp’s appearance, adding a cozy ambiance.
Improved Image Clarity: Reduces glare, making the lithophane’s details more visible.
Customizing the Lamp Design
Painting or Decorating the Lamp Base
Personalize the base of your lamp to match your style:
Painting: Use acrylic paints to add color or patterns.
Decals: Apply vinyl decals for intricate designs.
Staining: For wooden bases, staining can enhance the natural grain.
Adding Frames or Stands for Aesthetic Appeal
Elevate the visual appeal by incorporating frames or stands:
Wooden Frames: Provide a rustic or classic look.
Metal Stands: Offer a modern, industrial feel.
Custom Designs: 3D print unique frames or stands to match the theme of your lithophane.
Incorporating Multiple Lithophanes for a Multi-Photo Lamp
Create a dynamic display by integrating multiple lithophanes:
Rotating Mechanism: Design a base that allows the lithophanes to rotate, showcasing different images.
Stacked Layers: Arrange several lithophanes in layers for a 3D effect.
Themed Collections: Group lithophanes by themes like family portraits or scenic landscapes.
Wrapping Up
Creating a 3D photo lamp using lithophane 3D printing is both accessible and rewarding. With just a 3D printer, some filament, and a cherished photo, you can craft a unique lamp that brings your memories to light. This guide has walked you through each step, from selecting the perfect image to assembling your lamp, ensuring a smooth and enjoyable experience. Whether you’re a hobbyist or exploring new business opportunities, this project creatively showcases your favorite images.
A lithophane is a 3D-printed image that becomes visible and clear only when light is shined through it from behind. The image is created by varying the thickness of the material: thicker areas appear darker (blocking more light), while thinner areas appear lighter (allowing more light through).
The most common use is to create a personalized 3D photo lamp or backlit art, turning cherished photographs into unique, glowing pieces of physical art.
The easiest method is to use a free online lithophane generator (like 3DP Rocks Lithophane Generator or ItsLitho). You upload your image, adjust settings (contrast, size, shape), and download the resulting STL file.
You need to secure the lithophane to a lamp base or fixture using a strong adhesive (like E6000 or hot glue). Ensure the lithophane is centered and properly aligned with the light source for optimal, even illumination.

 Skip to content
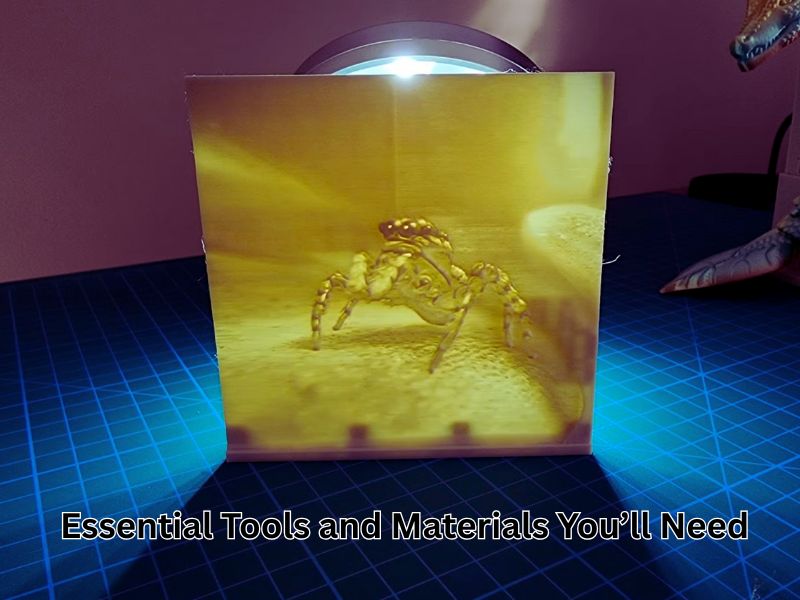
 Optimized by Seraphinite Accelerator