 Skip to content
As a seasoned 3D printing expert, I’ve witnessed firsthand the magic of lithophanes—translucent 3D images that come to life when backlit. These creations are more than just prints; they’re personalized works of art. With the advent of user-friendly lithophane maker tools, turning your cherished photos into illuminated masterpieces has never been easier. If you’re considering the best 3d printer for a small business, this guide will help you choose the right tools to start creating incredible 3D designs that captivate and inspire.
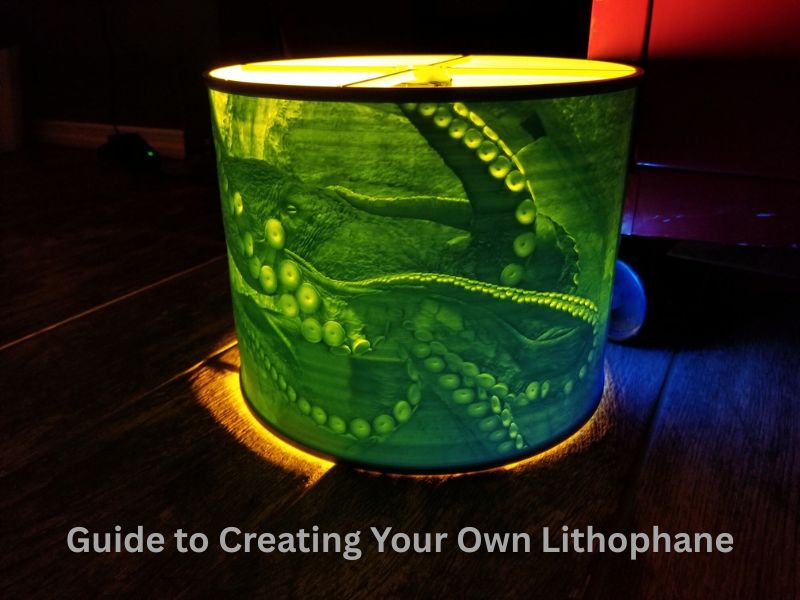
Step-by-Step Guide to Creating Your Own Lithophane
Selecting the Perfect Image for Your Lithophane
Choosing High-Contrast Images
Start with a high-contrast image to achieve a striking 3D effect in your lithophane. Images with distinct differences between light and dark areas translate better into the varying thicknesses needed for a detailed lithophane. If you’re creating Portraits with a 3D Picture Printer, avoid overly dark or light photos, as they may lack the depth required for a clear 3D representation.
Editing Images for Optimal Results
Before converting your image, consider enhancing its contrast and brightness. Using software like Photoshop or GIMP, adjust the levels to ensure the image has a good range of tones. Converting the image to grayscale can also help focus on the light and dark areas, which is crucial for the lithophane’s depth when using a lithophane maker.
H3: Converting Images into 3D Models
Using Online Lithophane Generators
For beginners, online tools like ItsLitho offer an easy way to convert images into 3D lithophane models. These platforms allow you to upload your edited photo and automatically generate a 3D model ready for printing. They often provide previews to ensure the final product meets your expectations.
Advanced Conversion Techniques
Software like Blender allows for manual adjustments to the 3D model, providing more control over the final design. This approach allows for fine-tuning of the lithophane’s depth and details, ensuring a high-quality print. Using a lithophane maker tool alongside Blender gives you even more flexibility in creating intricate designs. Tutorials are available online to guide you through this process.
Preparing for 3D Printing
Choosing the Right Filament
Selecting the appropriate filament is crucial for achieving the desired translucency in your lithophane. White PLA is commonly recommended due to its excellent light diffusion properties, which enhance the lithophane’s backlit effect.
Setting Up Your 3D Printer
For optimal results, print your lithophane vertically to capture the fine details. Adjust your slicer settings to use a layer height of 0.1 to 0.2 mm, ensuring high resolution. An infill of 100% is often suggested to maintain the structural integrity of the lithophane. Printing at a slower speed can also improve the quality of the final product.

Creative Applications of Lithophanes
Personalized Gifts and Home Décor
Creating Custom Night Lights and Lamps
Lithophane night lights and lamps are cherished for their ability to bring personal memories to life. By converting favorite photographs into 3D printed lithophanes, you can craft bespoke lighting pieces that glow warmly when backlit. These items serve as heartfelt gifts for birthdays, anniversaries, or memorials.
To create these, select a high-contrast image and use a lithophane generator to convert it into a 3D model. Print the model using white PLA filament for optimal translucency. Pairing the lithophane with LED lighting components like USB-powered LED strips ensures safe and efficient illumination.
Designing Photo Frames and Wall Art
Beyond lighting, lithophanes can enhance home décor as unique photo frames and wall art. By embedding lithophane panels into frames, you create dynamic displays that reveal detailed images when lit from behind. These pieces, created using a lithophane maker, add a personalized touch to living spaces and make thoughtful gifts.
When designing wall art, consider the placement of light sources to maximize the visual impact of the lithophane. Natural light from windows or strategically placed lamps can enhance the depth and detail of the image.
Business and Commercial Uses
Offering Lithophane Products
The demand for personalized items has opened opportunities for entrepreneurs to offer lithophane products. Starting with a single 3D printer and a lithophane maker, you can create a range of items such as night lights, lamps, ornaments, and keychains. Platforms like online marketplaces provide space to showcase and sell these custom creations.
To begin, develop a portfolio highlighting your lithophane products. High-quality photographs that capture the illuminated details can attract potential customers. Customization options, such as personal messages or customer-supplied photos, add extra value.
Marketing Strategies for Lithophane Businesses
Effective marketing is crucial for the success of a lithophane maker’s business. Use social media platforms like Instagram and Pinterest to showcase your products with engaging visuals and short stories. Sharing your creation process can help connect with your audience and build trust.
You can also collaborate with influencers or content creators in the home décor or gift space to reach new buyers. Encourage your happy customers to share their photos and reviews to act as real-life testimonials. Running seasonal promotions or launching limited-edition designs can also help generate buzz and boost sales.
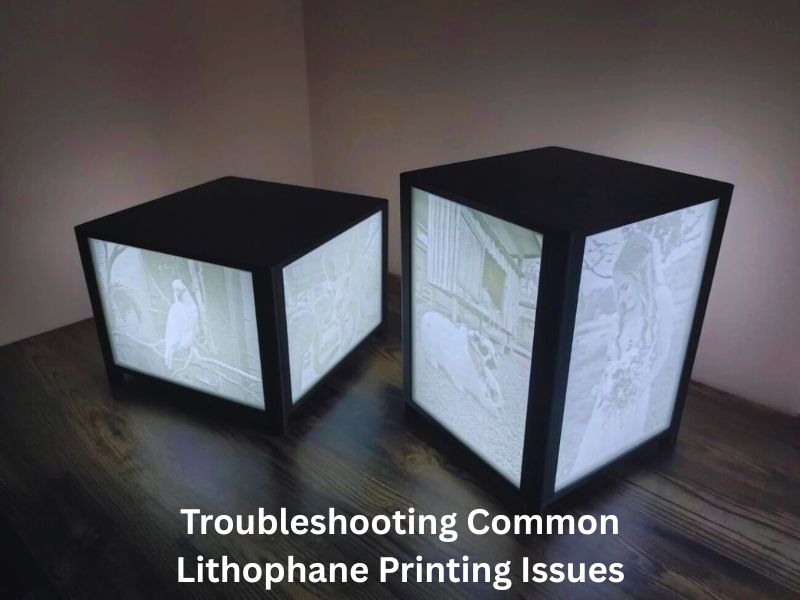
Troubleshooting Common Lithophane Printing Issues
Creating a crisp and vibrant lithophane requires more than a good photo and a 3D printer. A reliable lithophane maker can help you achieve the best results. Common challenges like poor layering and weak lighting can ruin the final look. Here’s how to fix those issues effectively.
Addressing Layering and Detail Problems
Layering issues often come from incorrect print settings or mechanical hiccups. To improve detail and clarity, follow these key tips:
- Layer Height
Use a layer height between 0.1 mm and 0.16 mm. This helps balance detail and print time while reducing visible lines. - Print Orientation
Print vertically along the Y-axis. This orientation takes advantage of better resolution and minimizes vibration during tall prints. - Print Speed
Keep your print speed slow, around 25–40 mm/s. Slower speeds give your printer more control, leading to sharper details. - Wall Thickness and Infill
Set the wall thickness to about 10 lines and use 100% infill. This ensures even density and avoids unwanted light leaks. - Bed Adhesion
Use a brim that’s at least 8 mm wide to help the print stick. This prevents tall lithophanes from tipping over mid-print.
Optimizing Lighting for Best Display
Great lighting can make or break a lithophane. Here’s how to bring out the best in your design:
- Backlighting
Place a light directly behind the lithophane. Even LED panels or light boxes work great for showing every detail clearly. - Light Intensity
Adjust brightness based on your room’s lighting. Too much light can wash out the image, while too little makes it hard to see. - Diffusion
Use a diffuser or a frosted plastic sheet to spread the light evenly. This softens harsh spots and enhances the overall look.
With the correct settings and lighting, your lithophane prints will shine—literally and visually. Let your designs do the talking by giving them the care they deserve.
Advanced Techniques: Taking Your Lithophanes to the Next Level
Incorporating Color into Lithophanes: Methods for Adding Color to Your Designs
Adding color to lithophanes transforms them from simple light-and-shadow pieces into vibrant 3D art. Here are some useful methods:
1. Backlit Color Prints
Print your lithophane in white filament and place a colored image behind it. Light shines through both layers, blending color and depth to create a vivid display. This method is easy and doesn’t require advanced tools.
2. Multi-Color Filament Printing
If you have a multi-material 3D printer, you can assign different colors to specific sections of your lithophane. This lets you print in full color. It requires careful slicing and printer setup but delivers stunning results.
3. Post-Processing with Paint
Paint your lithophane using translucent acrylics or dyes. You can highlight certain parts or recreate the full-color photo effect. This method offers control and creativity, but it also requires time and patience. With the help of a lithophane maker, you can also fine-tune your design for even more personalized results.
Exploring Multi-Layered Lithophanes: Creating Depth and Dimension with Multi-Layer Designs
Multi-layered lithophanes give your prints depth and storytelling power. Here are a few techniques:
1. Layered Image Stacking
Stack two or more lithophanes created with a lithophane maker using different images or patterns. The result changes as the lighting or your viewing angle shifts. It’s perfect for hidden messages or dynamic visual effects.
2. Variable Thickness for Light Control
Design parts of your lithophane with different thickness levels. Thicker parts block more light, while thinner sections glow brighter. This technique adds dramatic shading and a realistic 3D look.
3. Combining Different Filament Types
Use various filament materials in separate layers. Pair translucent and opaque filaments to enhance contrast and texture. This will add richness and a layered feel to your design.

Unique Insights: Enhancing Your Lithophane Projects
Innovative Lighting Solutions: Creative Ways to Illuminate Lithophanes
Edge lighting is a powerful way to bring lithophanes to life. Placing LED strips around the edges gives a clean, even glow. It helps show more detail and avoids harsh lighting spots, especially when using a lithophane maker to create detailed 3D designs.
Using dimmable LED lights lets you control brightness for different moods. USB-powered strips are easy to install and energy-efficient. Colored LED lights add extra flair, letting you change the background hue and create unique effects.
Educational Applications of Lithophanes: Using 3D Prints in Classrooms
Lithophanes are great learning tools in schools. Students can turn images into 3D prints using a lithophane maker and learn how design, light, and depth work together.
These projects boost creativity and help with understanding 3D concepts and materials. They also promote teamwork and problem-solving as students design, test, and improve their prints.
Wrapping Up
Creating lithophanes is a rewarding endeavor for both hobbyists and small businesses. By selecting high-contrast images and utilizing user-friendly lithophane maker tools, you can transform photographs into stunning 3D art. Whether you’re crafting personalized gifts or exploring educational applications, lithophanes offer endless possibilities for creativity and expression. With the proper techniques and a bit of practice, your lithophane projects can captivate and inspire, adding a unique touch to any space or occasion.
What is a lithophane?
A lithophane is a 3D-printed relief image that reveals detail when backlit—thin areas are bright, thick areas are dark.
What file formats are used for lithophanes?
Common formats include STL and OBJ for 3D models, often generated from images with lithophane conversion tools.
What resolution is good for lithophanes?
Higher resolutions (e.g. 0.1–0.2 mm layer height) yield finer detail in the final image.
Which 3D printers are good for lithophanes?
Printers with good XY accuracy, stable mechanics, and fine layer control (e.g., CoreXY machines) produce better lithophanes.
How to convert a photo into a lithophane model?
Use software like Image-to-Lithophane, Cura’s lithophane mode, or dedicated web tools to map brightness to thickness.
What materials work well for lithophanes?
White or light-colored opaque filaments (like PLA) are typically used so the light diffuses evenly.
Is it better to print vertical or flat?
Many creators print lithophanes nearly vertical (or curved) to optimize light diffusion and reduce surface artifacts. Many creators print lithophanes nearly vertical (or curved) to optimize light diffusion and reduce surface artifacts.
Do lithophanes need supports?
Minimal supports are best—too many supports can damage fine detail, so orient and slice carefully.
How to light a lithophane for display?
Use a flat, diffuse backlight (e.g., LED panel) behind the lithophane for optimal effect.
Are UV filters or coatings needed?
For long-term display, applying a UV protective coating or placing the lithophane behind UV-filtering glass can help preserve brightness.
