
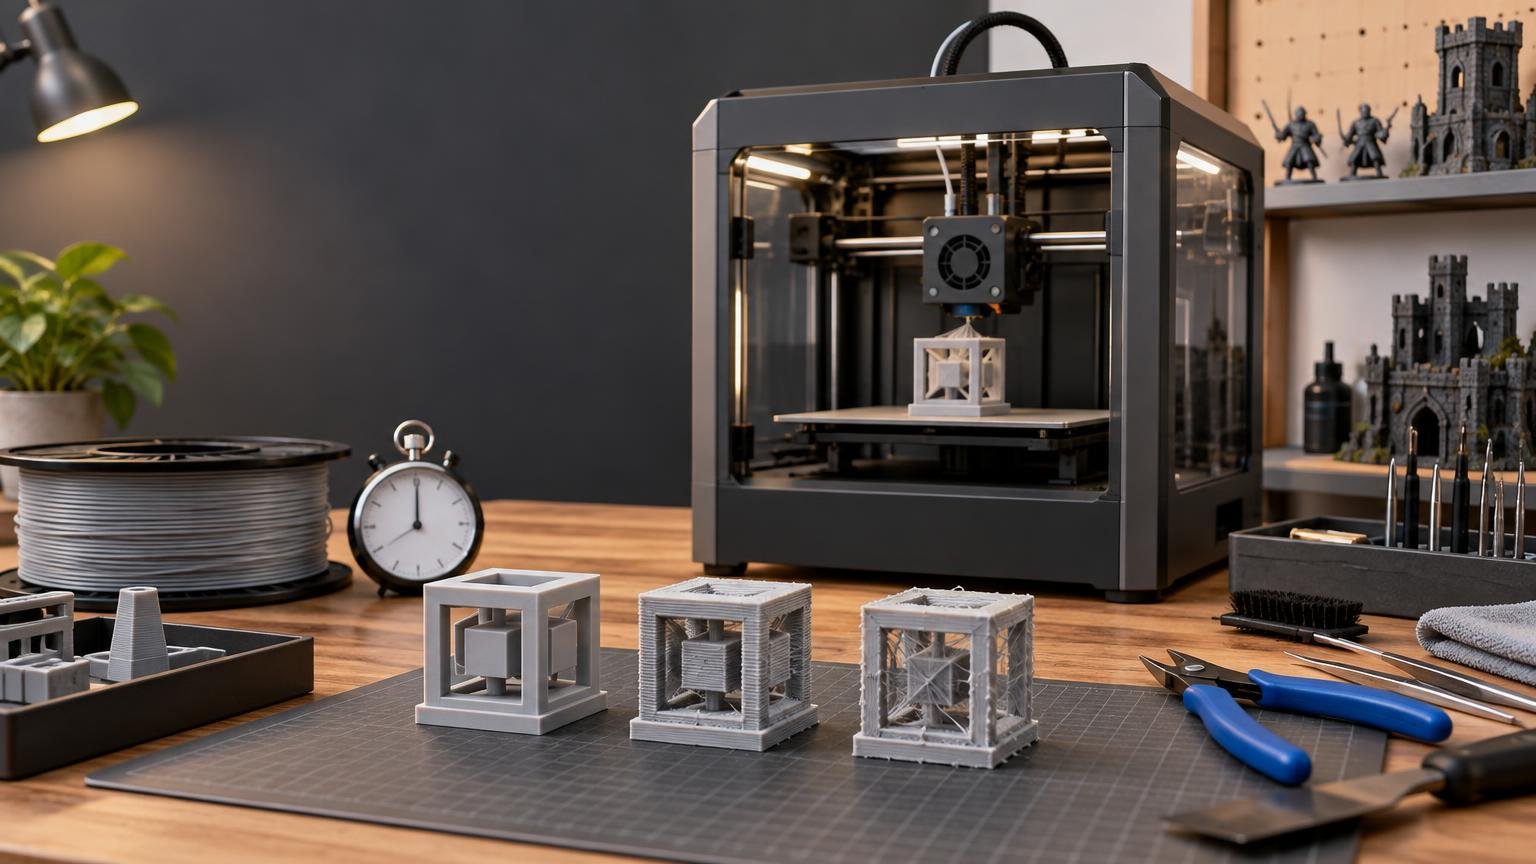
A fair 3d printer review speed test methodology should reward the printer that completes a usable part quickly, not the machine with the largest speed number on its specification sheet. The headline result should therefore combine elapsed time with a predefined quality standard, while separate diagnostic tests identify whether flow, motion, cooling or slicer settings limit performance.
This protocol is intended for filament-based FFF/FDM printers. Resin and powder-bed machines expose parts in fundamentally different ways, so their job times should not appear in the same speed ranking. Even within FDM testing, results only become meaningful when the nozzle, material, model, slicing parameters and timing boundaries are documented.
Why maximum speed is not completed-part speed
A specification such as “up to 500 mm/s” normally describes a maximum commanded movement or extrusion speed available under some conditions. It does not show that the printer can sustain that speed throughout a model, melt enough plastic for every line, cool each layer adequately or produce an acceptable finished part. Peak manufacturer speed is not a standardized completed-part result, and high-speed comparisons need to distinguish the motion system from the extrusion system.
A printer also needs distance in which to accelerate. It may approach a high line speed on a long straight run but never reach it while drawing small perimeters, holes, lettering or repeated short infill paths. Slicers commonly assign lower speeds to external walls, bridges, overhangs and first layers. Two machines carrying the same advertised maximum can consequently finish the same model at different times.
Four measures should remain separate in a review:
- Commanded line speed: the requested toolhead speed for a particular feature, expressed in millimeters per second.
- Actual toolpath speed: the speed the machine can reach after accounting for acceleration, path length and firmware limits.
- Volumetric flow: the volume of molten filament requested each second, expressed in cubic millimeters per second.
- Elapsed completed-part time: the real time required to turn a print command into a finished part under a declared timing rule.
Completed-part time is the best headline measure of practical throughput, but it cannot explain the result by itself. Volumetric flow and acceleration tests reveal why one printer is faster, while inspection and measurements establish whether that time produced a part worth keeping.
The flow limit behind the speed setting
Requested volumetric flow can be estimated as line width × layer height × line speed. A 0.45 mm line printed at a 0.20 mm layer height and 200 mm/s requests 18 mm³/s. At 500 mm/s, the same extrusion geometry requests 45 mm³/s. That is a major difference even though the nozzle diameter has not changed.
The extruder and hotend must heat and deliver that material consistently. If they cannot, the print may show thin lines, gaps, weak layer bonding or intermittent under-extrusion. Raising temperature can sometimes increase usable flow, but it also changes cooling behavior, surface finish, bridging and material response. It should be disclosed as a changed test condition rather than treated as a free speed improvement.
PrusaSlicer’s maximum volumetric speed control illustrates how a slicer can reduce requested line speed when the selected extrusion geometry would exceed a configured melt-throughput limit. The effective limit depends on both the hotend and the filament. Prusa’s maximum volumetric speed explanation describes how this cap interacts with print moves.
This is why a speed review should include a single-wall flow ramp or another documented flow test. Increase demand in controlled steps, inspect the extrusion, and identify the highest repeatable region that still meets the stated acceptance rules. Report this as stable tested flow for that hotend, nozzle, temperature and filament—not as a universal capability of the printer.
Use both stock and controlled benchmark profiles
A stock-profile test and a controlled comparison answer different questions. Both are useful, but merging them into one result can conceal what is being measured.
Stock-profile test: what a buyer receives
Use the current manufacturer-supported slicer or profile, an ordinary recommended PLA, the supplied nozzle size and normal automatic calibration. Avoid hidden edits intended to improve the result. This test captures the buyer-facing combination of hardware, firmware and profile tuning.
Record the profile version because updates can materially change acceleration, temperatures, cooling, line widths and feature speeds. A strong stock result shows that the supported workflow delivers useful performance without extensive manual tuning; it does not prove the underlying hardware is faster in a normalized comparison.
Controlled test: what the hardware can do under common conditions
Use the same filament batch where practical, comparable nozzle material and diameter, fixed model geometry, consistent layer height, equivalent wall and top/bottom construction, comparable infill, and declared cooling rules. Publish every intentional difference that remains necessary for safe or reliable operation.
Do not force incompatible printers into identical machine limits merely to claim perfect normalization. A shared slicing target can establish a baseline, but each printer may also need a separately labeled tuned run to show its usable performance. The controlled result answers the comparison question; the tuned result shows available headroom.
For broader workload design, see our guide to benchmarking FDM printers with real projects. Calibration objects diagnose individual limits, while representative parts reveal how those limits interact during useful work.
Publish a test card before publishing a time
A reader should be able to identify exactly what produced each result. Attach the following test card to every benchmark set:
- Printer model, hardware revision and any installed modifications
- Firmware version and relevant motion, flow or compensation settings
- Slicer name, version and complete profile or exported project file
- Nozzle diameter and material, plus the measured or configured filament diameter
- Filament brand, material, color, batch when available and conditioning state
- Layer height, line widths, wall count, top and bottom layers, infill and supports
- Feature speeds, travel speed, acceleration limits and volumetric-flow cap
- Nozzle, bed and enclosure temperatures, cooling rules and ambient conditions
- Calibration state, including resonance compensation and pressure advance
- Timing boundary, inspection method and quality acceptance criteria
This level of disclosure prevents a result from floating free of its configuration. It also allows a later firmware or profile update to be treated as a new test rather than silently replacing the conditions behind an old number. Our broader evidence standards and methodology provide the same traceability principle for other review measurements.
Use a small suite instead of one magic model
No single object exposes every speed limit. A practical suite combines targeted diagnostics with at least one representative workload.
| Test | What it reveals | What to record |
|---|---|---|
| Timed #3DBenchy | Combined motion, cooling, overhang and small-feature behavior | Elapsed time, dimensions, visible defects and successful runs |
| Single-wall flow ramp | Hotend and filament throughput | Requested flow steps, stable region and failure symptoms |
| Sharp-corner motion test | Ringing, corner behavior and usable acceleration | Acceleration settings, compensation state and visible artifacts |
| Representative project | Real toolpath mix and practical throughput | Total job time, material use, failures and finished-part quality |
#3DBenchy is useful because it is compact, widely recognized and has published nominal dimensions: 60.00 mm long, 31.00 mm wide and 48.00 mm high. Its publisher also warns that meaningful comparisons require similar settings. The official #3DBenchy measurement guide provides the reference dimensions and measurement locations.
A timed Benchy should not become the whole review. A printer tuned aggressively for one small model may behave differently on a large box, a functional bracket or a terrain section with repeated retractions and short perimeters. A documented Speed Benchy exercise from Tom’s Hardware demonstrates the value of shared filament, explicit slicing settings and discussion of quality compromises alongside time.
Define acceptable quality before starting the clock
A fast defective print is a failed run, not a record. Write the acceptance card before seeing the results so that standards are not relaxed for a favored machine. There is no universal tolerance that suits every model and use case, so the publication must declare its own thresholds and inspection method.
At minimum, evaluate layer continuity, under-extrusion, shifted layers, detached features, ringing, corner shape, cooling deformation, bridges and dimensional checks at nominated locations. State whether cosmetic stringing is merely noted or causes failure. For a functional workload, also identify the features that must fit, move or carry load.
Photograph every result under consistent lighting and from the same angles. Keep speed and quality as separate fields rather than compressing both into an unexplained score. A reader should be able to see that Printer A was faster but rougher, while Printer B took longer and retained cleaner corners.
Motion tuning must not erase geometry
High acceleration can shorten a job, especially when the model contains many short moves, but fast directional changes can excite mechanical vibration. Klipper identifies frame rigidity, belts, alignment and moving mass among the factors that contribute to ringing. Its resonance compensation documentation also explains the trade-off between suppressing ringing and applying so much smoothing that features become rounded.
Input shaping or resonance compensation should therefore be reported as part of the tested configuration. Inspect sharp corners, fine lettering and narrow features rather than judging only the disappearance of ripples. The useful limit is the highest acceleration that preserves the predefined geometry, not the highest value the firmware accepts.
Pressure advance addresses a different problem: changes in pressure inside the extrusion path. Proper tuning can reduce corner bulging and ooze, but excessive or insufficient compensation may contribute to under-extrusion, rounded corners or other defects. Klipper’s pressure advance tuning documentation explicitly treats those artifacts as tuning constraints. Neither feature should be presented as a license to ignore the resulting part.
Time the job with transparent boundaries
Report two clocks when possible. Print-only elapsed time starts at a declared print boundary, such as the print command or first extrusion, and ends when the final printing move completes. Total job time starts when the user initiates the job and includes heating, homing, probing, purging and automatic calibration through completion.
The first value helps compare deposition performance. The second reflects how long the owner waits and how much overhead short jobs carry. State whether cooldown, plate removal or manual intervention is excluded. Slicer estimates can be included as a separate field, but the headline time should come from an external clock or a clearly documented machine timestamp rather than an estimate alone.
Repeat important runs and show the spread
Do not quietly recalibrate between runs. If a nozzle cleaning, belt adjustment, firmware change or fresh calibration becomes necessary, record it and begin a newly labeled series when the change could affect performance. A short benchmark establishes repeatability over those runs, not long-term reliability. Durability and maintenance need a separate test window, as discussed in our guide to printer lifespan and replaceable components.
Report a speed-performance profile, not one rank
A useful final result should show the buyer where the printer is fast and what constrains it. Use a compact profile containing stock elapsed time, controlled median time and range, stable tested volumetric flow, usable tested acceleration, dimensional results, visible-quality observations, successful-run count and failed-run count.
Then identify the likely bottleneck. Flow-limited performance appears when extrusion quality deteriorates as material demand rises. Motion limits appear as ringing, lost geometry or little time improvement despite higher speed commands. Cooling limits appear in soft overhangs, curled edges or deformed small layers. Slicer limits appear when conservative feature speeds or volumetric caps prevent the hardware from approaching its tested capability.
Keep the conclusion material-specific. PLA performance should not be used to predict PETG, ABS, ASA, TPU, nylon or filled composites. Each material changes melt behavior, cooling needs, adhesion and often the safe motion or flow envelope. Nozzle geometry, filament condition, slicer updates and firmware revisions can also move the result.
The practical standard for calling a printer fast
Call an FDM printer fast when it repeatedly completes a disclosed workload in less time while meeting the same declared quality criteria. Support that conclusion with stock and controlled runs, flow and motion diagnostics, transparent timing, repeat results and visible inspection evidence.
That approach may not produce the most dramatic headline, but it gives buyers the answer they need: how quickly the machine can make a part they would actually keep. Before running the first test, freeze the test card, quality thresholds and timing boundary. Changing any of them later should create a new labeled result, not a more flattering version of the old one.
Frequently Asked Questions
What does an “up to 500 mm/s” specification mean?
It usually indicates a maximum commanded movement or extrusion speed under certain conditions. It does not establish sustained speed, adequate material flow, acceptable quality or completed-part time.
Should a speed test include heating, probing and calibration time?
Report both when possible: print-only elapsed time for deposition performance and total job time including heating, homing, probing, purging and automatic calibration. Clearly state the start and end points and any exclusions.
How many timed runs should a reviewer complete?
For the primary workload, complete at least three repetitions when practical. Report every time, the median, the range, and any failed or aborted attempts rather than highlighting only the fastest run.
References
- A new automated method for analysing high-speed FFF: manufacturer data synthesis and mechanism-based limits for motion and extrusion systems | The International Journal of Advanced Manufacturing Technology | Springer Nature Link
- Max volumetric speed | Prusa Knowledge Base
- Measure and calibrate – #3DBenchy
- Fastest 3D printers benchmarked: Top printers ranked by output time | Tom's Hardware
- Resonance Compensation – Klipper documentation
- Pressure advance – Klipper documentation